Easy Lemon Sorbet

With its vibrant and zesty lemony flavor, this homemade Lemon Sorbet recipe is the perfect balance of tanginess to sweetness. Made with just four simple ingredients, this authentic Italian recipe is incredibly easy to prepare – I have tried this recipe many times, and it’s really easy. So whether you’re entertaining guests or simply craving a cool and refreshing treat, this easy dessert is the answer to your citrusy dreams.
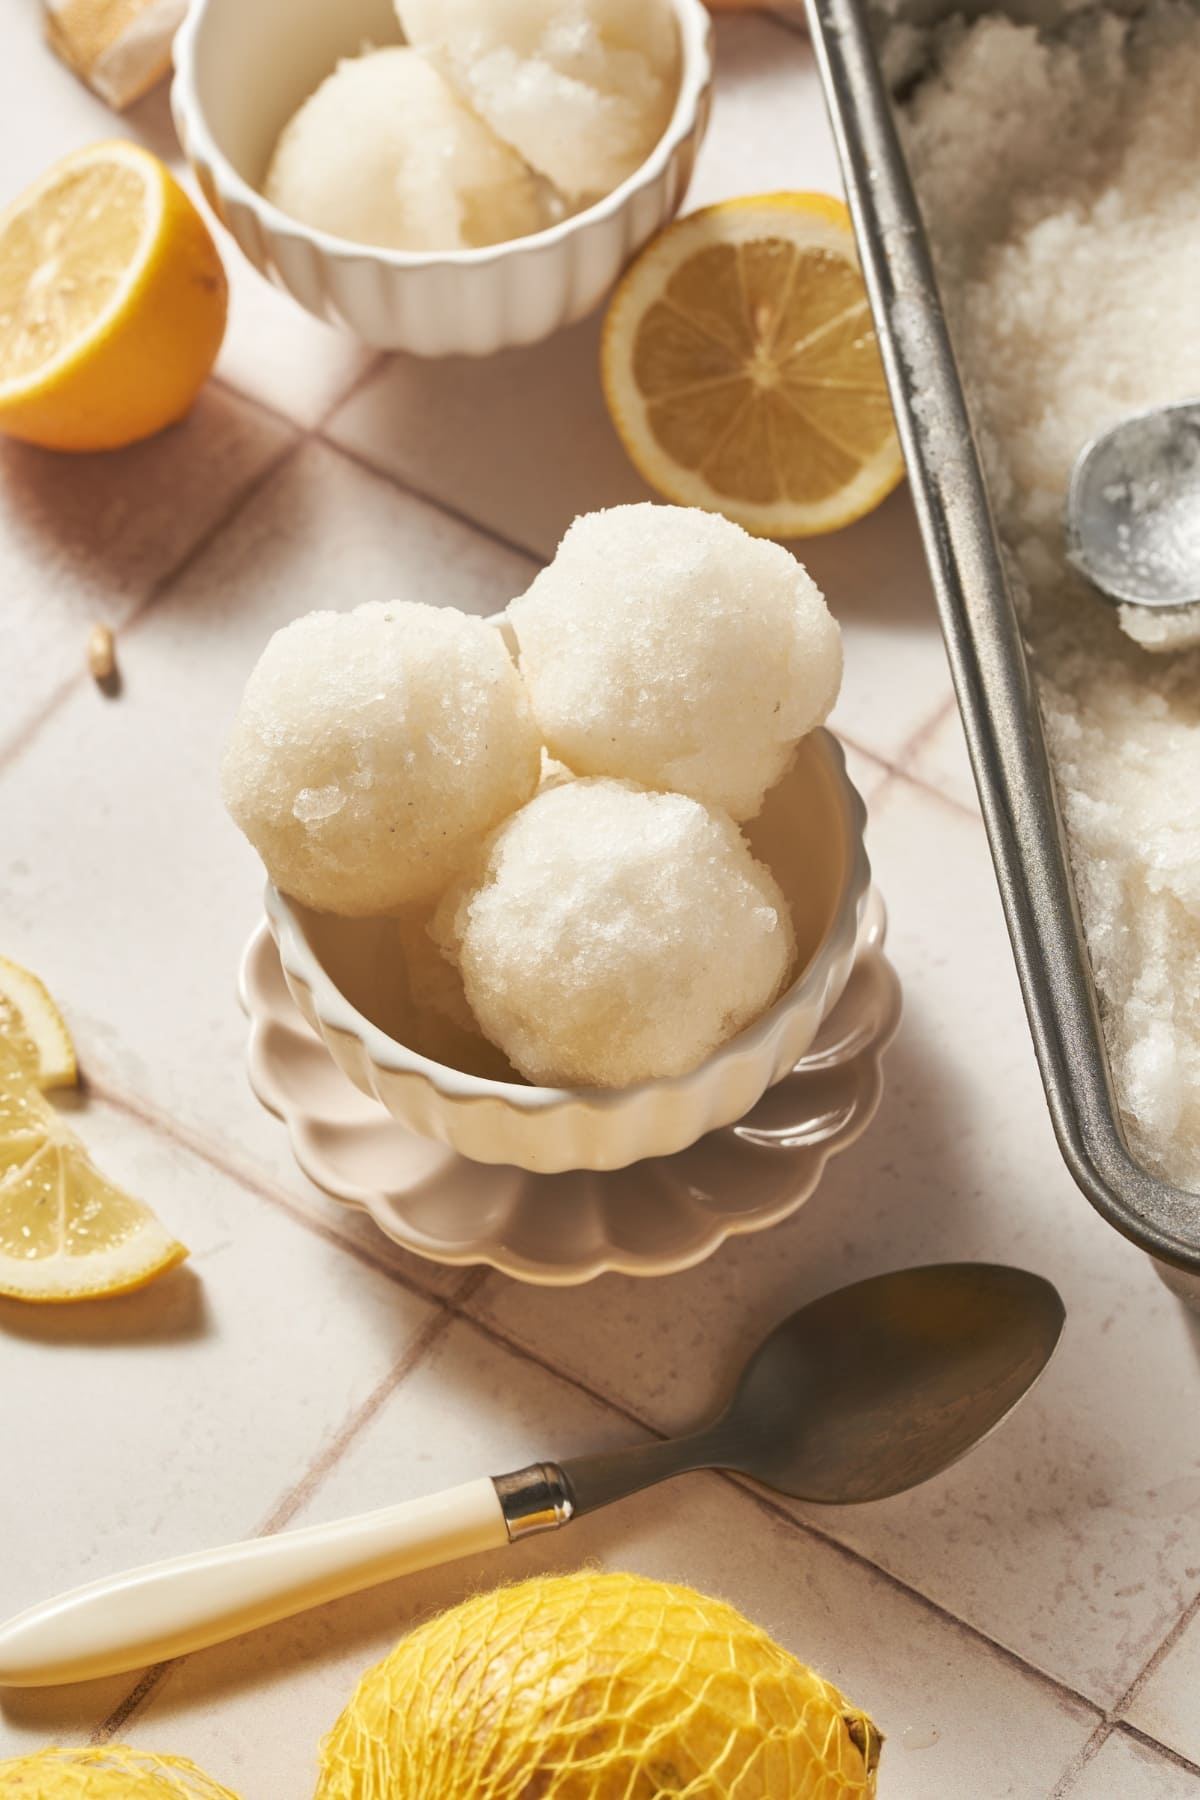
lemon sorbet

Italian Lemon Sorbet Recipe

Also known as, “Sorbetto al Limone”, lemon sorbet is a timeless Italian dessert that embodies the essence of pure, sun-kissed lemons. It stands as a testament to the beauty of simplicity that characterizes Italian cuisine. With every spoonful, it’s tart, refreshing, and utterly delightful, making lemon sorbet a favorite not only for dessert but also as a palate cleanser between courses.

Now, what is lemon sorbet made of? Typically, it consists of fresh lemon juice, water, sugar, and a whipped egg white. Unlike ice cream or sherbert, sorbet contains no dairy, making it an excellent choice for those with lactose intolerance or anyone seeking a dairy-free dessert.

So, as you can see, making homemade lemon sorbet doesn’t require any fancy ingredients. But you might be wondering, how is sorbet traditionally made? It’s pretty easy and you don’t need an ice cream maker! The process begins by creating a sugar syrup and then adding lemon juice. After that, a whipped egg white is gently folded in, and the mixture is placed in the freezer to chill.

Whether you’re a devoted lemon lover or simply seeking a light dessert, grab yourself a handful of lemons and get ready to scoop up a taste of zesty sunshine with this lemon sorbet recipe!

Equipment

  • Medium Saucepan: Needed to make the simple syrup. 
  • Bowls: You will need one bowl for whipping the egg white and another one for making the sorbet. 
  • Citrus Juicer: Helps you to extract the most juice with the least amount of effort. 
  • Fine Mesh Sieve: To strain the pulp from the lemon juice.
  • Electric Hand Mixer: Used to whip the egg white until it forms stiff peaks. You can also use an electric whisk or stand mixer.
  • Rubber Spatula: Perfect for gently folding the whipped egg white into the lemon mixture. 
  • Metal Pan: You will need a metal baking or loaf pan to freeze the lemon sorbet.
  • Whisk: Used to stir the frozen lemon sorbet to prevent ice crystals from forming. You can use a hand whisk or an electric whisk.

Ingredients
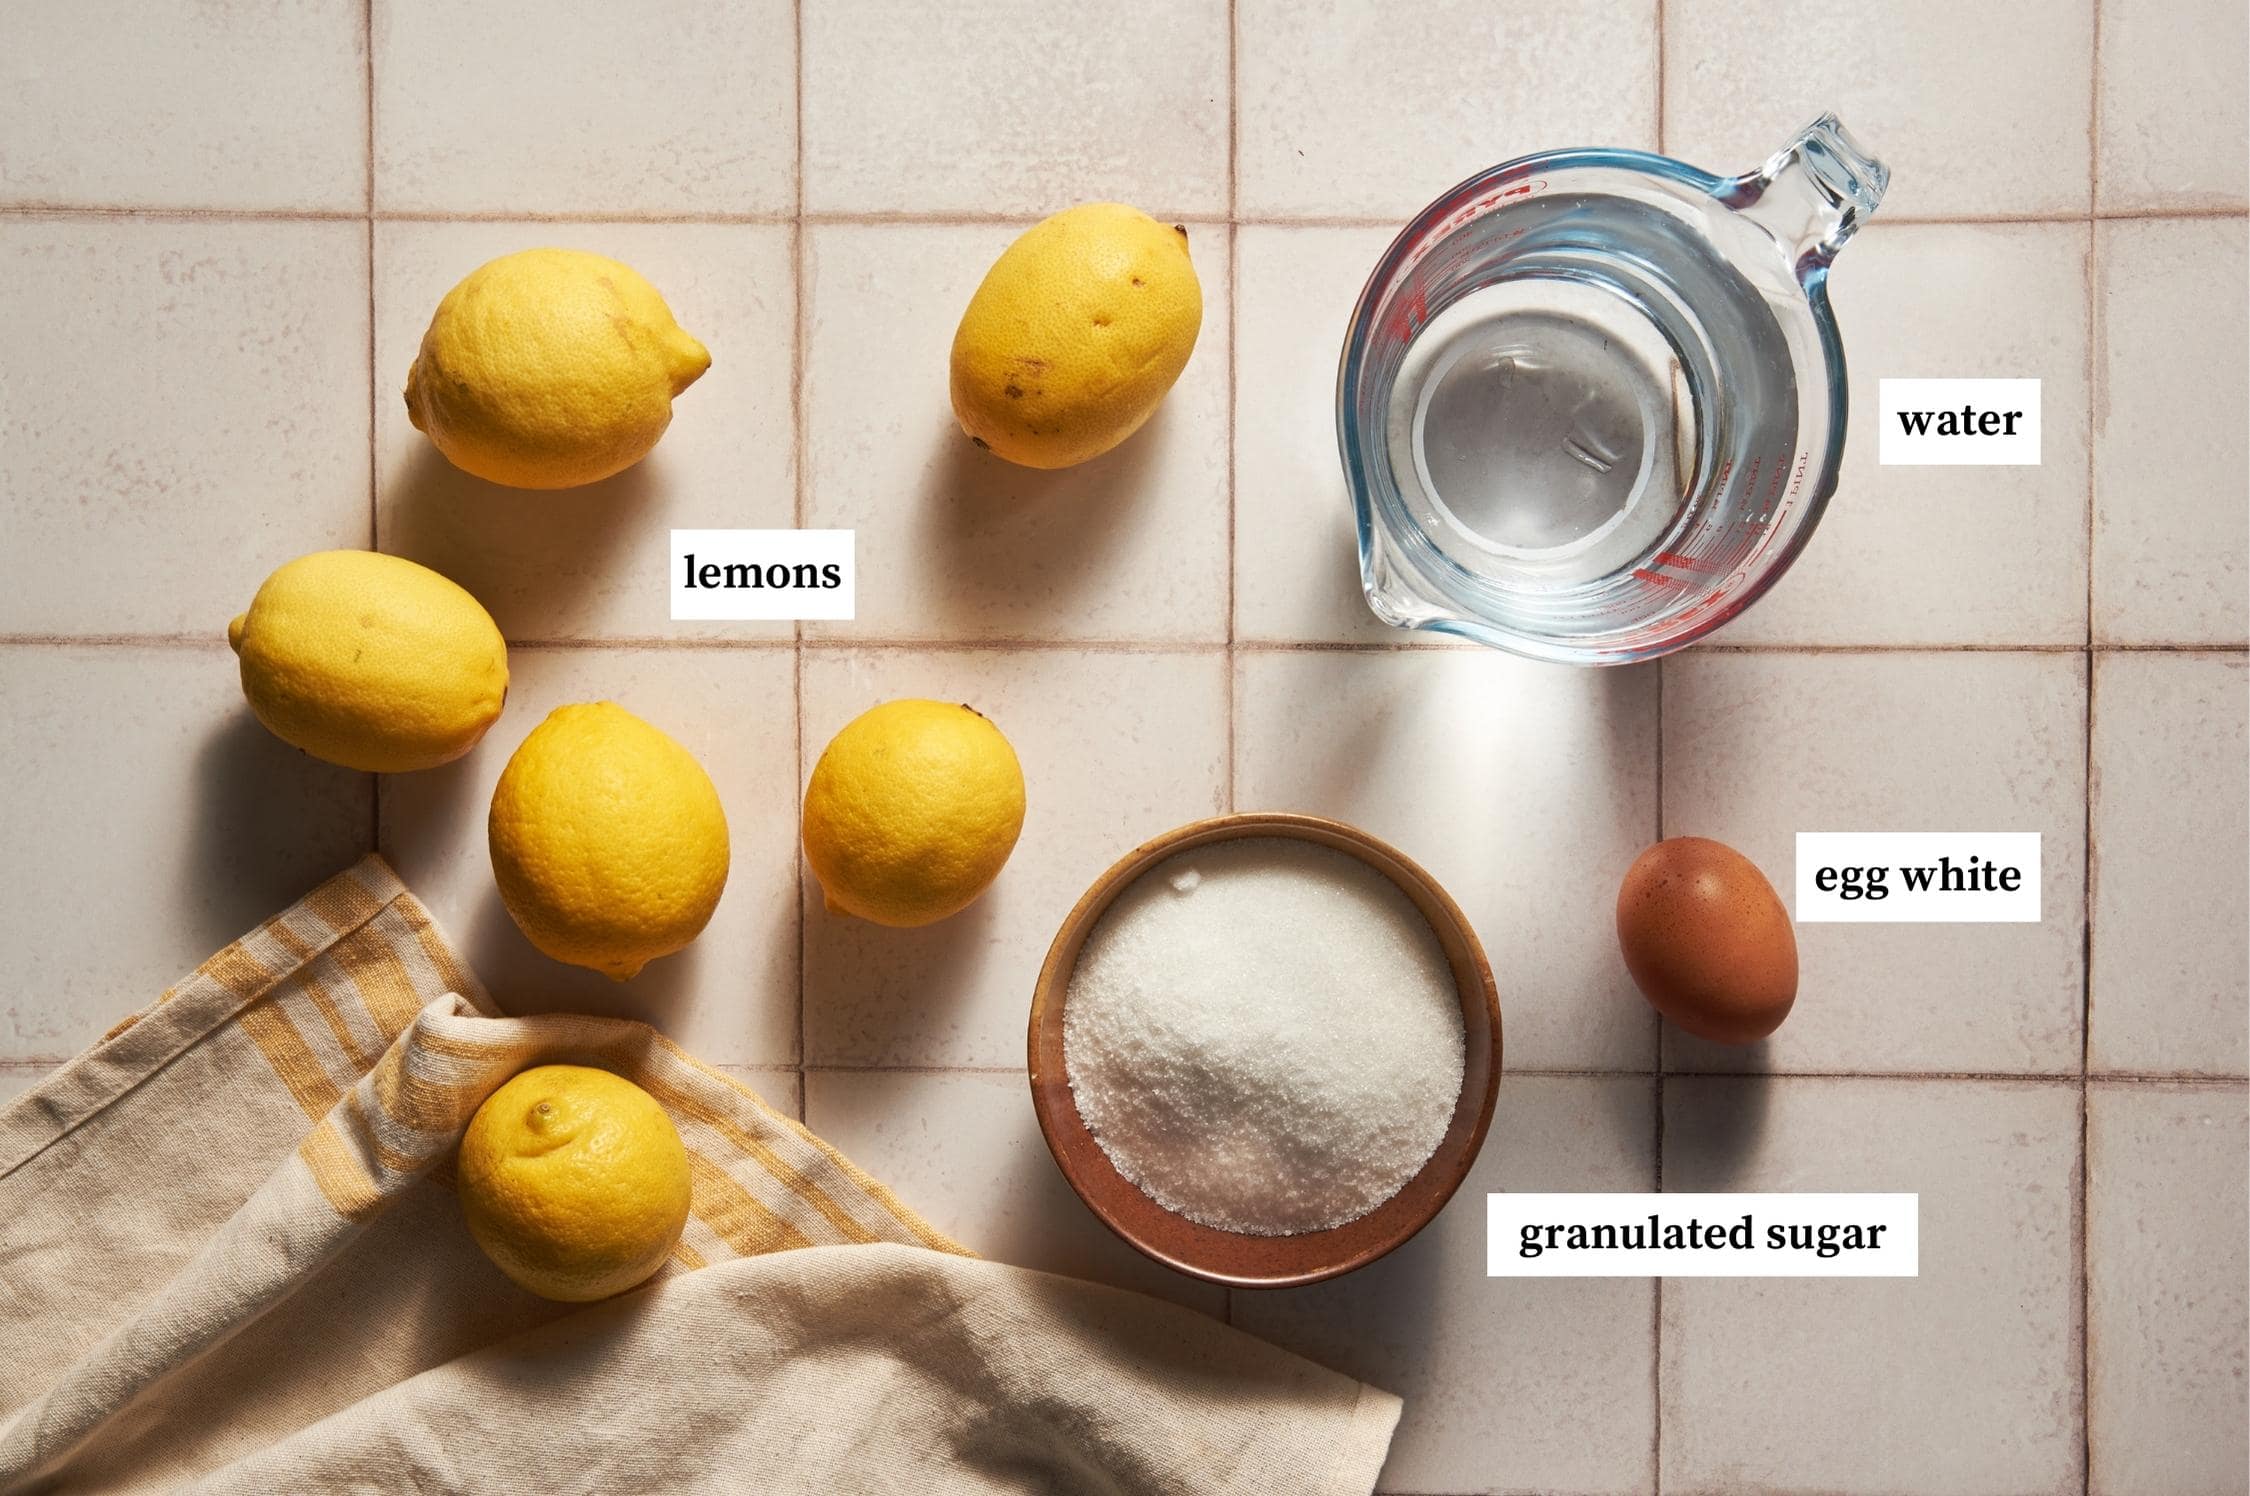
lemon sorbet ingredients
  • 6 Lemons: Use organic lemons with vibrant yellow skin to achieve the most intense and natural lemon flavor. Feel free to add the lemon zest too.
  • 200 grams Granulated Sugar: Serves as a sweetening agent that balances the tartness of the lemon sorbet.
  • 2 cups Water: What is the base for sorbet? Fruit juice and water! The zesty lemons may flavor the sorbet but water is just as important.
  • 1 Egg White: Used to add structure and create a frothy consistency. It’s essential to have it at room temperature for optimal results. I also recommend that you use a pasteurized egg and an organic one if that’s not possible.

How to make lemon sorbet step by step

Make the simple syrup

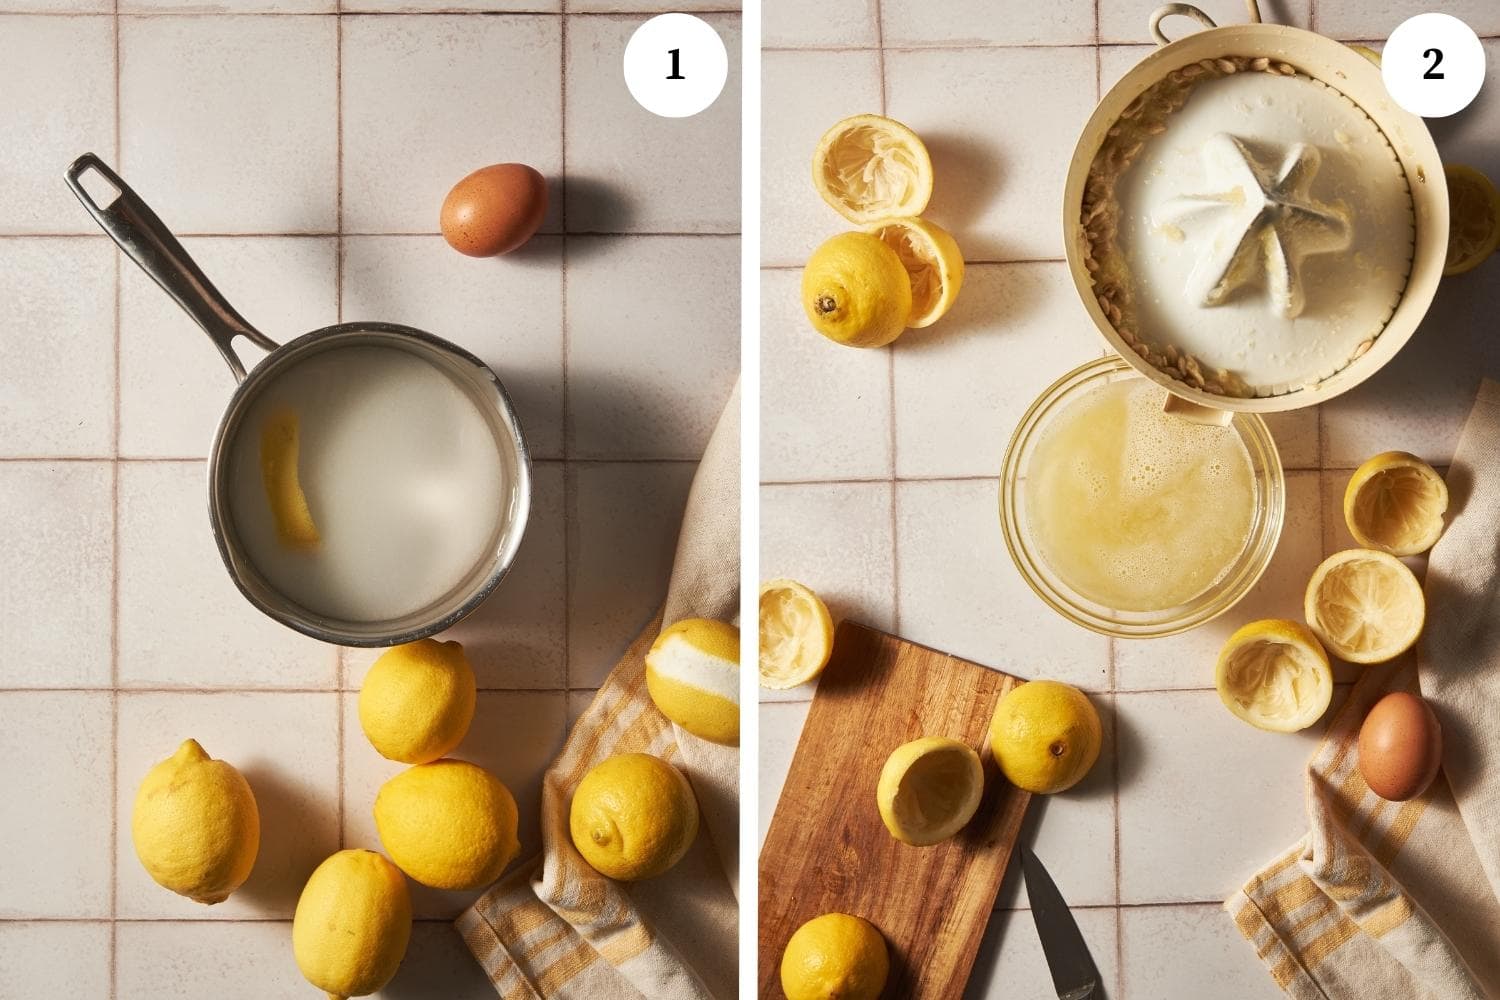
Begin by bringing 2 cups of water to a boil together with the sugar and one whole lemon peel (photo 1). Now, let the mixture simmer over medium heat until the sugar is completely dissolved. Then pour it into a large mixing bowl and let it cool completely down to room temperature. 

Extract the lemon juice

While your syrup is cooling, juice the lemons (photo 2). Then strain the pulp and stir the freshly squeezed lemon juice into the simple syrup. 
Whip the egg white

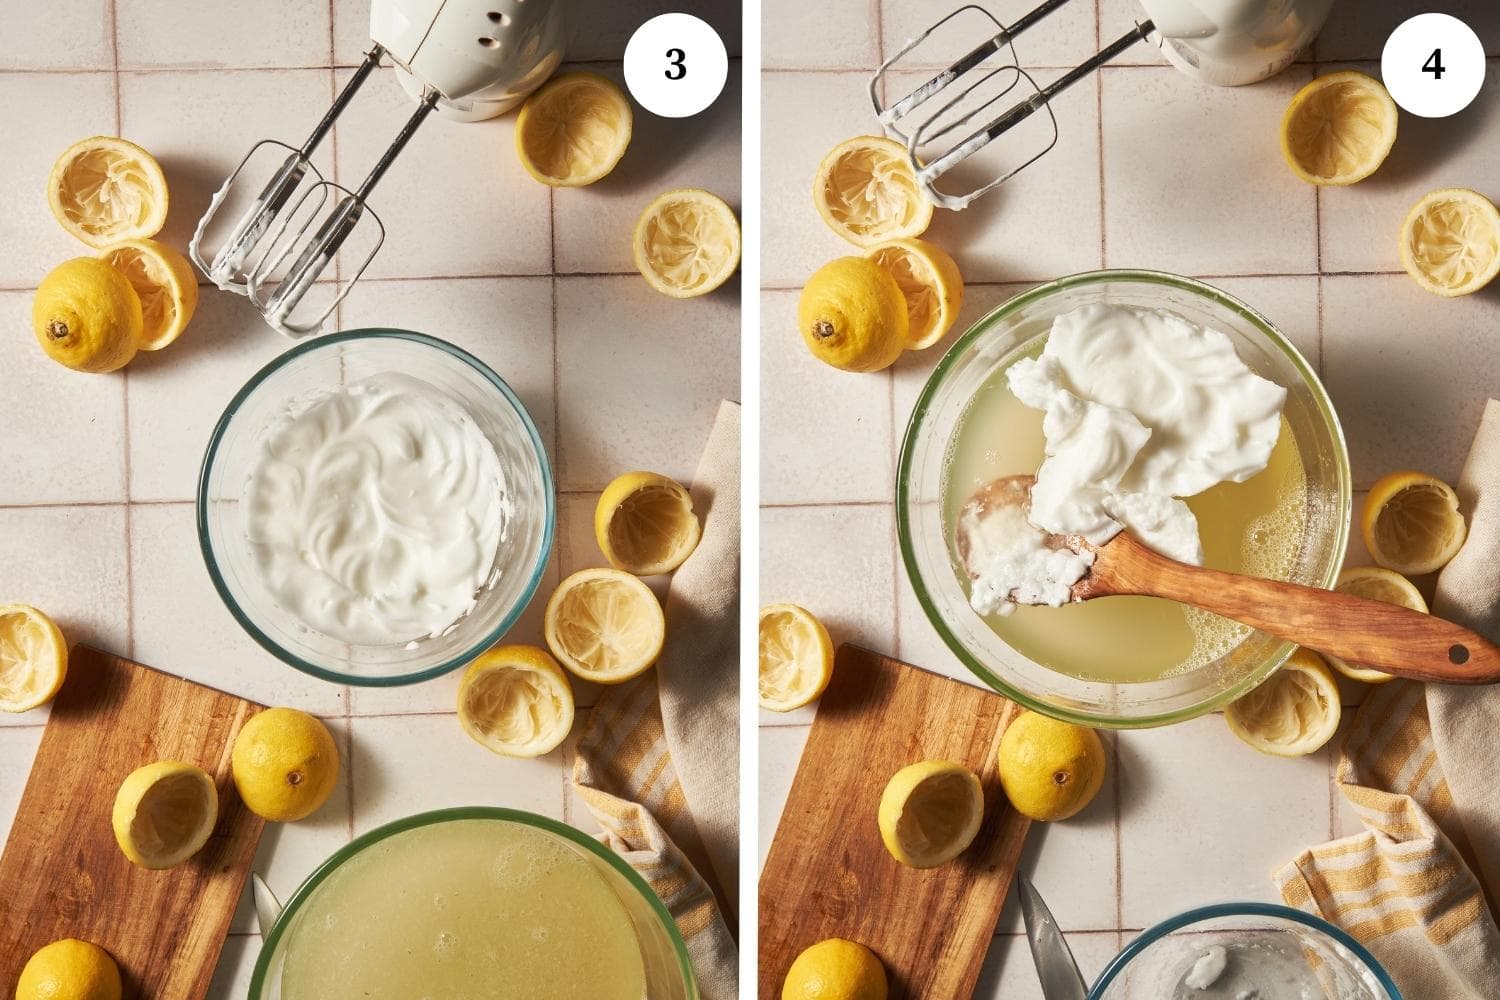
Now, in a separate bowl, use an electric hand mixer or an electric whisk to whip the room-temperature egg white for about 5 to 7 minutes or until it forms stiff peaks (photo 3). This step is crucial for creating that foamy texture, so be patient and wait for those firm peaks to develop.

Fold the mixtures together

Once you’ve whipped the egg white, gently fold it into the sweet lemon mixture (photo 4). The goal is a foamy consistency so be careful not to deflate the egg white. Then pour the sorbet mixture into your metal pan and put it in the freezer. 
Freeze and mix

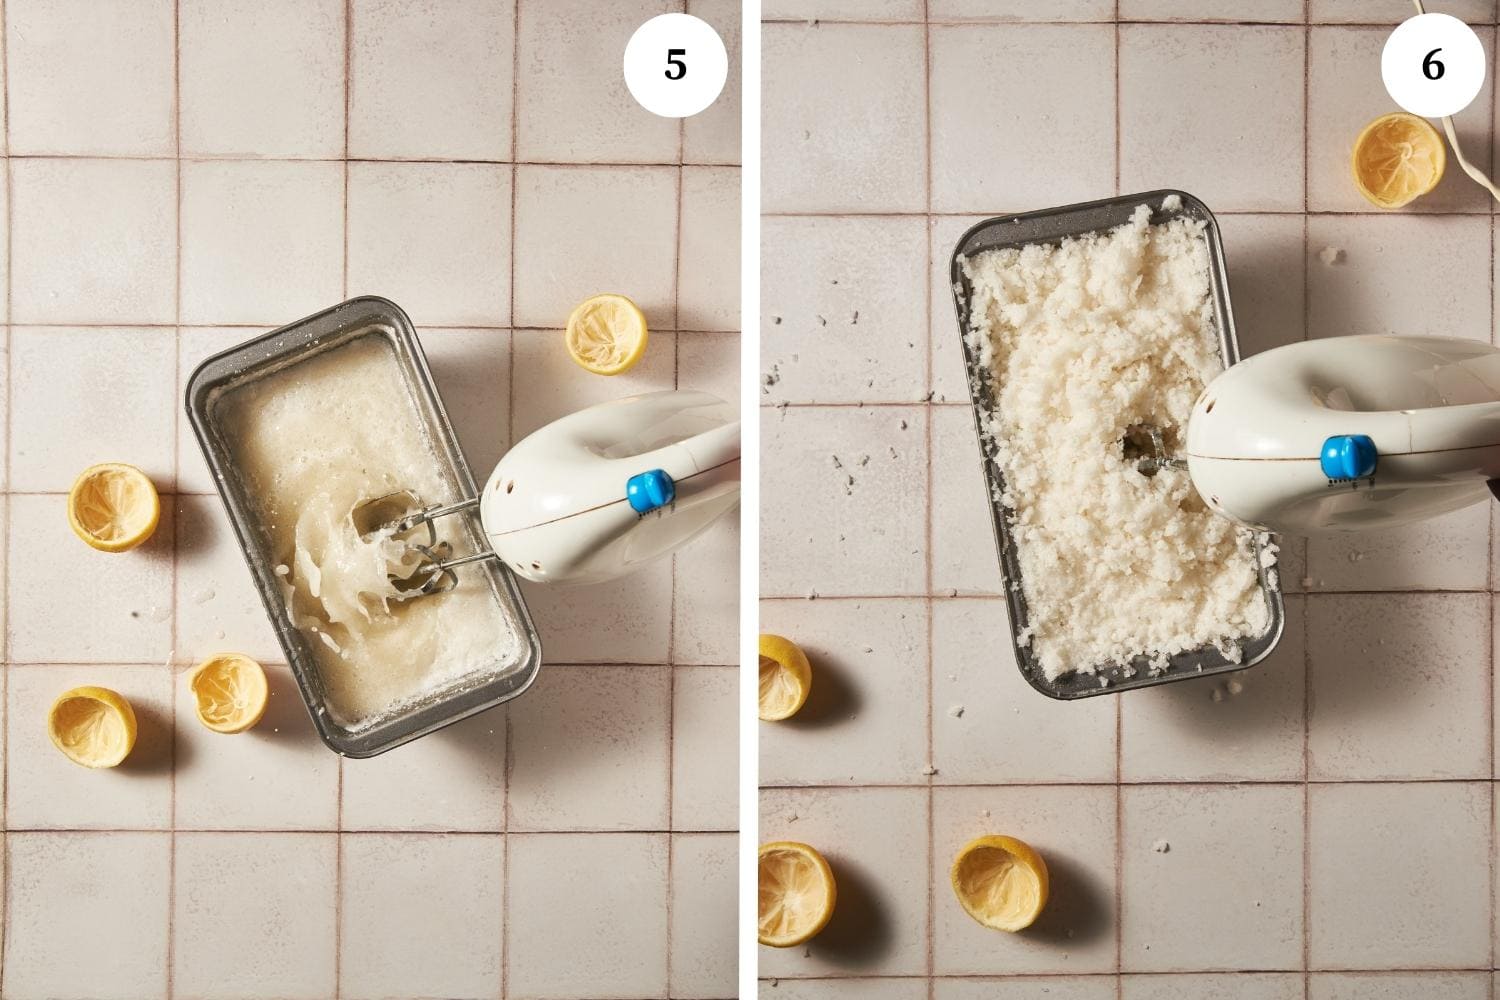
After an hour in the freezer, remove your lemon sorbet and stir it with either a hand whisk or an electric whisk. This ensures a fine-textured sorbet without any ice crystals. Then return it to the freezer and repeat this process 2 to 3 more times every hour.
Serve and enjoy

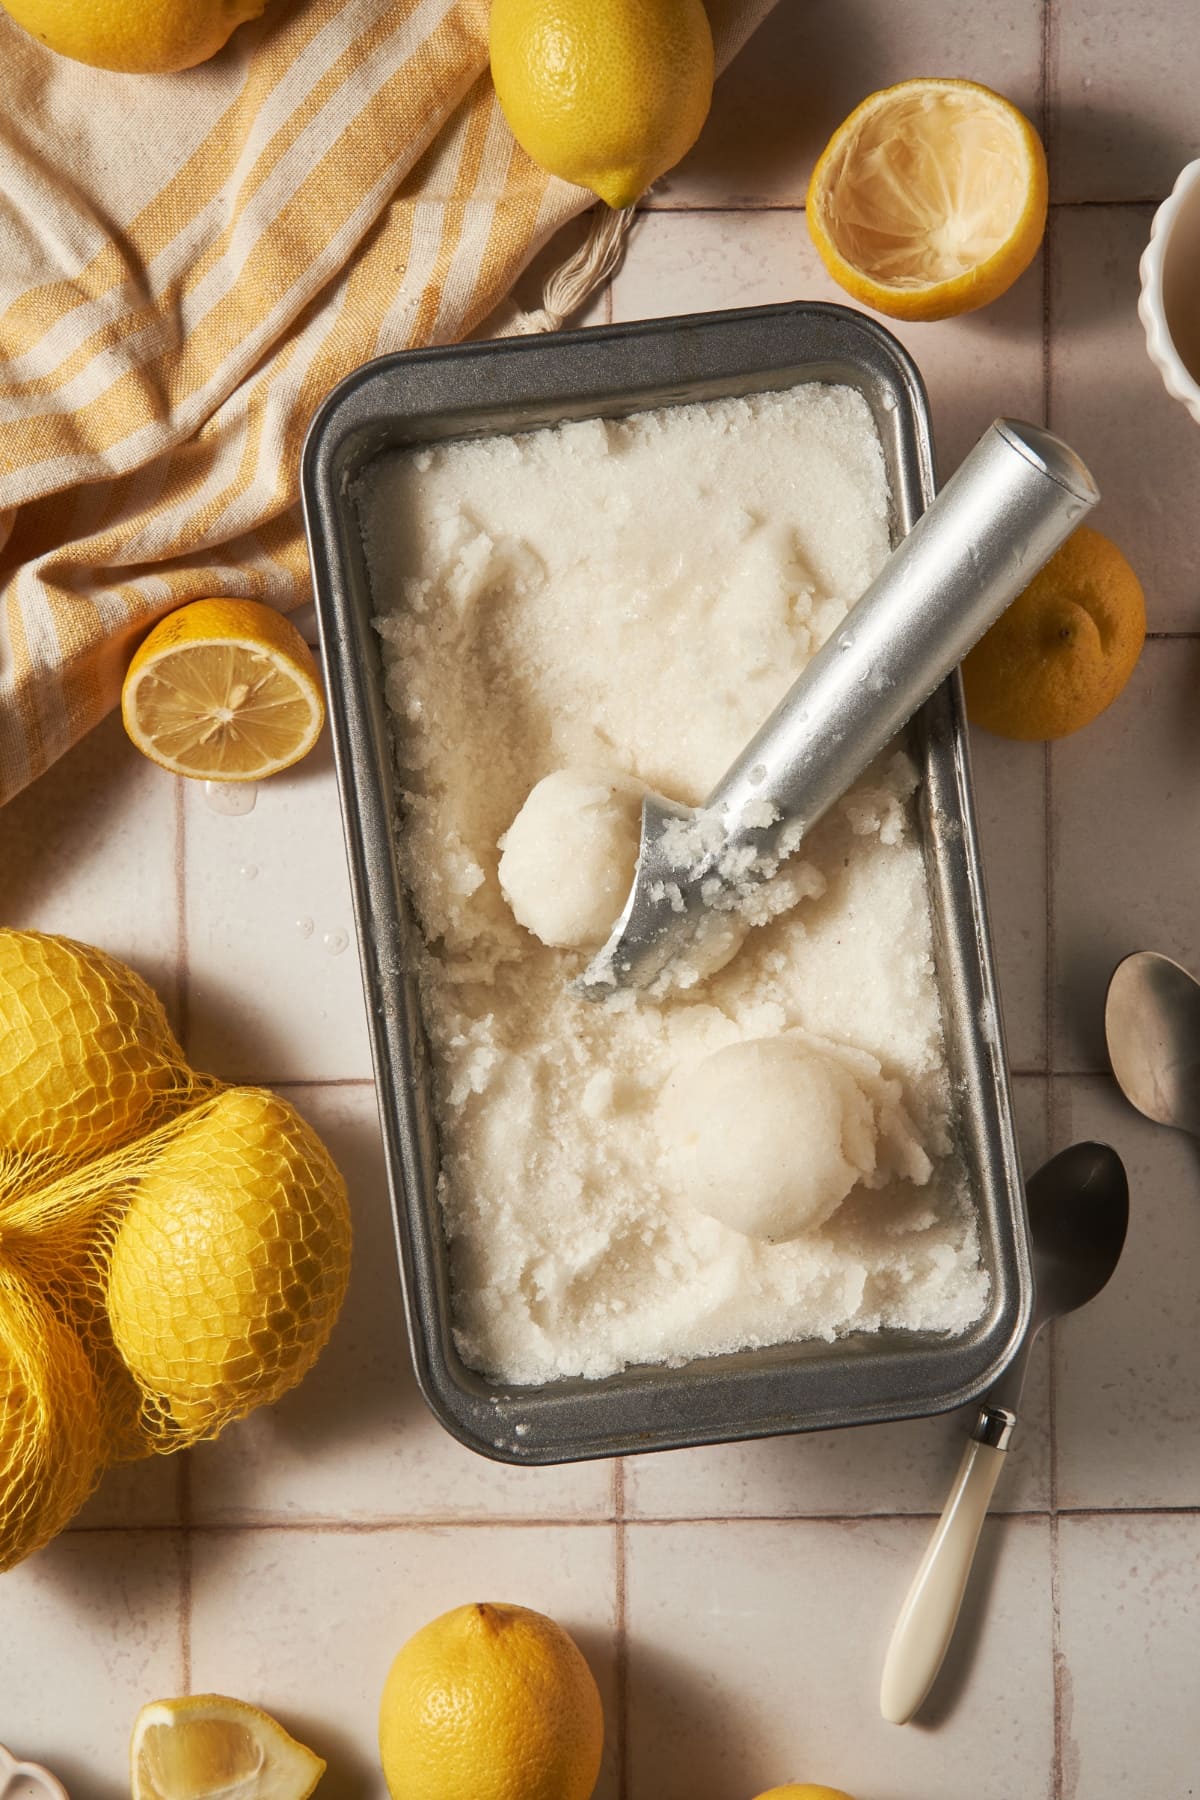
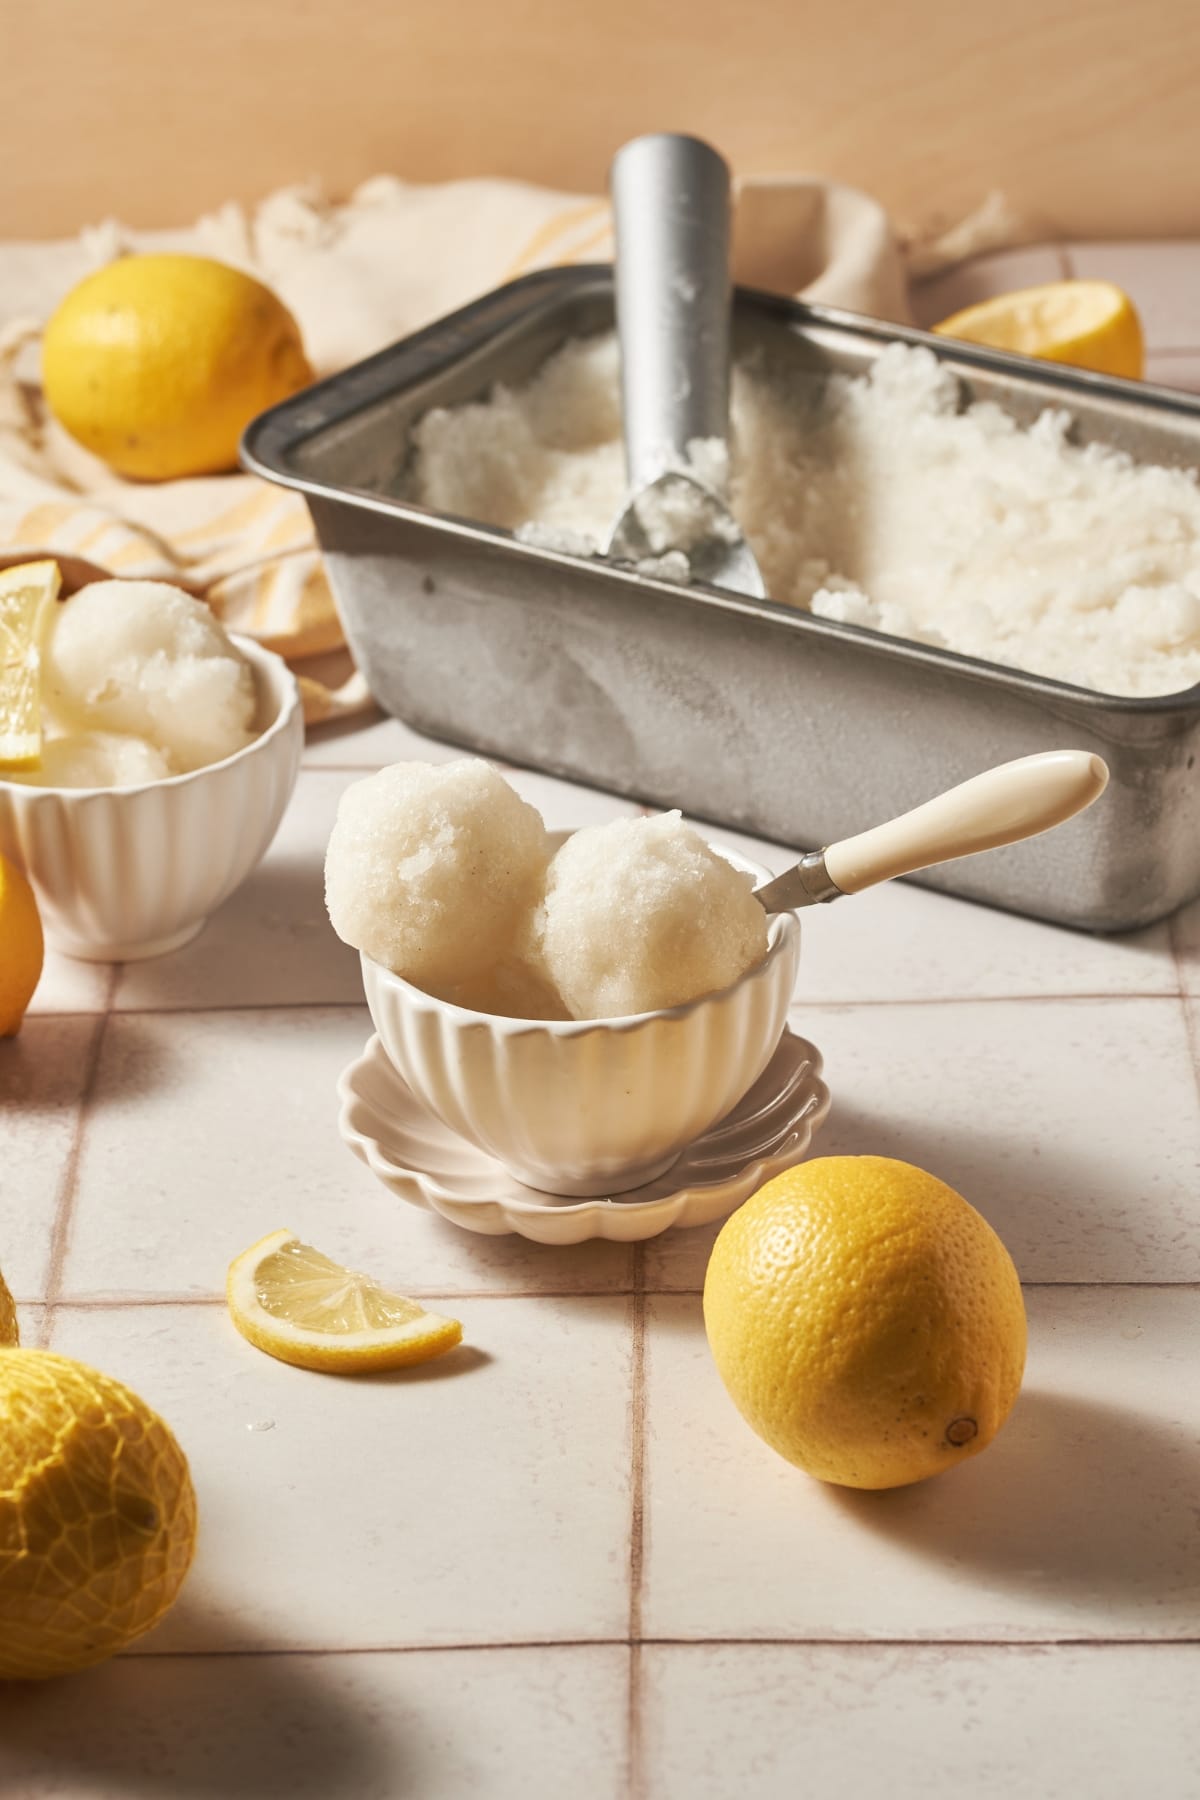
When it’s ready, you can scoop and serve your lemon sorbet right away or store it in an airtight container in the freezer for up to one month. 
Expert Tips

  • Choose fresh, organic lemons free from waxy coatings and chemicals for the best lemon zest and juice flavor.
  • Strain the lemon juice to remove any pulp or seeds.
  • If possible, use a pasteurized egg white for added safety. A fresh organic egg is the next best option. 
  • Make sure your egg white is at room temperature before whipping. This helps in achieving those stiff peaks for the sorbet’s foamy texture.
  • Using a metal pan to freeze the lemon sorbet helps it to chill faster and more evenly. 
  • Don’t rush the freezing and blending process. Stirring the lemon sorbet every hour with a whisk is what gives the finished sorbet its signature texture without an ice cream maker.
  • For an eye-catching presentation, serve your lemon sorbet in hollowed-out lemon shells.

Other iced desserts you can try:

Variations

Now that we’ve answered, how is sorbet made!? It’s time to dive into the various ways that you can customize this yummy lemon sorbet recipe!

  1. Minty: Add a handful of freshly chopped mint leaves to the lemon sorbet before freezing for a refreshing lemon-mint sorbet.
  2. Berry Bliss: Add a burst of berry goodness by folding in fresh or frozen berries like strawberries, blueberries, or raspberries. You can also top the sorbet with berries right before serving. 
  3. Lavender: Add a hint of floral flavor by infusing the sugar and water mixture with dried culinary lavender buds. 
  4. Vodka Twist: For an adult-friendly version, add a splash of vodka before freezing.
  5. Limoncello: Make it more lemony and a little boozy by adding some sweet and tart Limoncello liqueur! 
  6. Other Citrus: Swap out the lemons for limes, oranges, grapefruit, or even Meyer lemons to make a new flavor of sorbet.

FAQs

How to store lemon sorbet?

Place it in an airtight freezer container and consume it within one month.

What is the best stabilizer for sorbet?

Natural gums like guar gum or xanthan gum are often the best stabilizers for sorbet. These additives help prevent the formation of ice crystals and keep the sorbet smooth and creamy. Other options include corn syrup or glucose syrup.

What’s the difference between lemon ice and lemon sorbet?

Lemon ice is a frozen dessert made by freezing sweetened lemon juice, often resembling a lemon slush texture. Lemon sorbet, on the other hand, is a smoother and more refined frozen treat usually made from a mixture of lemon juice, water, sugar, and whipped egg white.

What’s the difference between sorbet and sherbet?

Sorbet is a dairy-free frozen dessert made primarily from fruit puree or juice, sugar, and water. Whereas, sherbet contains all those same ingredients but also a small amount of milk.

Print

Lemon Sorbet

#wprm-recipe-user-rating-0 .wprm-rating-star.wprm-rating-star-full svg * { fill: #343434; }#wprm-recipe-user-rating-0 .wprm-rating-star.wprm-rating-star-33 svg * { fill: url(#wprm-recipe-user-rating-0-33); }#wprm-recipe-user-rating-0 .wprm-rating-star.wprm-rating-star-50 svg * { fill: url(#wprm-recipe-user-rating-0-50); }#wprm-recipe-user-rating-0 .wprm-rating-star.wprm-rating-star-66 svg * { fill: url(#wprm-recipe-user-rating-0-66); }linearGradient#wprm-recipe-user-rating-0-33 stop { stop-color: #343434; }linearGradient#wprm-recipe-user-rating-0-50 stop { stop-color: #343434; }linearGradient#wprm-recipe-user-rating-0-66 stop { stop-color: #343434; }

A delicious and refreshing lemon sorbet recipe that is super easy to prepare. Steal the recipe!
Course Dessert
Cuisine Italian
Keyword lemon sorbet, sorbet
Prep Time 15 minutes
Chill Time 4 hours
Total Time 4 hours 15 minutes
Servings 6 servings
Calories 131kcal

Ingredients

  • 6 organic lemons
  • 200 grams of granulated sugar
  • 2 cups water
  • 1 egg white room temperature

Instructions

  • In a medium saucepan, bring 2 cups of water to a boil together with the sugar and one whole lemon peel until the sugar is completely dissolved. Then transfer the mixture into a large bowl and let it cool to room temperature.
  • Juice the 6 lemons and strain the pulp. Then add the juice to the sugar syrup.
  • In another mixing bowl, use an electric hand mixer or electric whisk to whip the egg white for 5 to 7 minutes or until stiff peaks form.
  • Gently fold the whipped egg white into the lemon mixture with a rubber spatula. It should be foamy. Then pour the mixture into a metal baking pan or loaf pan and place it in the freezer.
  • After 1 hour, mix the mixture with a hand whisk or an electric whisk to create a fine texture with no ice crystals. Then put the sorbet back in the freezer and repeat this process 2 to 3 more times every hour.
  • When the lemon sorbet is ready, it should have a solid but creamy, frothy consistency that doesn’t have any chunks of ice.
  • Serve the sorbet immediately or store it in the freezer in an airtight container for up to 1 month.

Nutrition

Calories: 131kcal | Carbohydrates: 33g | Protein: 1g | Fat: 0.1g | Polyunsaturated Fat: 0.002g | Sodium: 13mg | Potassium: 10mg | Fiber: 0.03g | Sugar: 33g | Vitamin A: 0.2IU | Vitamin C: 1mg | Calcium: 3mg | Iron: 0.03mg

This article https://ift.tt/voUX3le appeared first on Nonna Box
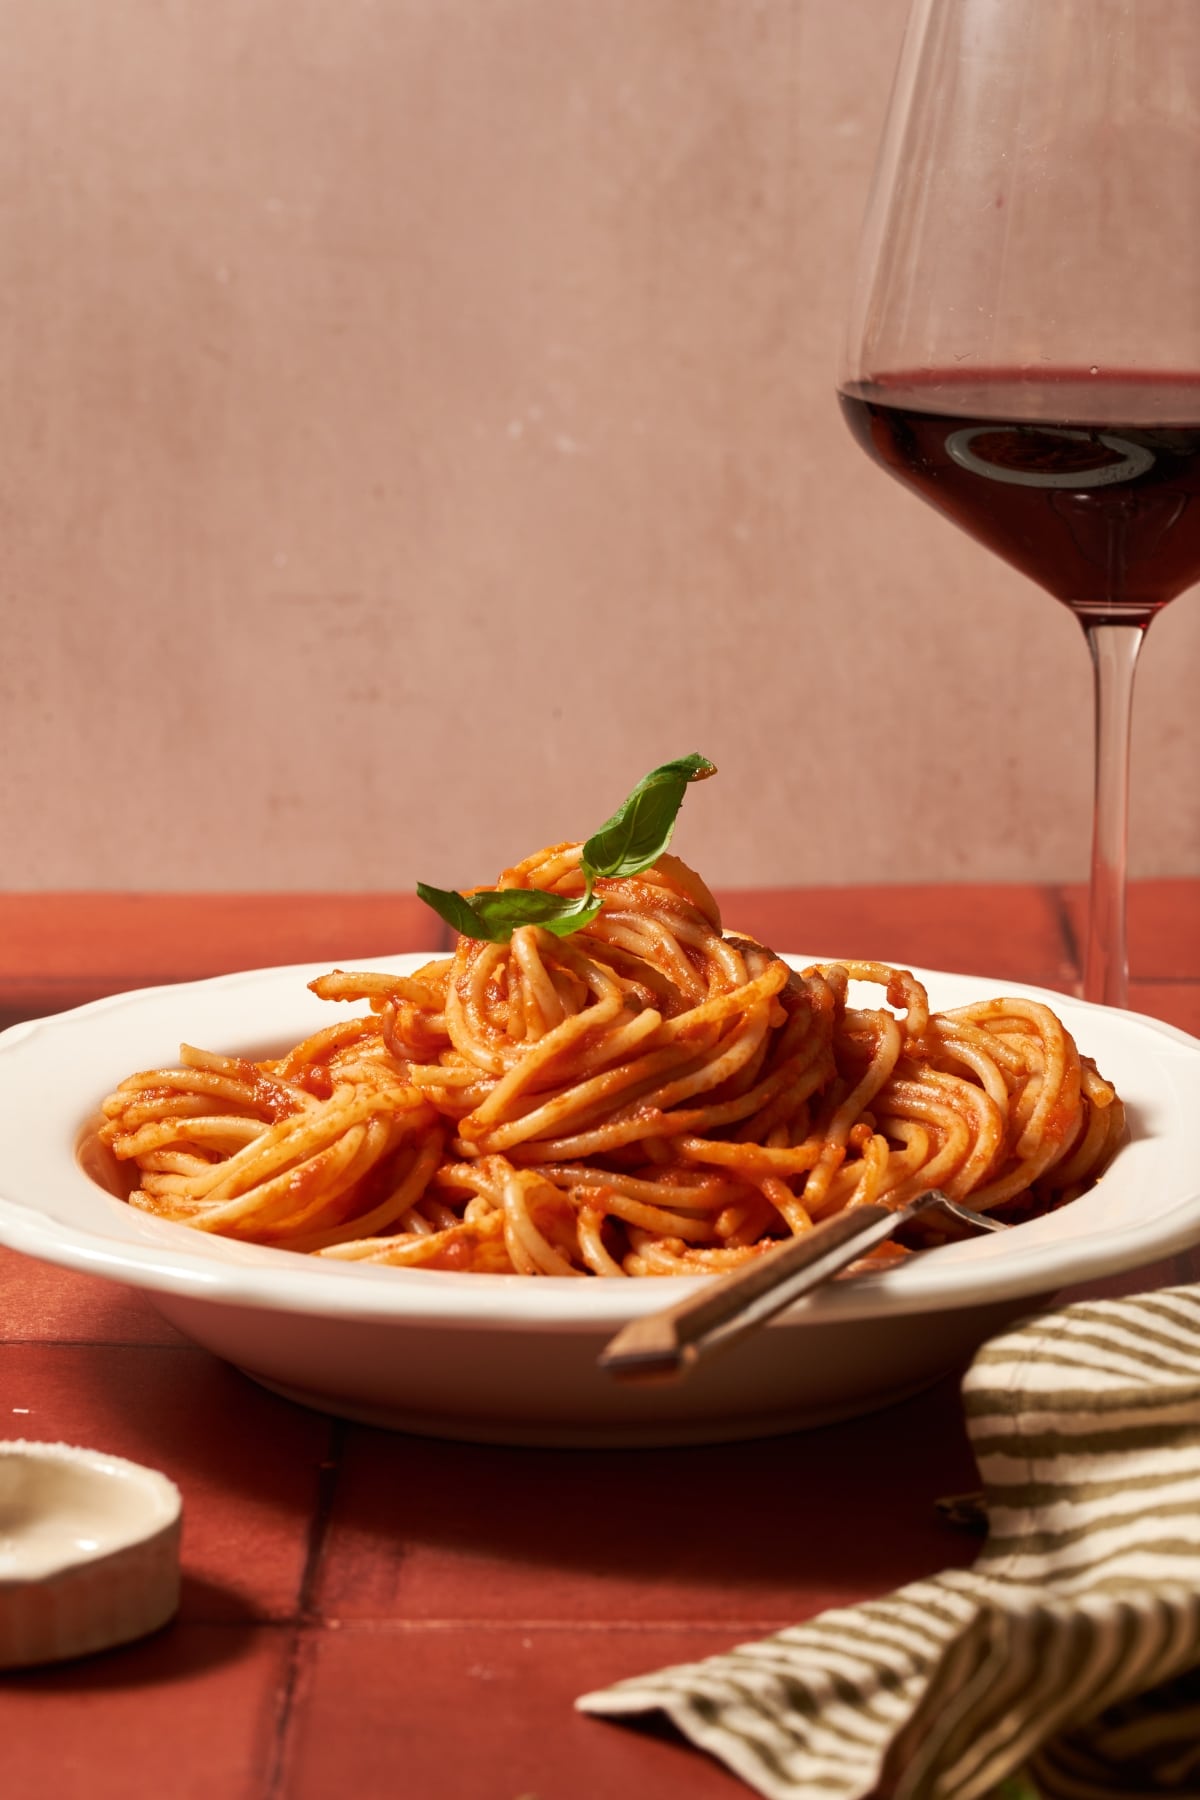
Pasta al Pomodoro

Perhaps the most classic dish in all Italian cooking is the pasta al pomodoro or spaghetti with tomato sauce. A big Italian family sitting around a table heaped with food, including a big plate of spaghetti noddles with delicious tomato sauce is truly iconic, and a symbol of Italy and Italian immigrants around the world.

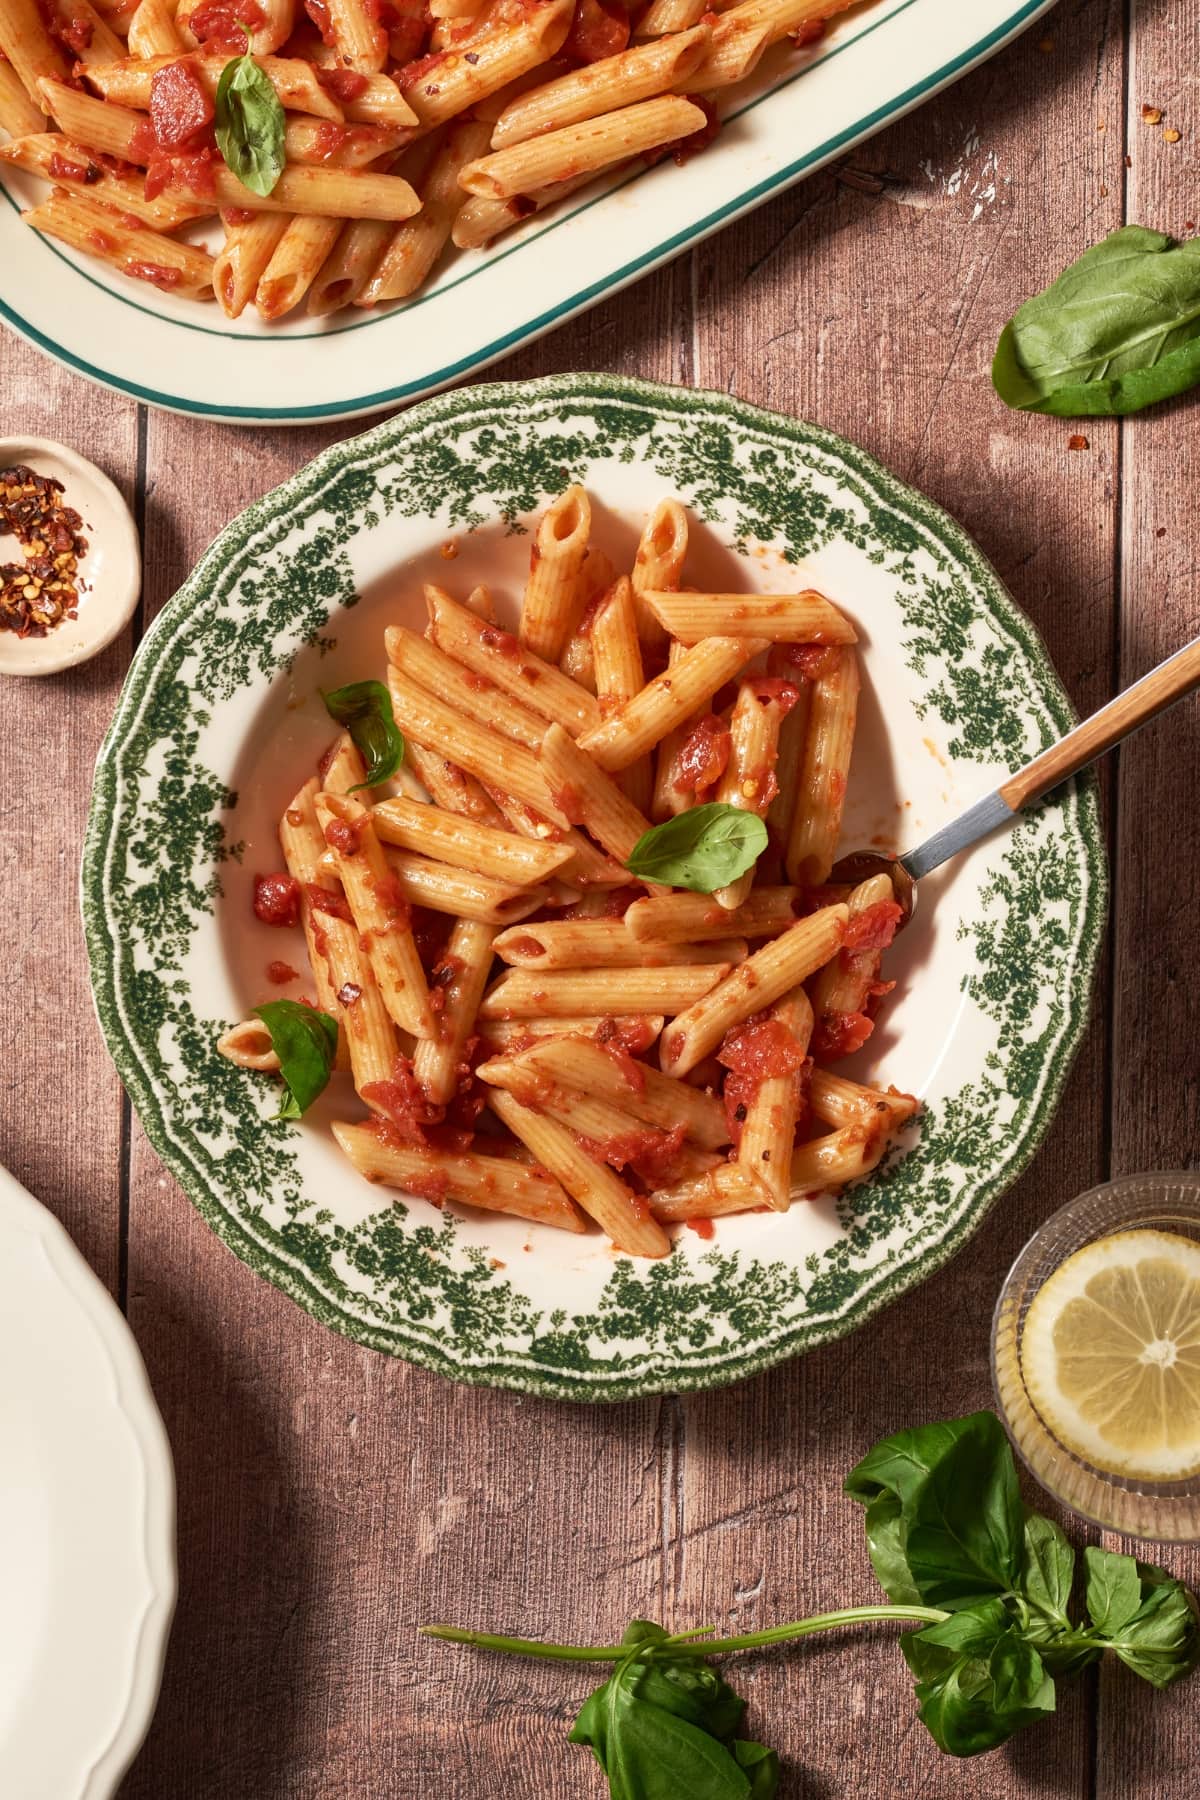
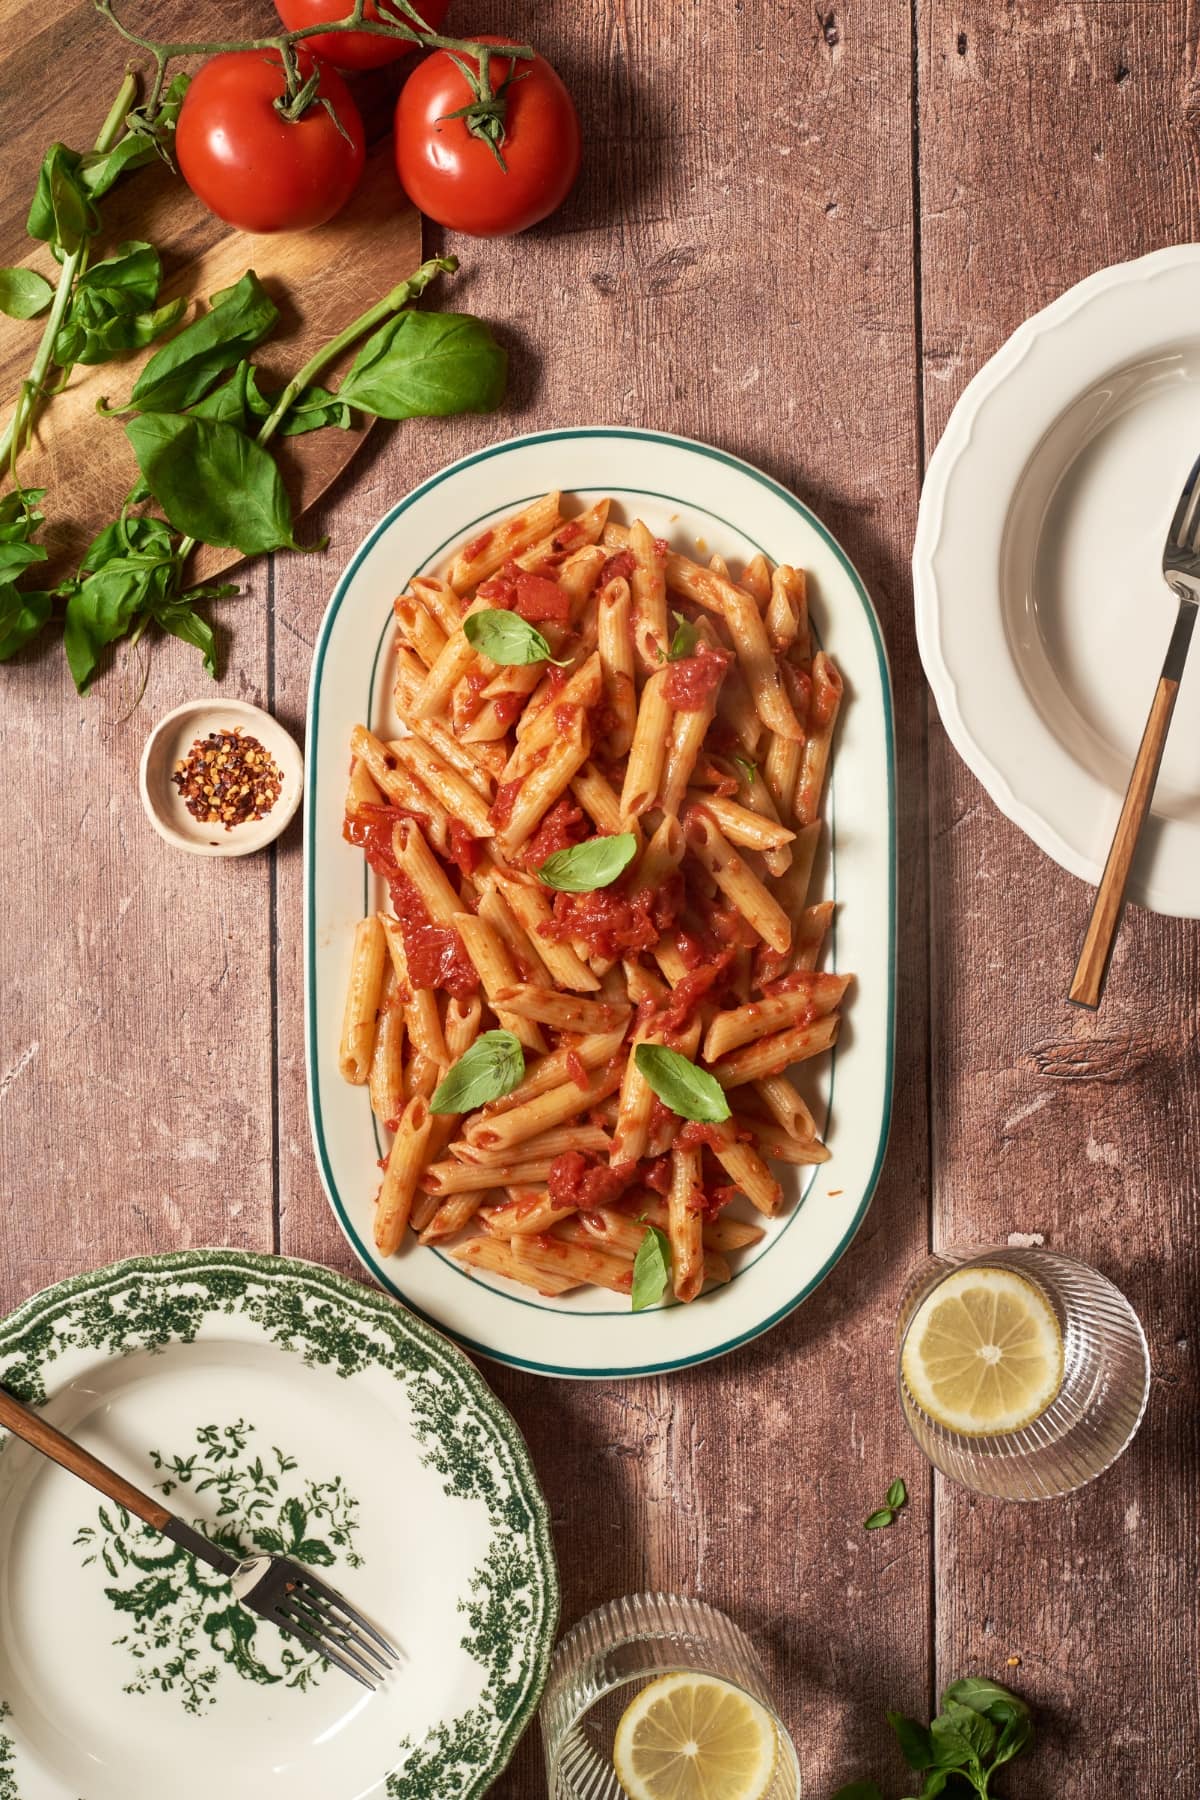
pasta al pomodoro

In Italy, pasta pomodoro is a classic comfort food for kids, one of the most simple and quick pasta recipes that every mama makes for her kids for lunch or dinner.

Just a simple tomato sauce and pasta with each child’s favorite topping like grated cheese, fresh basil or even a little crushed red pepper flakes and the meal is served and tummies are filled!

This recipe is excellent served alongside a large salad and garlic bread to make it complete meal.

  • large pot for boiling salted water to cook pasta
  • saucepan for cooking sauce
  • wooden spoon for stirring sauce
  • colander to drain pasta
  • serving dish

Ingredients

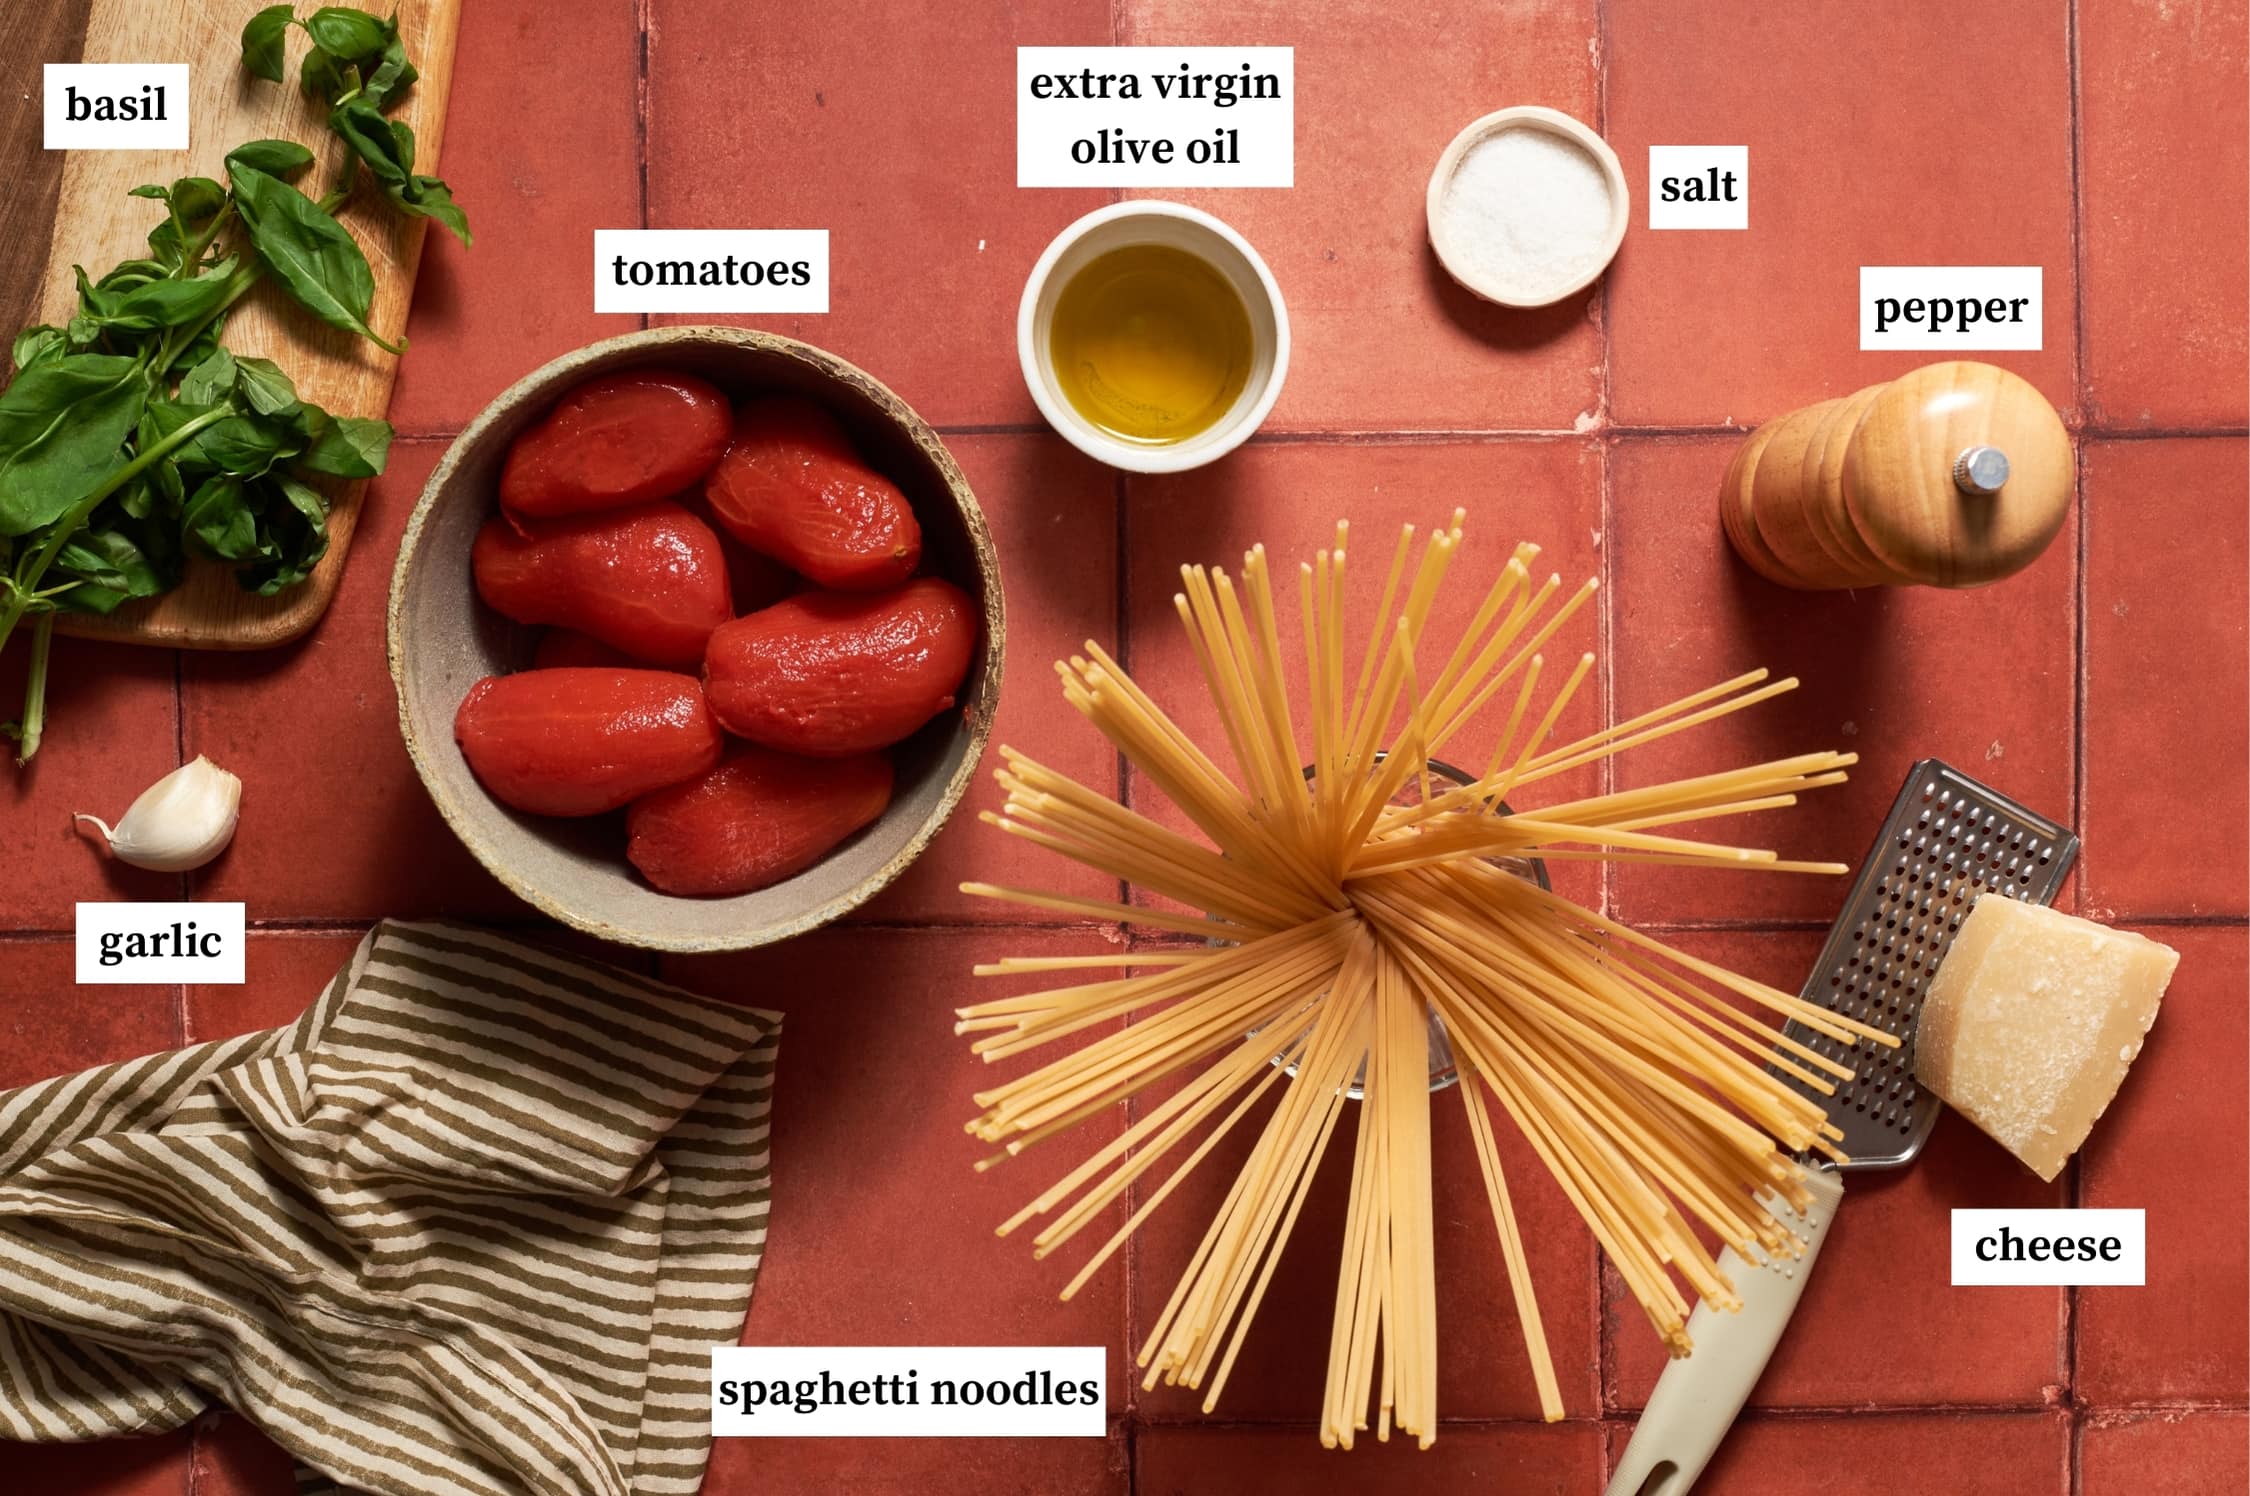
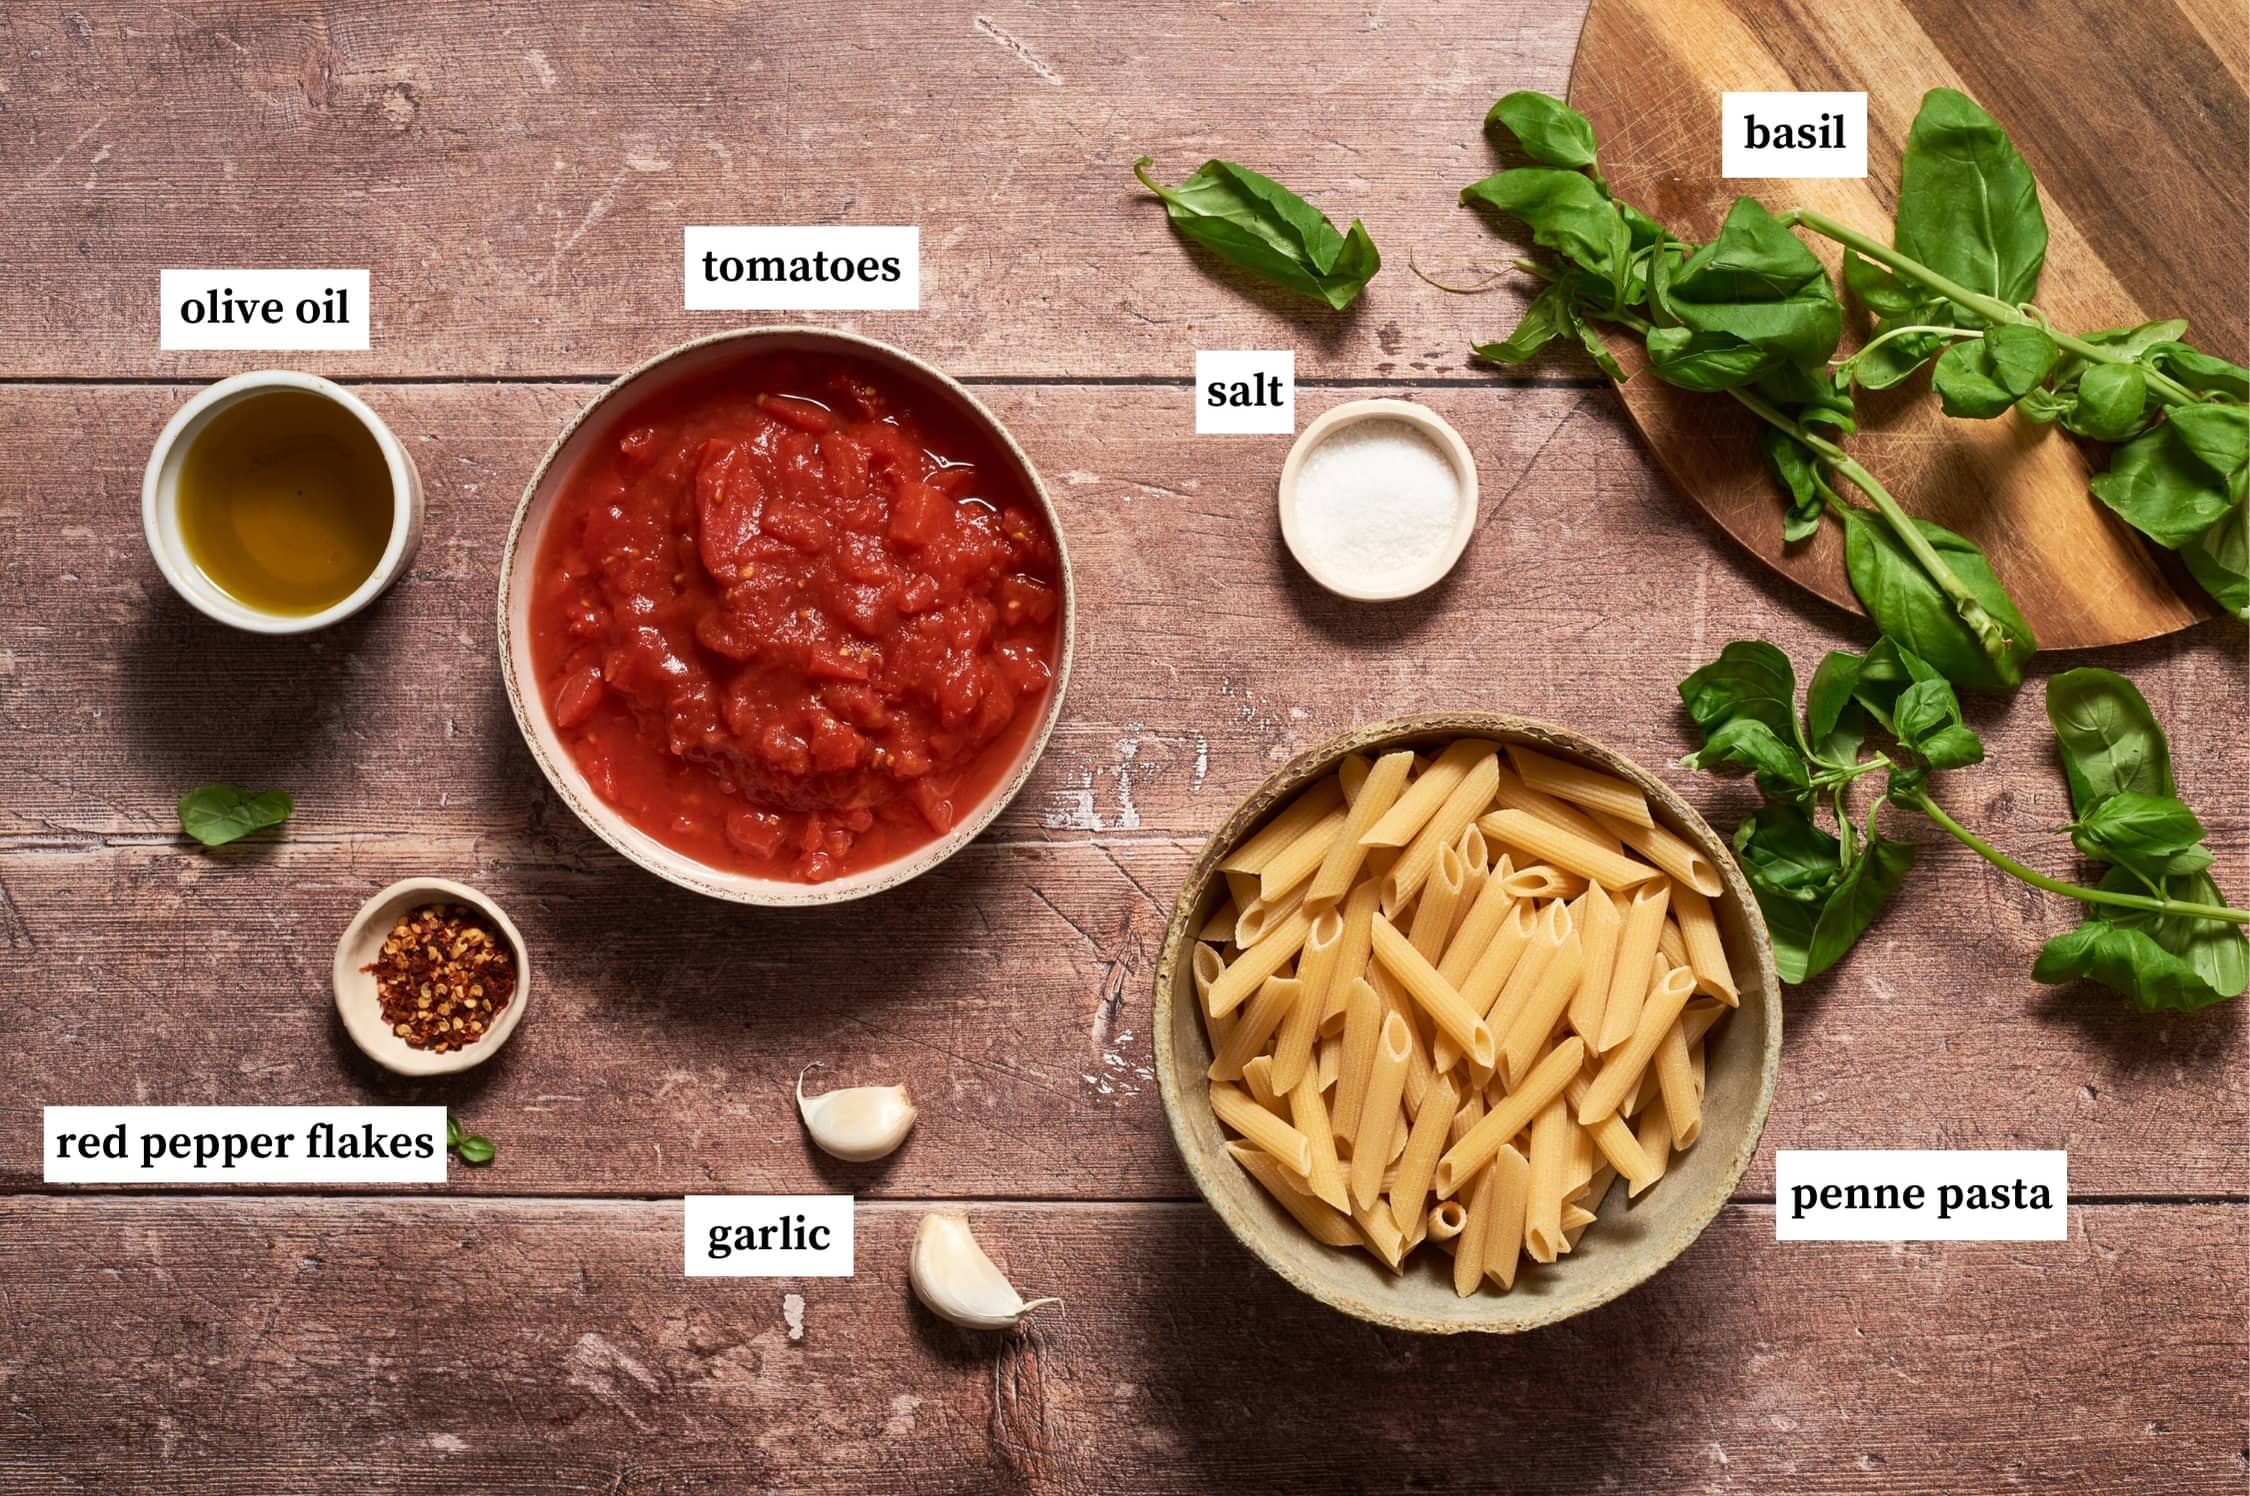
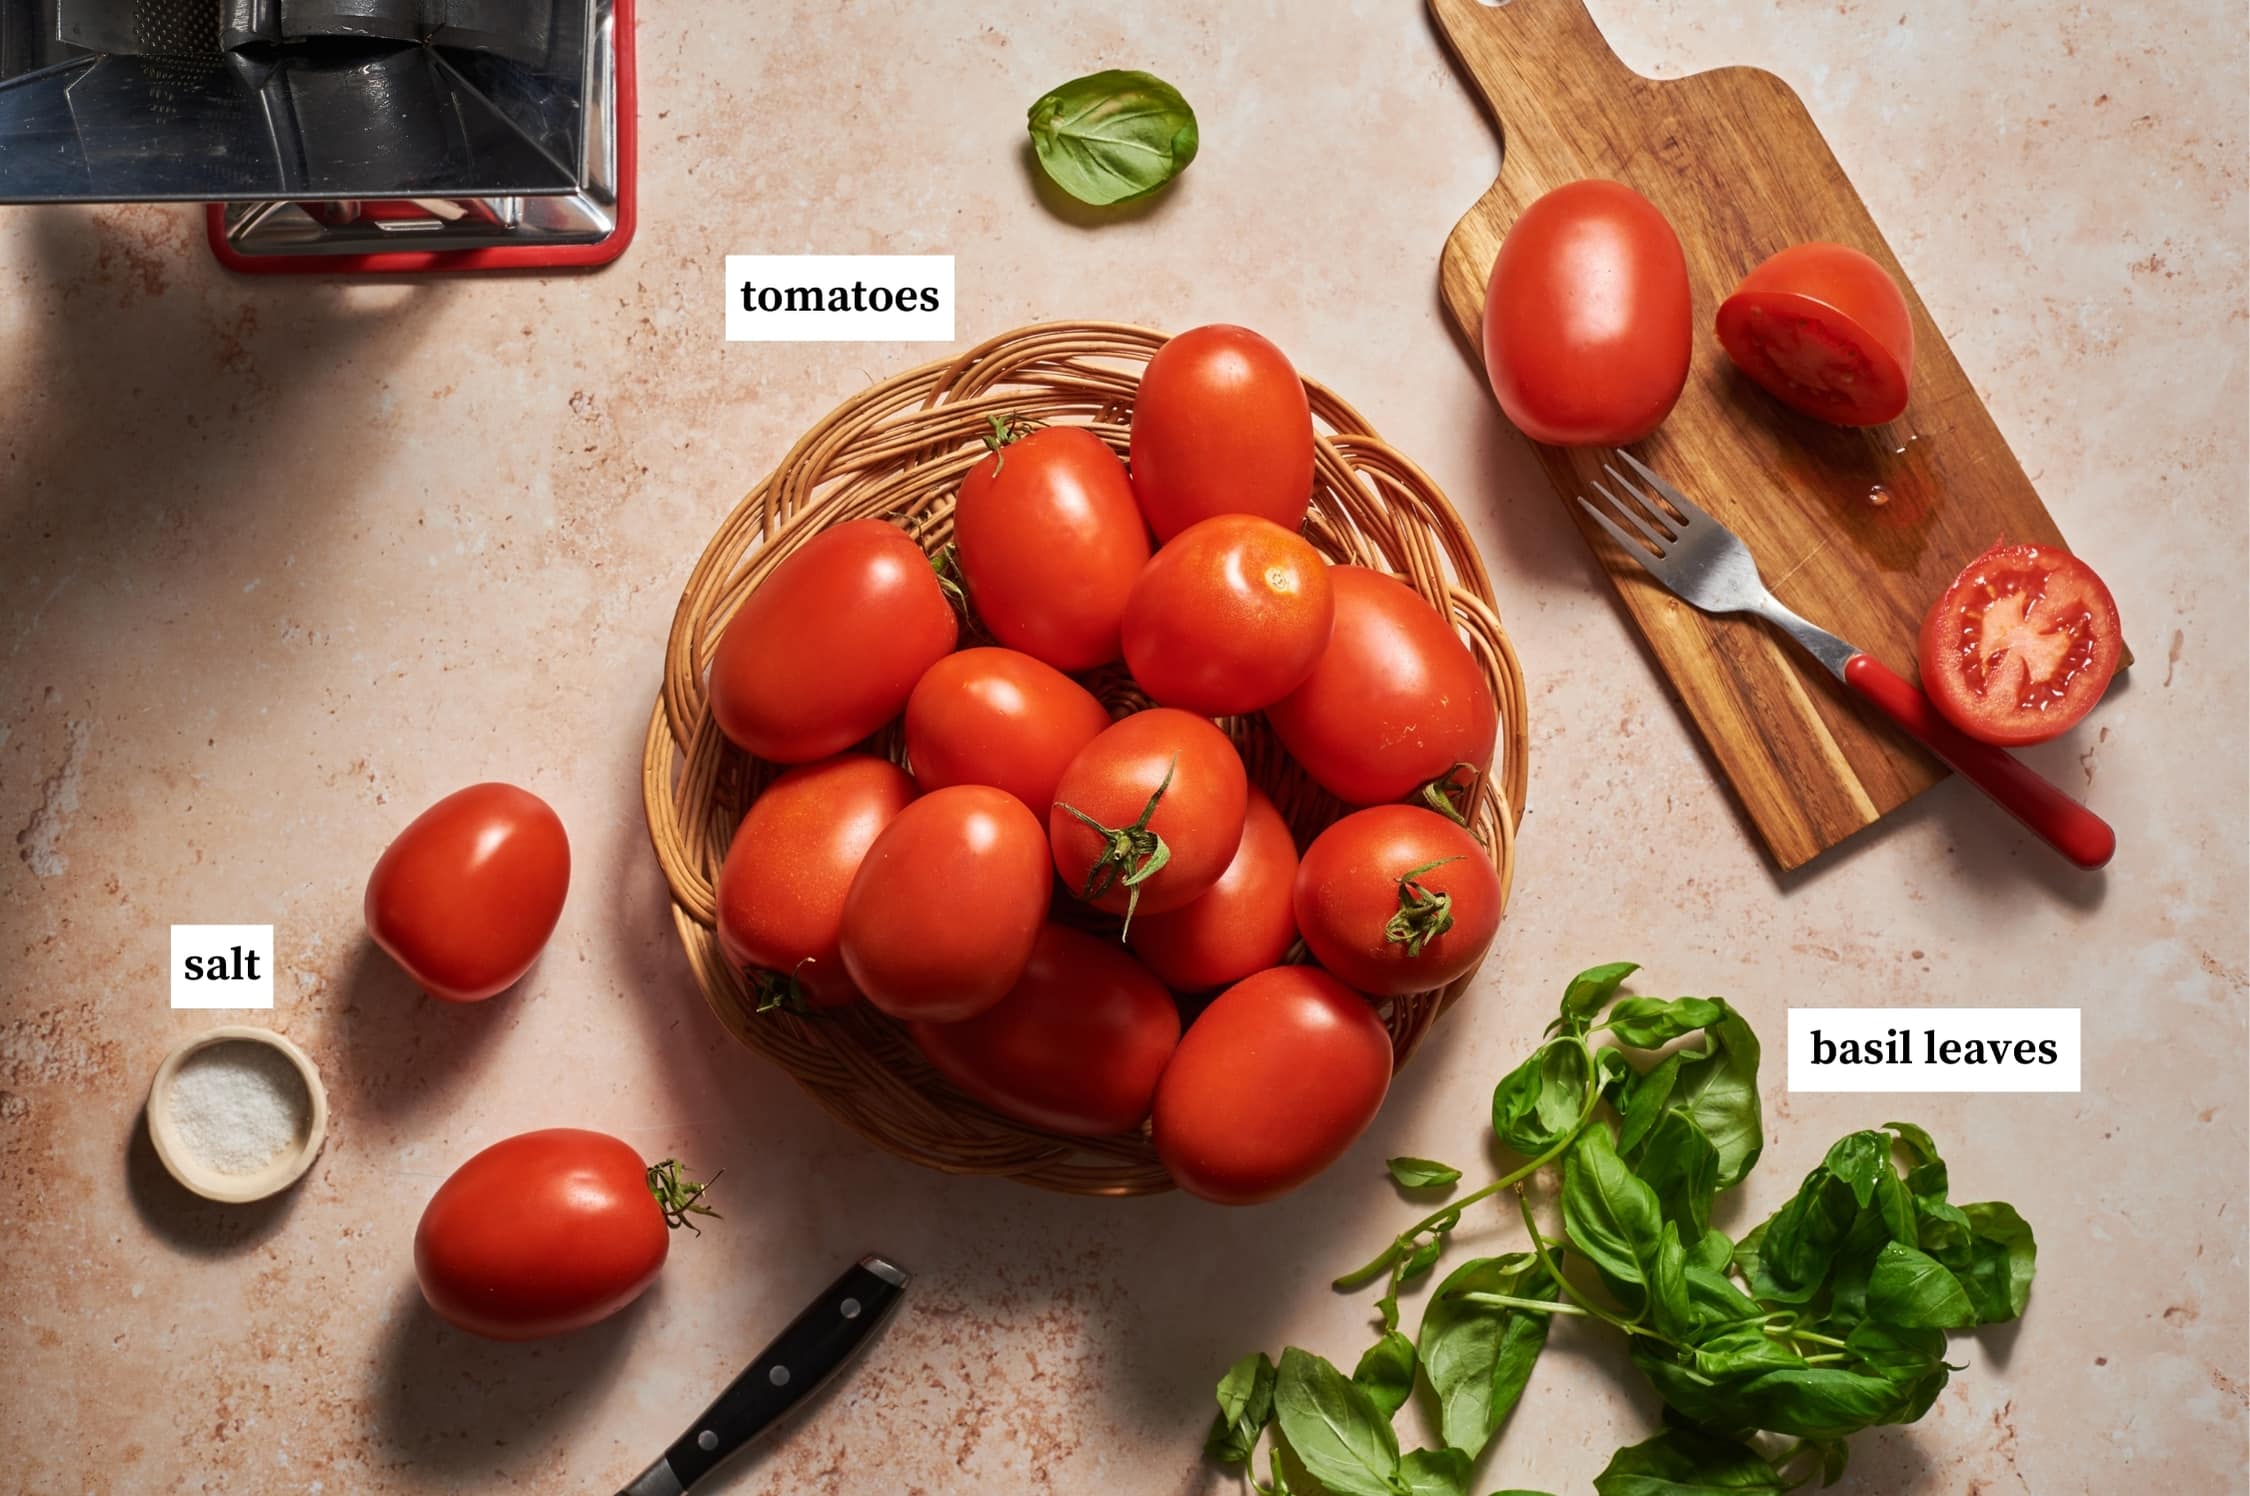
  • Spaghetti noodles (0.88 lb | 400 grams) – a high-quality package of dry spaghetti noodles or really any other shape of pasta works great with this tomato sauce.
  • Extra virgin olive oil (2 tbsp | 30 grams) – a medium quality extra virgin olive oil is sufficient, as it will be cooked you don’t need to use your most expensive one. Although Italians would not dream of using it, some American recipes for pasta pomodoro use butter instead of olive oil. If you like a creamy, buttery flavor, you can add an additional pat of butter to the sauce or completely substitute the olive oil with butter.
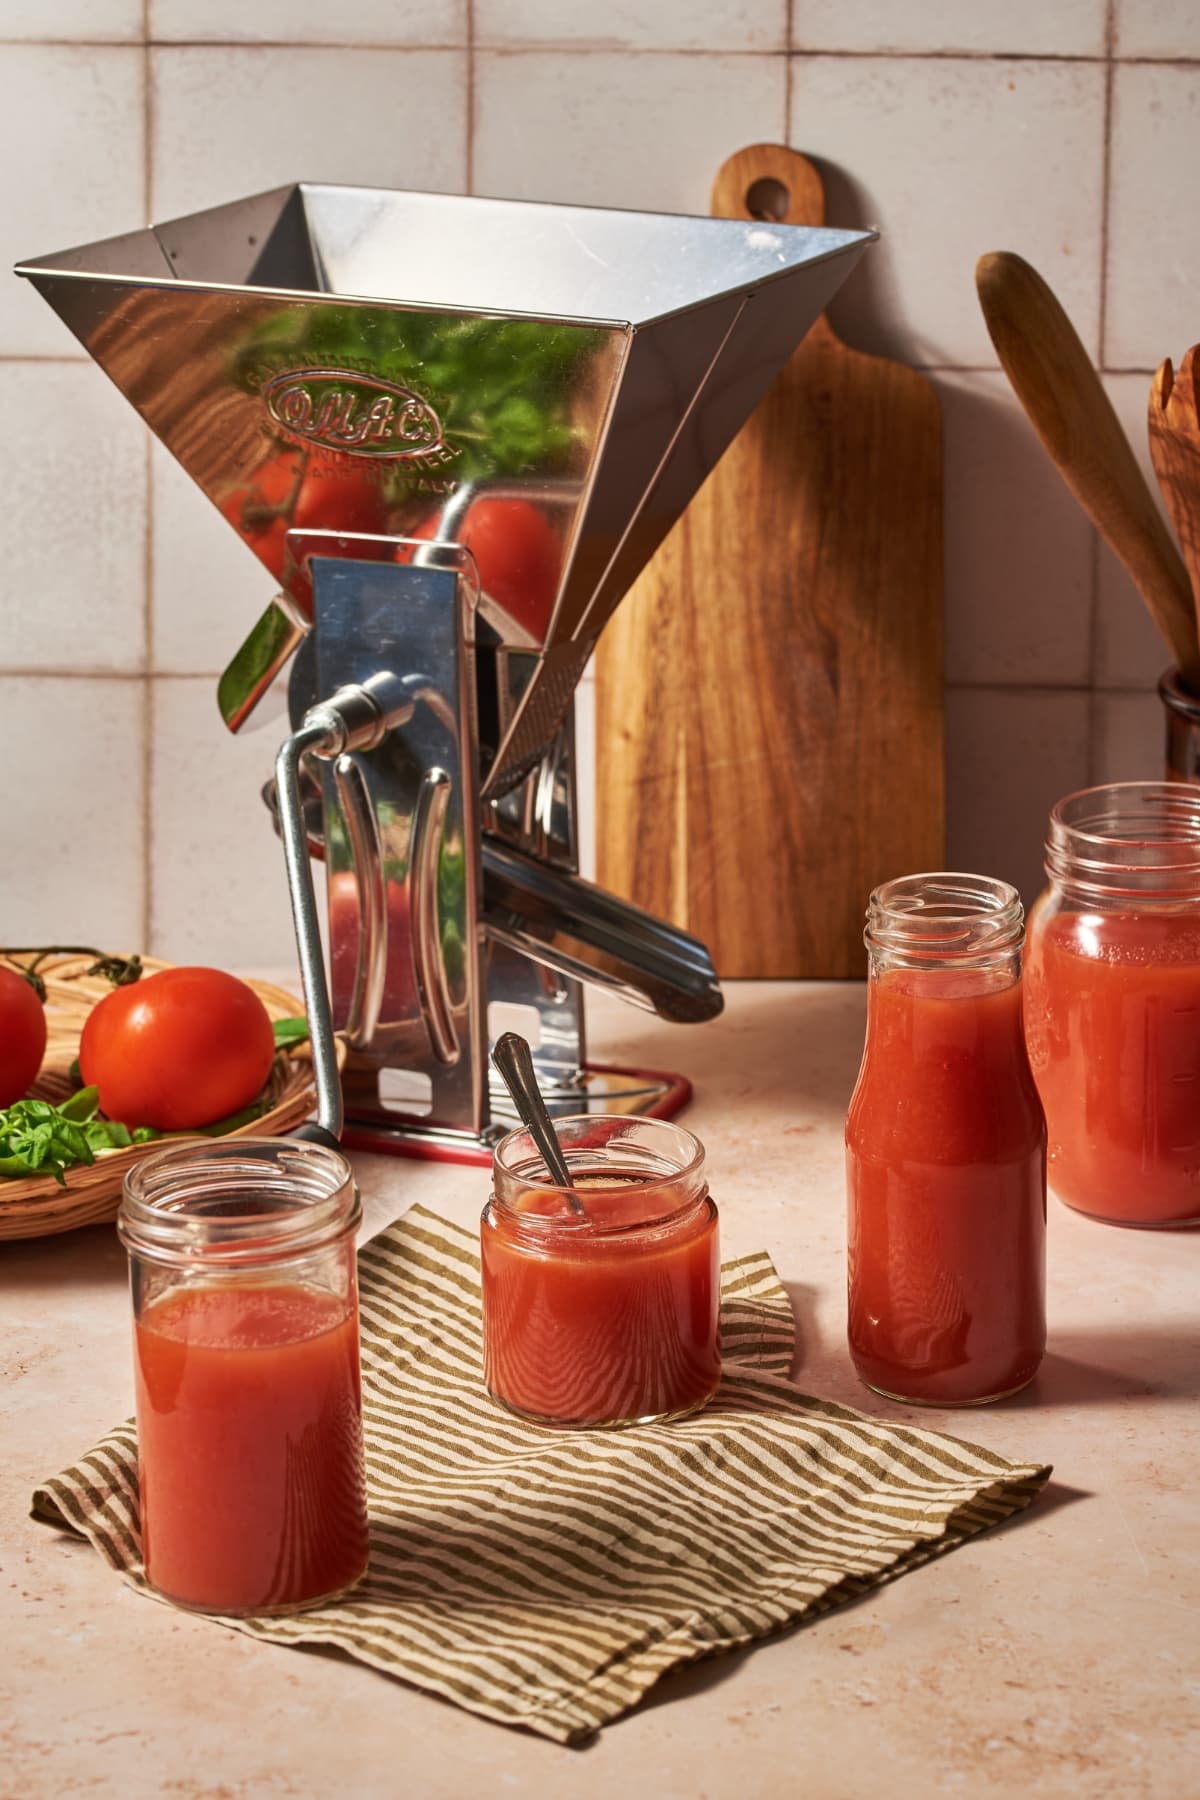
  • Tomatoes (1.1 lbs | 500 grams) – you can either choose canned tomatoes (San Marzano tomatoes are the best) or tomato puree to start with. Another option is starting with fresh whole Roma tomatoes or cherry tomatoes/grape tomatoes if you like a tarter taste. When using a large variety of fresh tomatoes you will need to quickly blanch the ripe tomatoes and remove the skin and seeds before chopping and cooking into a delicious tomato sauce. With grape and cherry tomatoes you usually leave both skins and seeds.
  • Garlic (1 clove) – we like to add in one or two pieces so that the garlic can easily be removed which makes this recipe even more kid friendly, however some people add crushed garlic and leave it in the sauce. An alternative to garlic is 2 tablespoons of finely chopped onion added at the beginning.
  • Salt (as needed) – you will need fine salt for the pasta sauce and coarse salt for the pasta cooking water.
  • Pepper (optional) – add a little dash of pepper if you like the taste.
  • Basil (as desired) – some basil leaves straight from a plant on your windowsill or from the garden will fill your kitchen with an incredible aroma. If you don’t have fresh basil, consider adding a pinch of dried oregano.
  • Cheese (as desired) – we love a sprinkling of grated Parmigiano Reggiano or Parmesan cheese on top of our pasta dish.

Making pasta pomodoro step by step

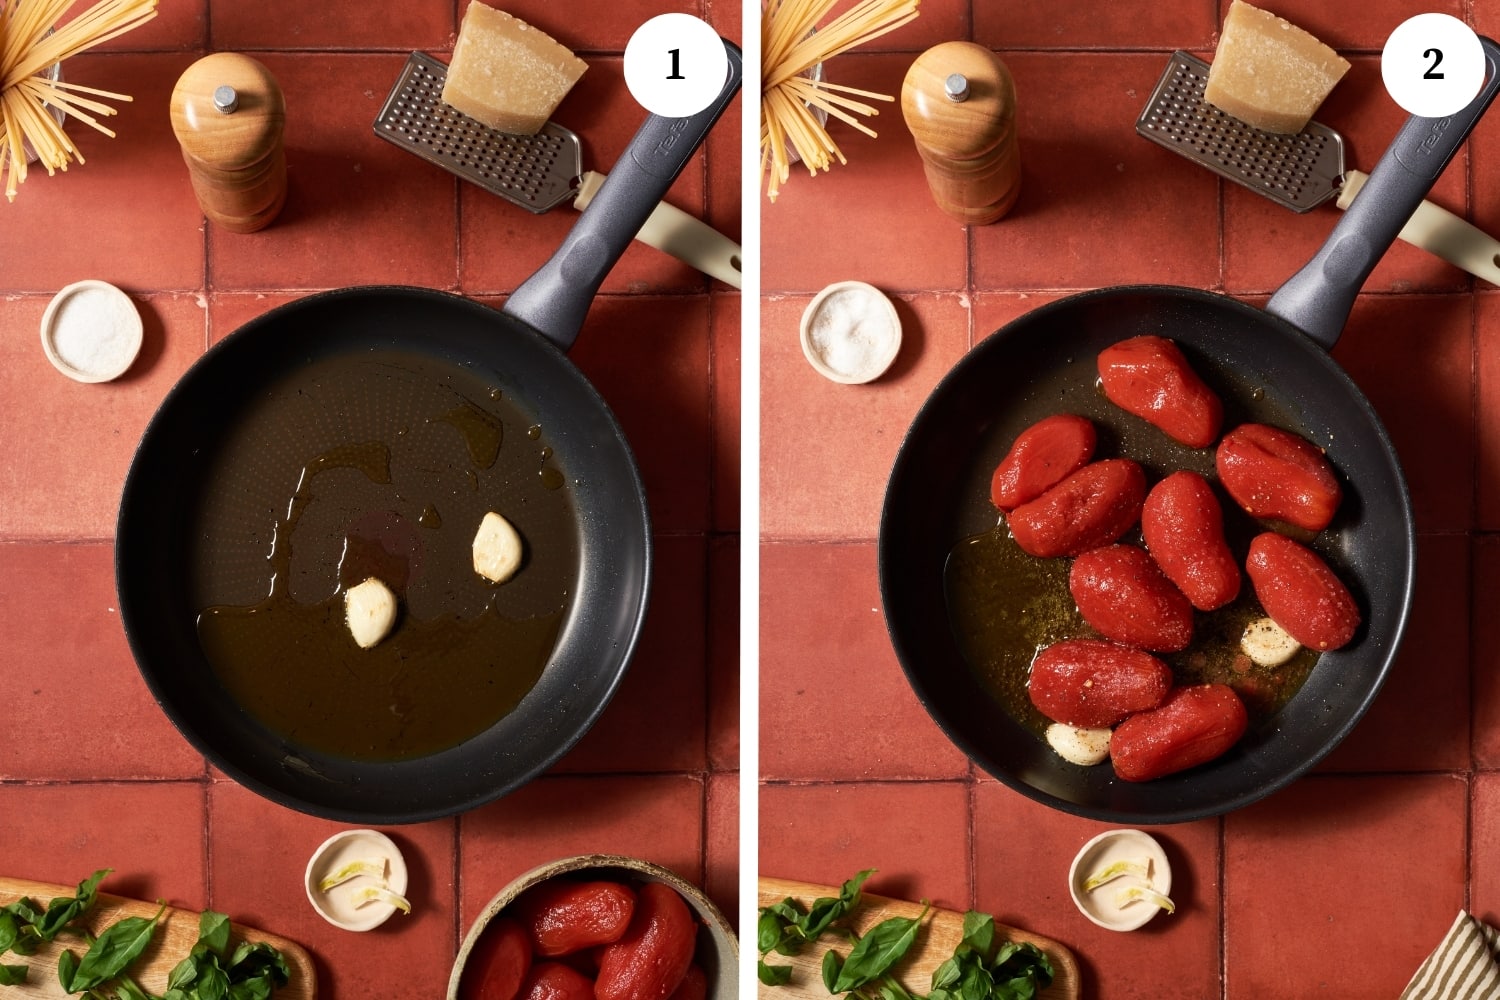
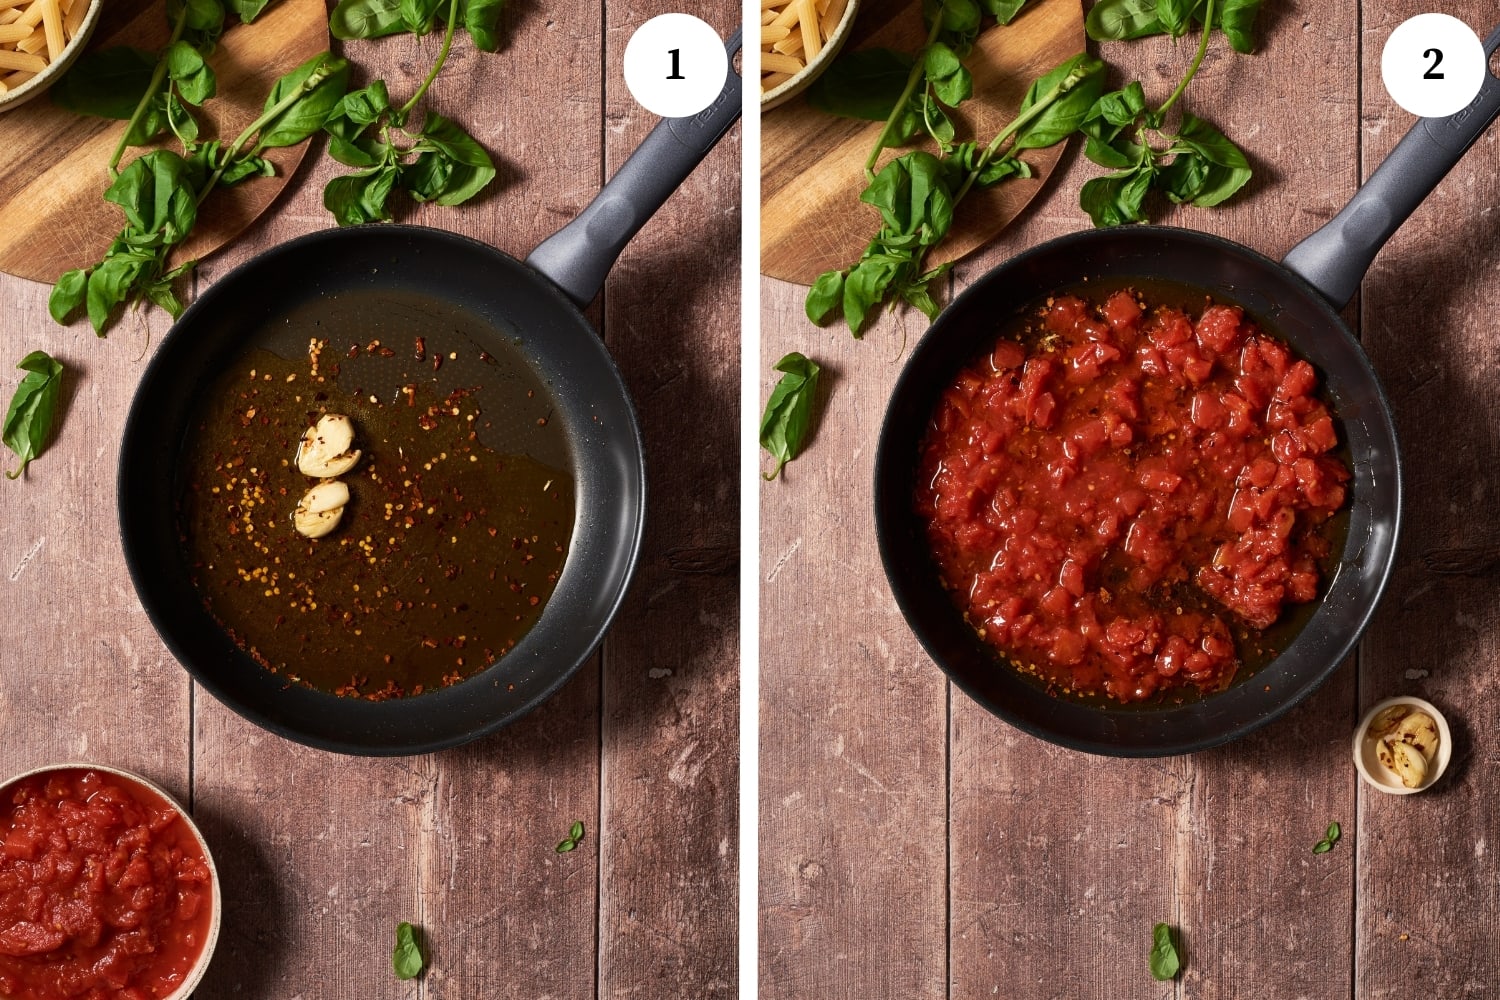
Start the pomodoro sauce: Put the olive oil in a medium or large skillet over medium heat and then add the garlic clove that has been peeled and chopped in half with the little green part in the middle removed (photo 1). After cooking for two minutes, add the tomato puree or whole peeled tomatoes from the can (photo 2).

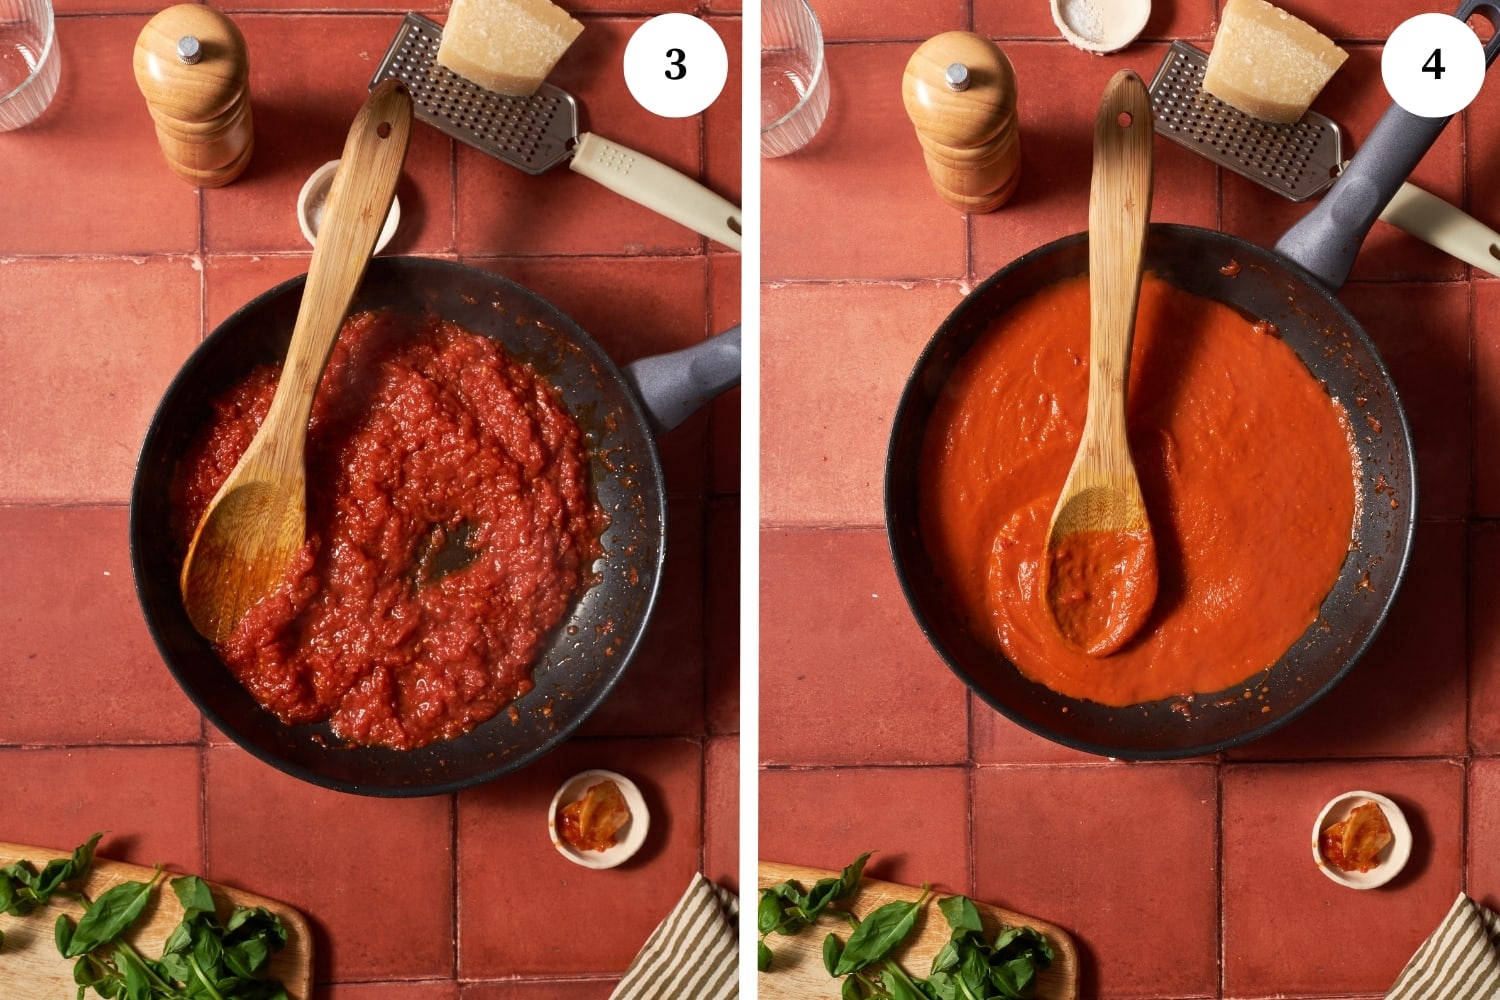
Season and cook the sauce: Season lightly with a dash of salt and pepper. Cover and cook, stirring occasionally, for 30 minutes when cooking tomato puree or about an hour with whole tomatoes, both over low heat. Remove the garlic clove and throw away. If you used whole tomatoes, either put them through a vegetable mill or use an immersion blender to make it smooth (photo 4).

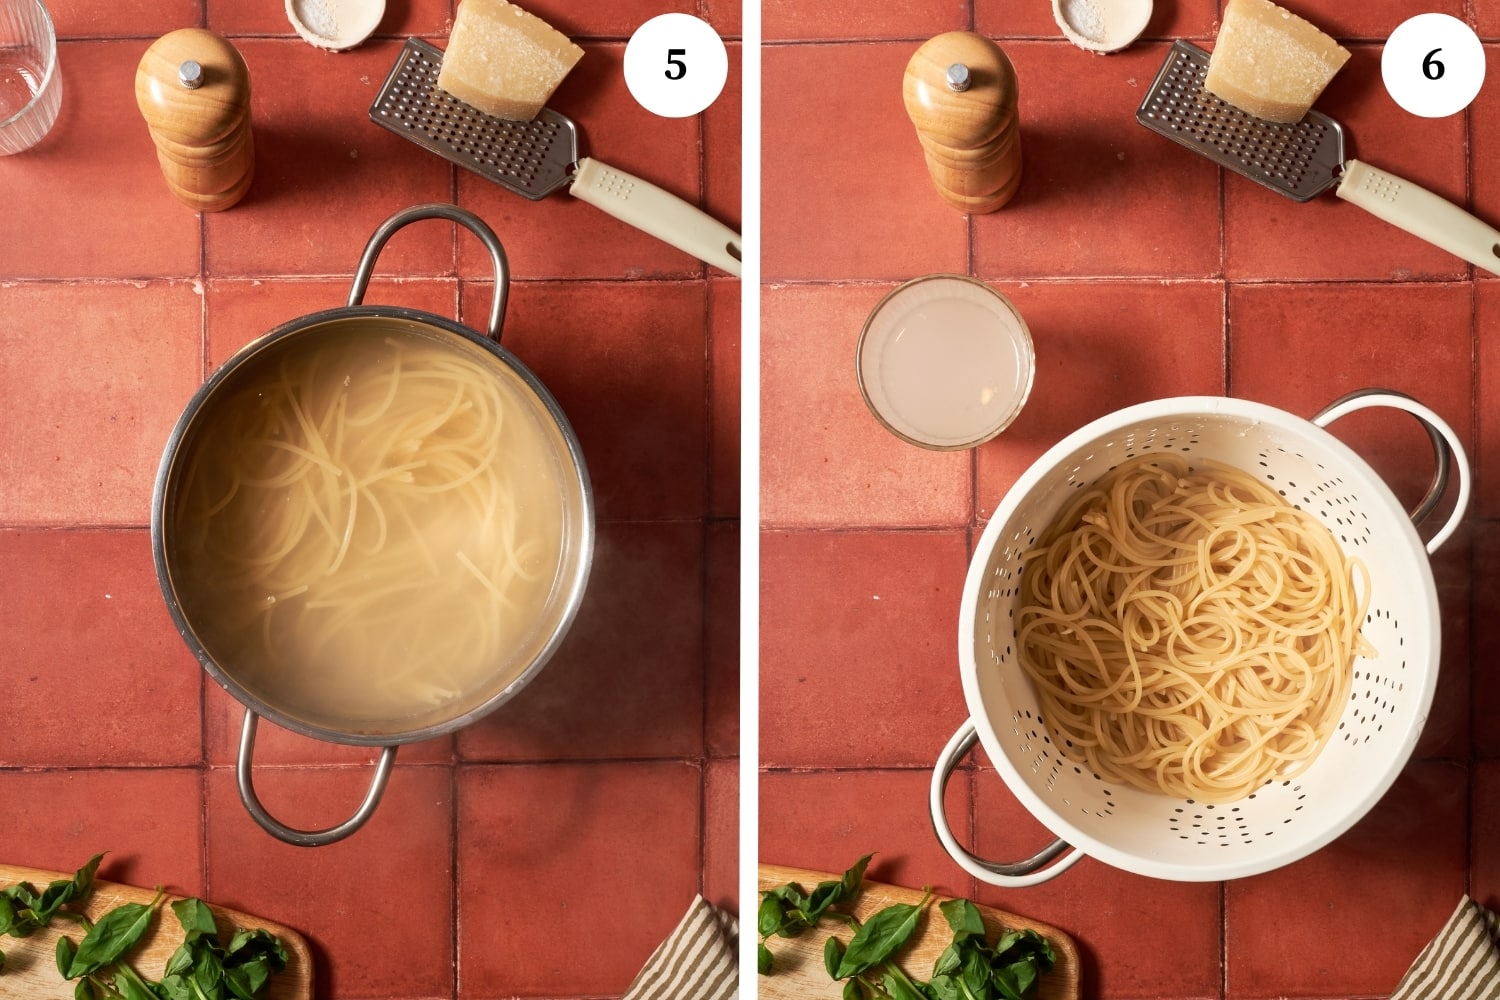
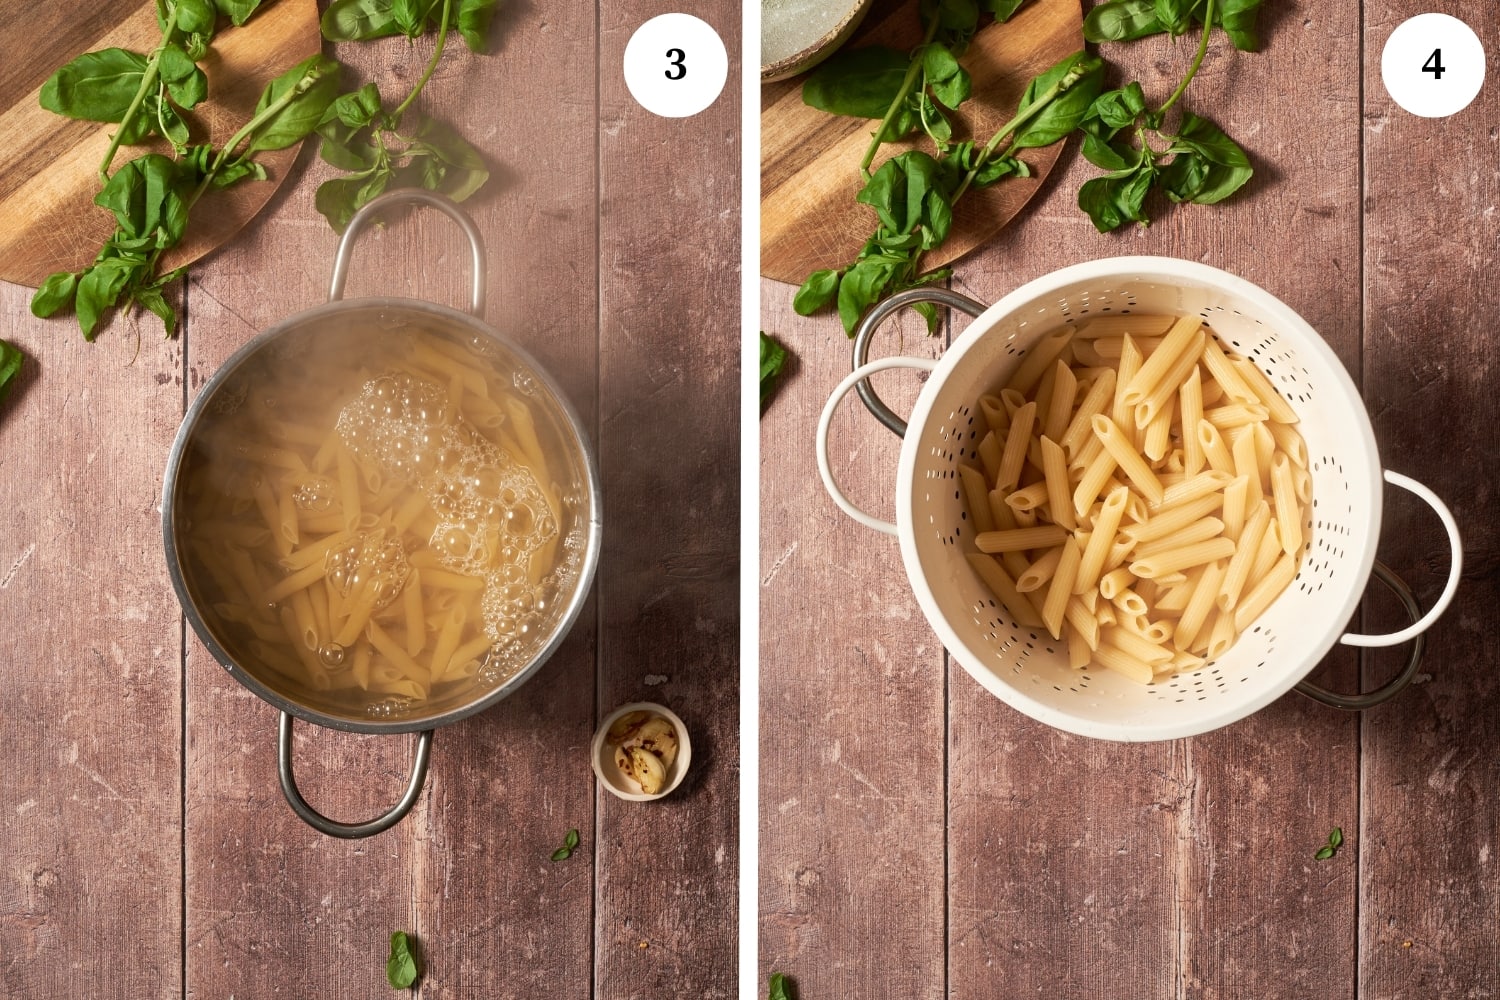
Cook the pasta: Put a large pot of water on to boil for the spaghetti when the sauce is almost ready. Add salt to the boiling water, add the pasta, and cook following the package instructions for al dente (photo 5). Drain the spaghetti keeping a small cup of pasta water aside (photo 6).

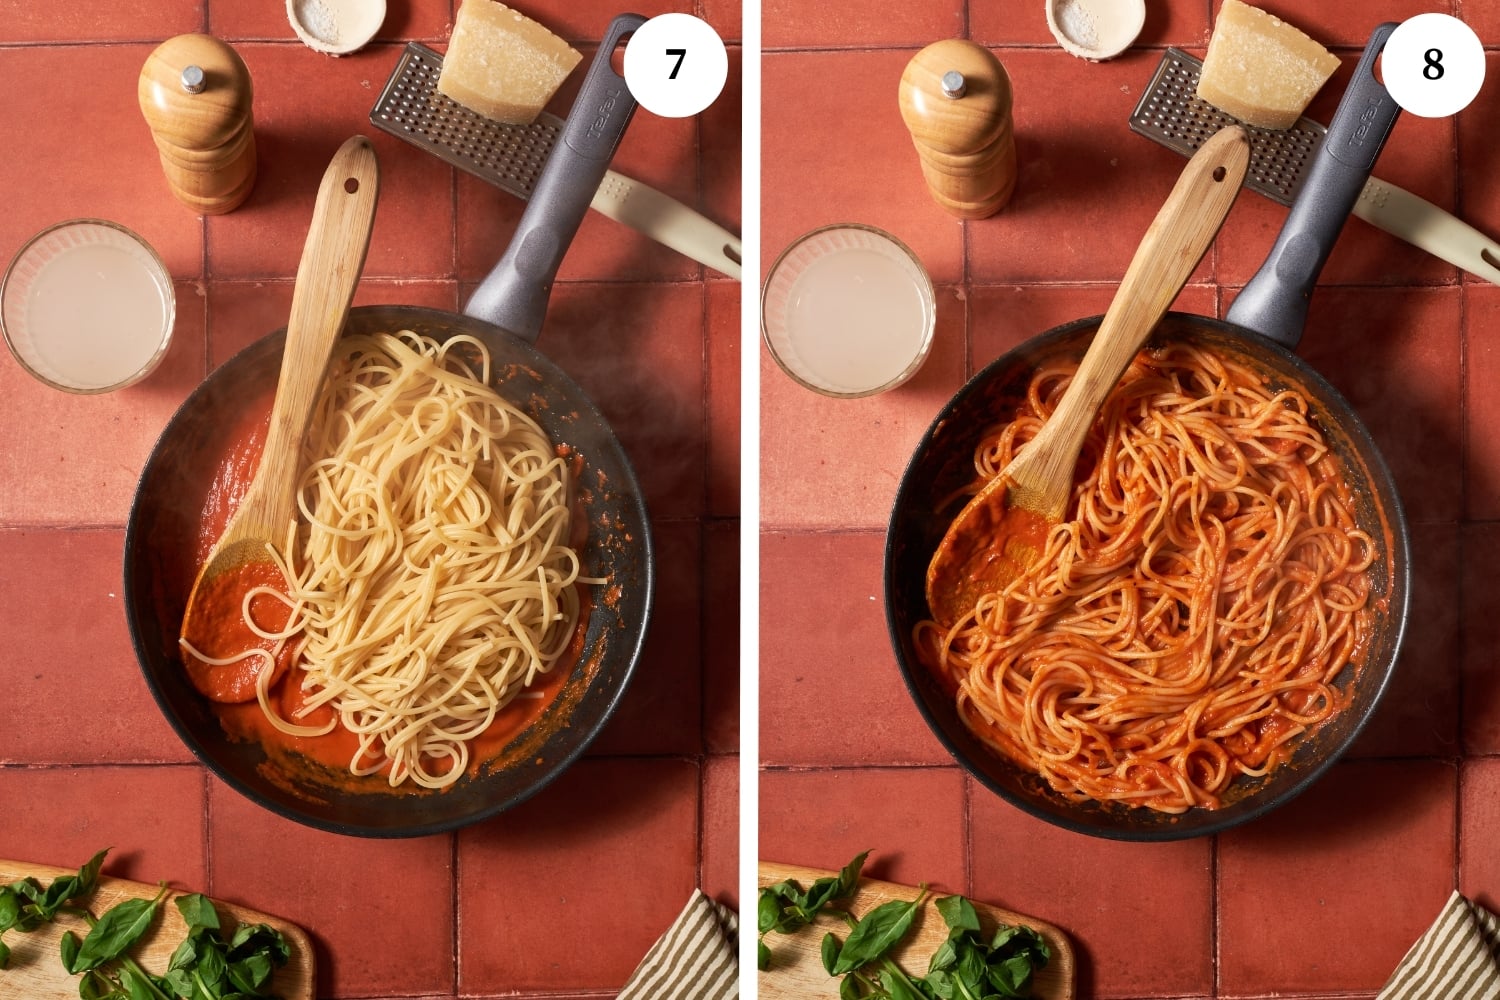
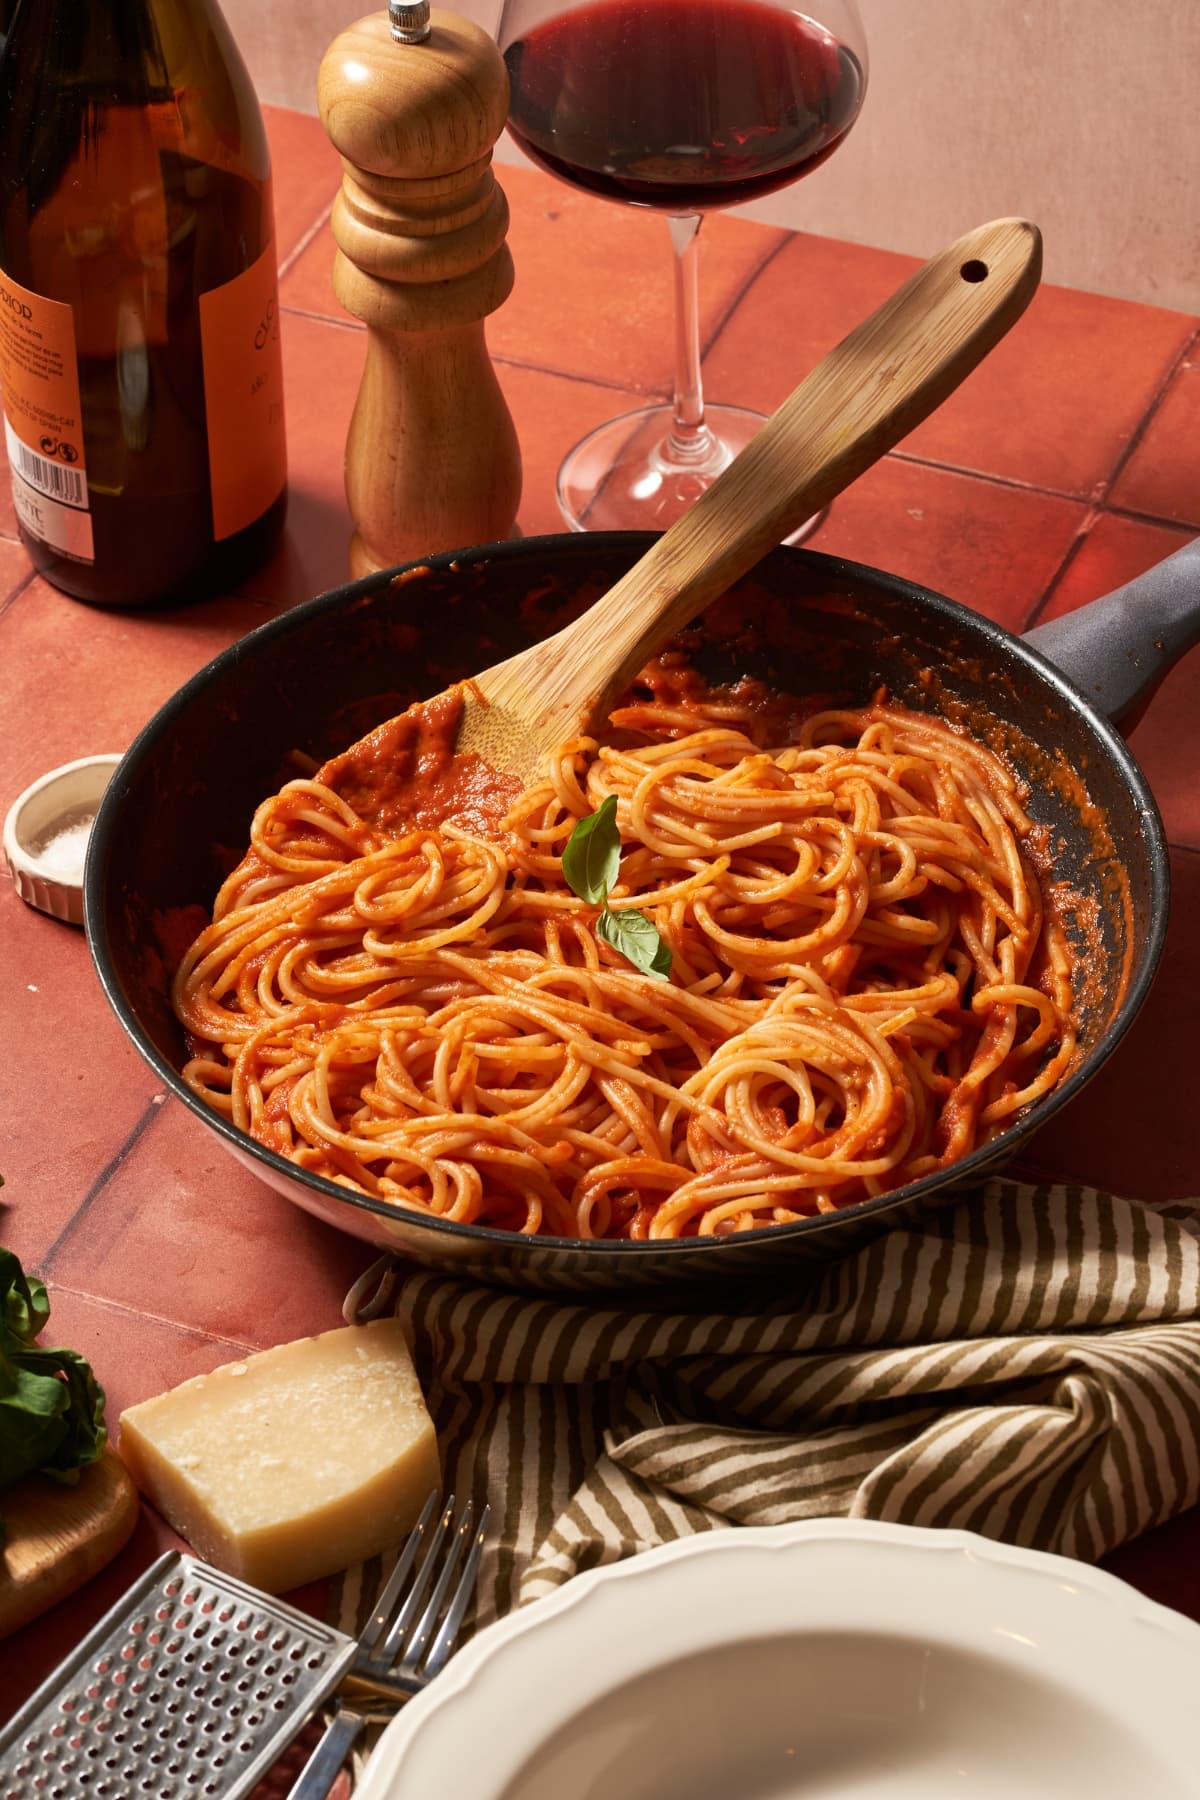
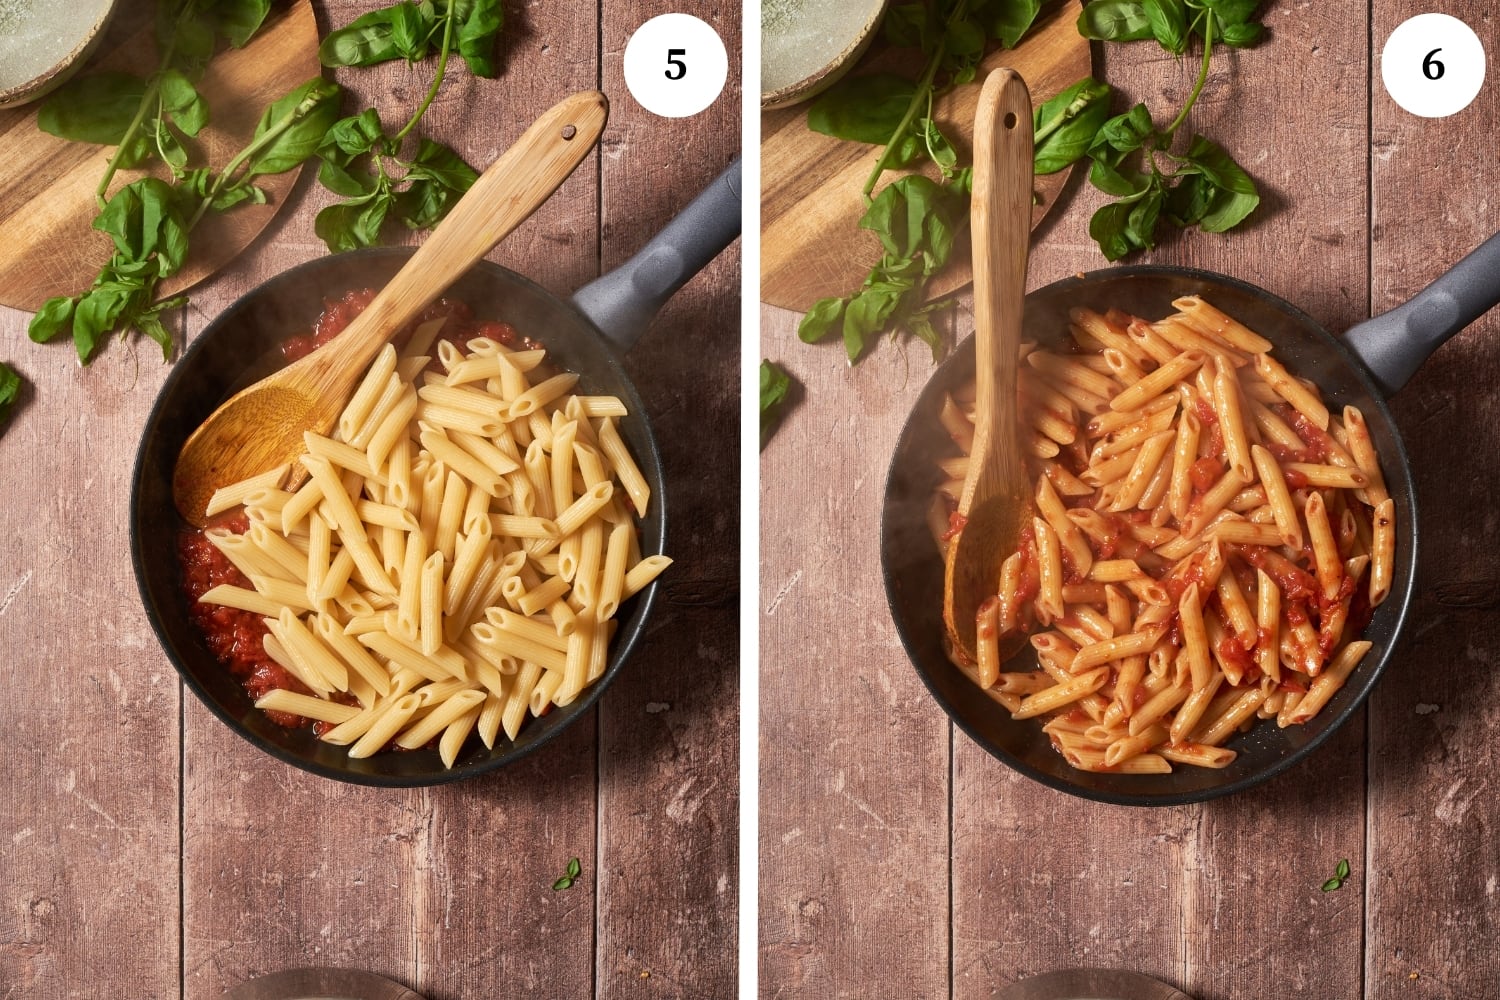
Coat the pasta with sauce: Add the drained pasta directly to the sauce (photo 7) and stir until the sauce coats the pasta (photo 8). If the sauce is too thick, you can add a little pasta water when stirring.

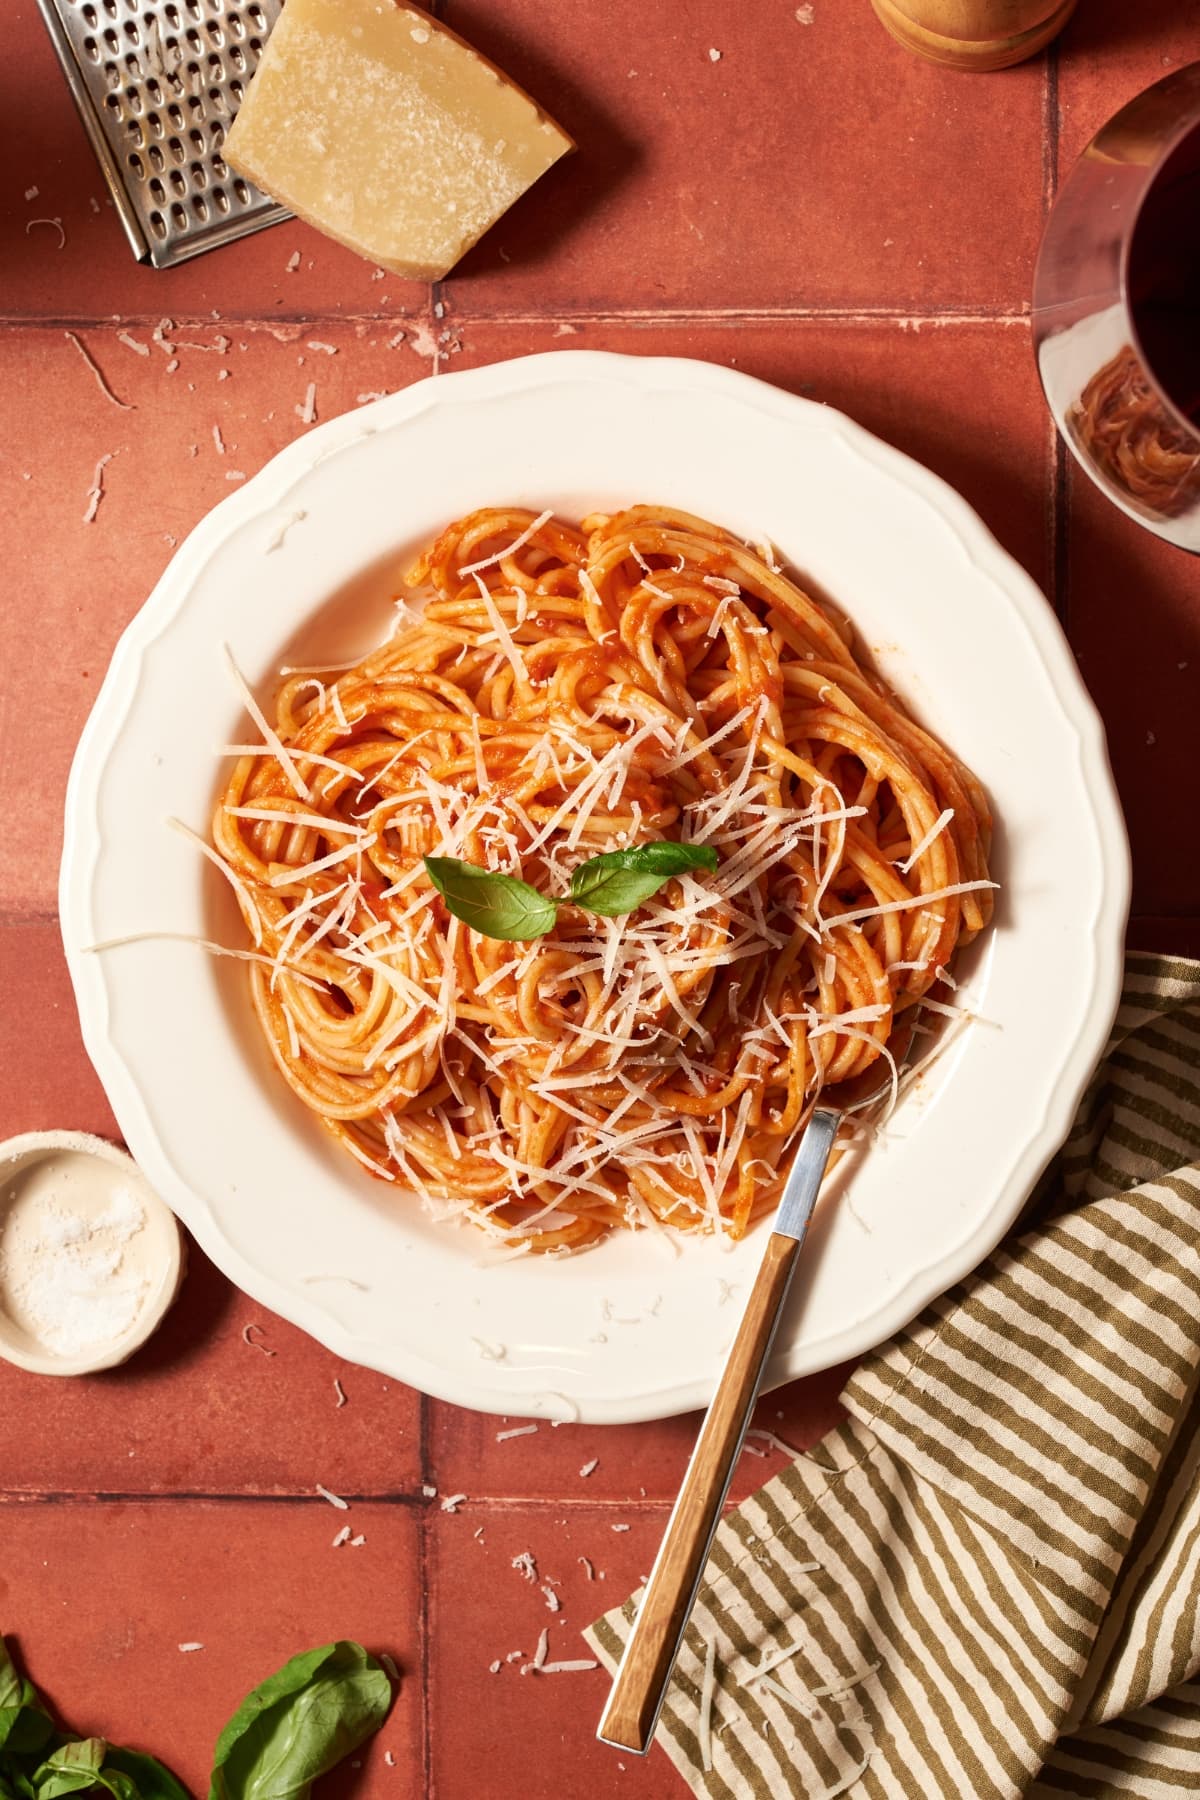
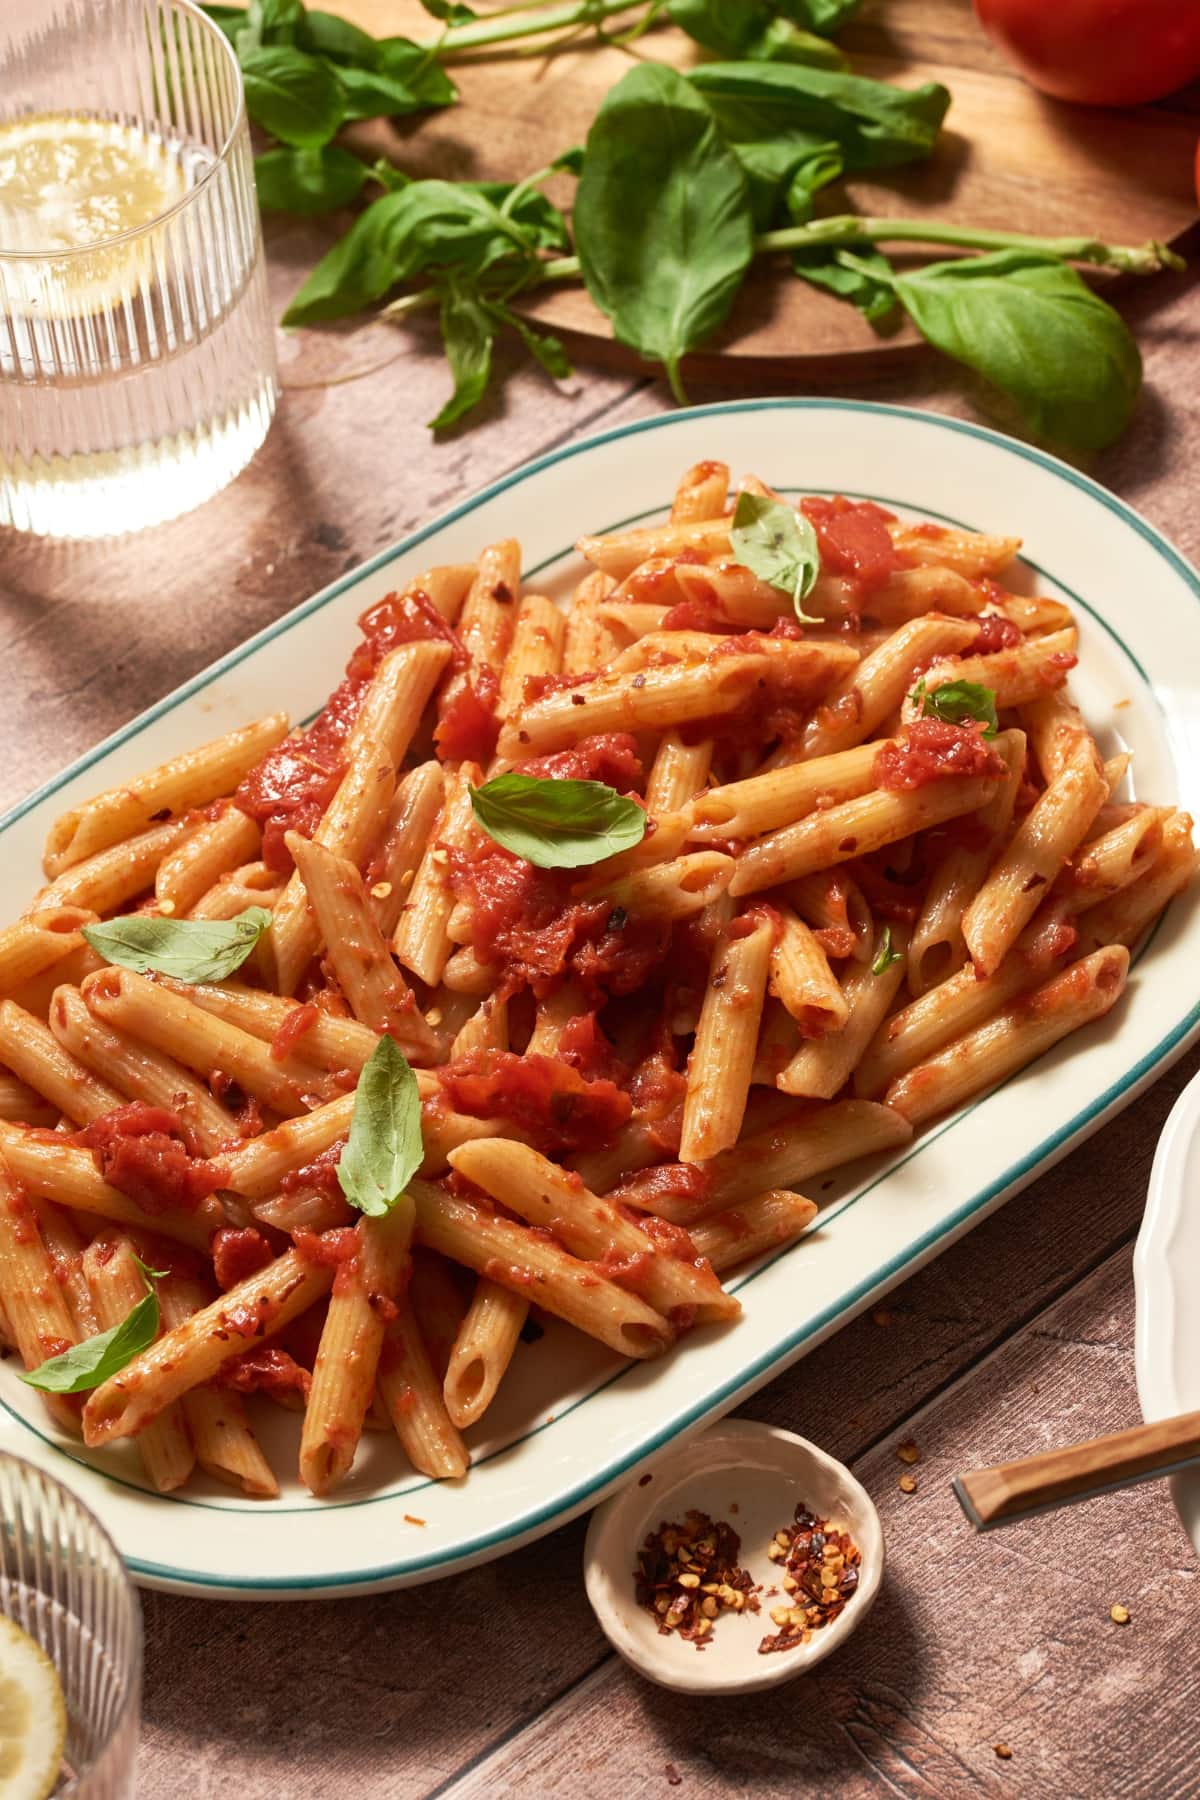
Finishing touches and serve: Place in a large serving dish, garnish with fresh basil and serve. Each person can add finely grated Parmesan cheese or Parmigiano Reggiano as desired directly onto their own pasta.

Expert tips for your tomato sauce pasta

  • Real Italian-style pasta. To make your pasta come out very al dente like in Italy, set a timer with the amount of time indicated on the instructions and then drain the pasta at that time, setting aside a little cup of pasta water. Add the pasta to the sauce and add some of the reserved pasta cooking liquid and stir together.
  • Types of tomatoes. Whether you are using fresh tomatoes or canned tomatoes for your pomodoro sauce, most Italians prefer San Marzano tomatoes for this kind of puréed tomatoes sauce, however Roma tomatoes work well too. If you want to try something with a little more tang, you can use grape or cherry tomatoes instead. Read our guide on tomatoes for more helpful information.

Variations on this classic Italian dish

  • Pick a different pasta shape. Once you have tried this delicious sauce with spaghetti, go ahead and get creative and try any type of pasta you love. Unlike other sauces that have very specific types of pasta shape that they as associated with, the great flavor of this pasta pomodoro recipe works with any shape. Try short pastas like penne, farfalle or fusilli or long pastas such as chitarra or angel hair pasta. As long as you aim for al dente pasta you can’t go wrong with this pomodoro sauce.
  • Get spicy with red pepper flakes! You can add red pepper flakes to this pomodoro sauce recipe to give it an extra kick of flavor.

Try other easy pasta recipes:

FAQs

How can I reheat cooked pasta?

Reheating cold pasta can be a bit tricky. Start by warming up a sauce pan over low heat with a little water in the bottom of the pan. Pour most of the water out and add the spaghetti al pomodoro into the dish and gently stir over low to medium heat as it warms. If it is too dry, you can drizzle a little olive oil or a very small amount of water as you turn the pasta. When it is heated through serve with fresh basil leaves and a sprinkling of grated cheese.

How long does pasta pomodoro keep for?

You can keep pasta pomodoro in fridge for up to 3 days in an airtight container. We do not recommend freezing cooked pasta, as it doesn’t defrost well.

Step by Step PhotosMost of our recipes come with step by step photos, helpful tips and tricks to make it perfectly first time and even video!

Save

#wprm-recipe-user-rating-0 .wprm-rating-star.wprm-rating-star-full svg * { fill: #343434; }#wprm-recipe-user-rating-0 .wprm-rating-star.wprm-rating-star-33 svg * { fill: url(#wprm-recipe-user-rating-0-33); }#wprm-recipe-user-rating-0 .wprm-rating-star.wprm-rating-star-50 svg * { fill: url(#wprm-recipe-user-rating-0-50); }#wprm-recipe-user-rating-0 .wprm-rating-star.wprm-rating-star-66 svg * { fill: url(#wprm-recipe-user-rating-0-66); }linearGradient#wprm-recipe-user-rating-0-33 stop { stop-color: #343434; }linearGradient#wprm-recipe-user-rating-0-50 stop { stop-color: #343434; }linearGradient#wprm-recipe-user-rating-0-66 stop { stop-color: #343434; }

No ratings yet

Save

Print Recipe
Pin Recipe

Pasta al Pomodoro

This is a great recipe for a classic Italian comfort food your family will love. The best part is how simple it is, just some spaghetti and tomato sauce! It is one of the best dishes for a large group as it is inexpensive and filling as well.

Author:

Prep Time 10 minutes
Cook Time 1 hour
Total Time 1 hour 10 minutes
Servings 4 servings

Ingredients 

1x2x3x

MetricUS Customary

Instructions

  • Put the olive oil in a medium sauce pan over medium heat and then add the garlic clove that has been peeled an chopped in half with the little green part in the middle removed.
  • After cooking for two minutes, add the tomato puree or whole peeled tomatoes from the can. Add a dash of salt.
  • Cover and cook for 30 minutes when cooking tomato puree or about an hour with whole tomatoes, both over low heat, stirring occasionally. Remove the garlic clove and throw away.
  • If you used whole tomatoes, either put them through a vegetable mill or use a immersion blender to make the sauce smooth.
  • Put a large pot of water on to boil for the pasta when the sauce is almost ready.
  • Add salt to the water and cook the pasta by following the package directions for al dente.
  • Drain the pasta keeping a small cup of pasta water aside.
  • Add the drained pasta directly to the sauce or vice versa, and stir until it is completely combined. If the sauce is too thick, you can add a little pasta water when stirring.
  • Put in a large serving bowl and garnish with fresh basil leaves and serve. If you have extra sauce, you can add more sauce in the middle with a few extra basil leaves. Each person can add grated Parmesan cheese or Parmigiano Reggiano as desired directly onto their own pasta.
Tried this recipe?Mention @nonnabox or tag #nonnabox!

This article https://ift.tt/MlIJZTG appeared first on Nonna Box

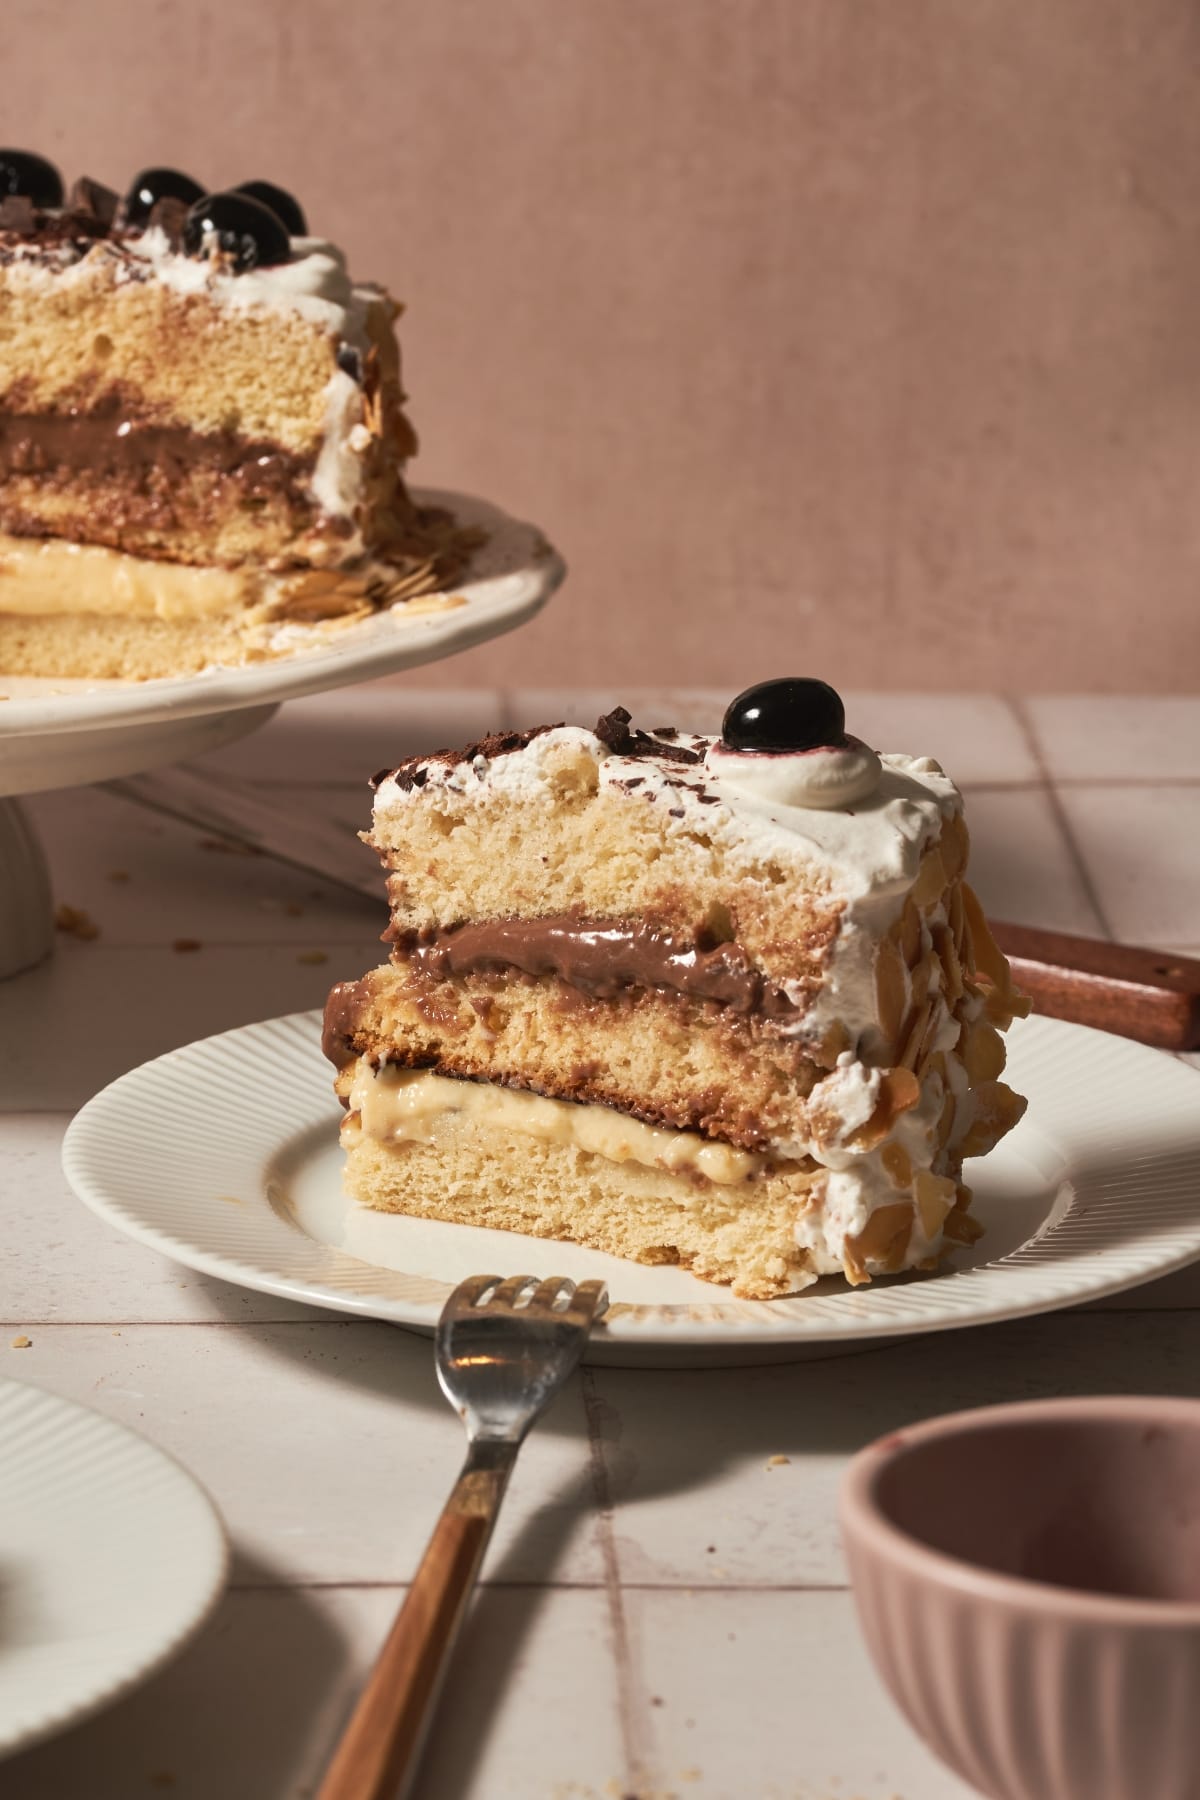
Authentic Italian Rum Cake Recipe

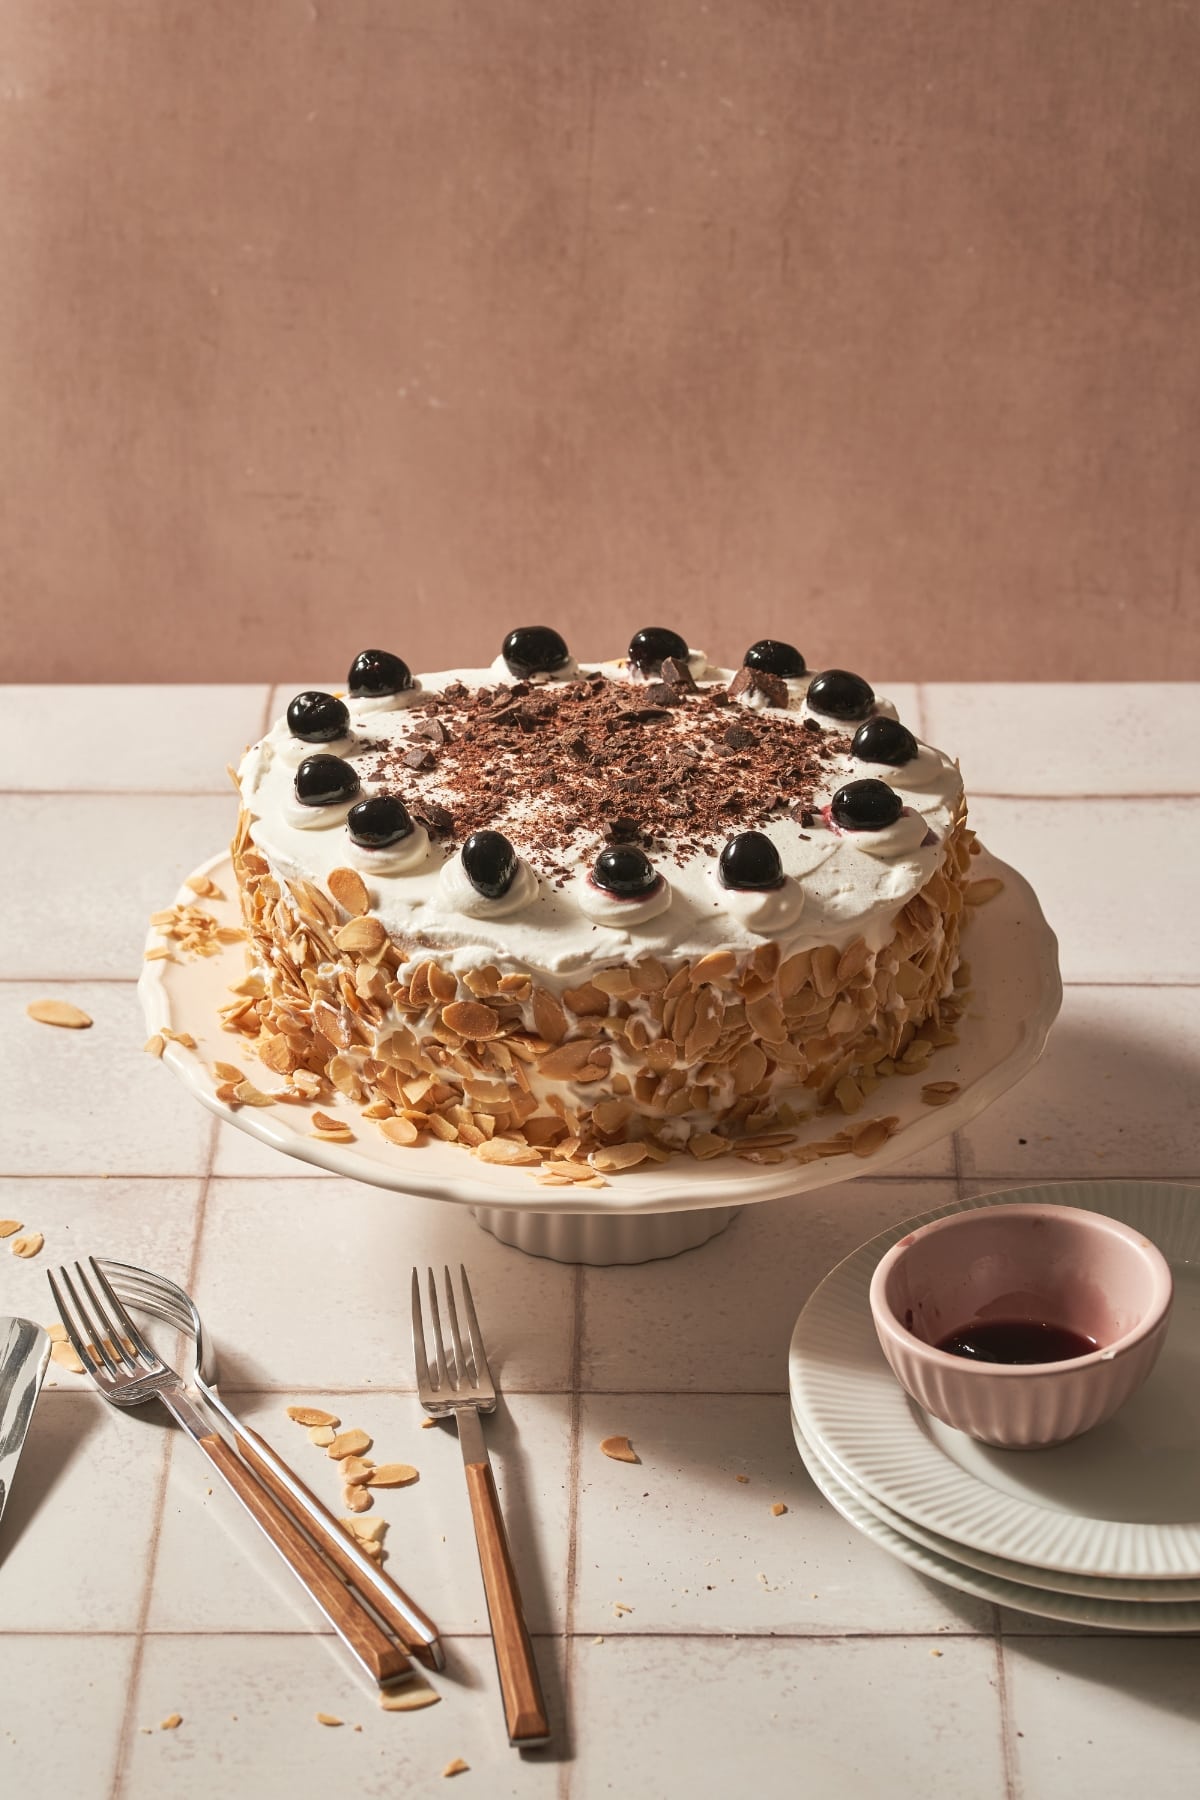
This Italian rum cake recipe makes a delicious dessert that is so impressive it is often served on special occasions such as birthdays or anniversaries.

italian rum cake

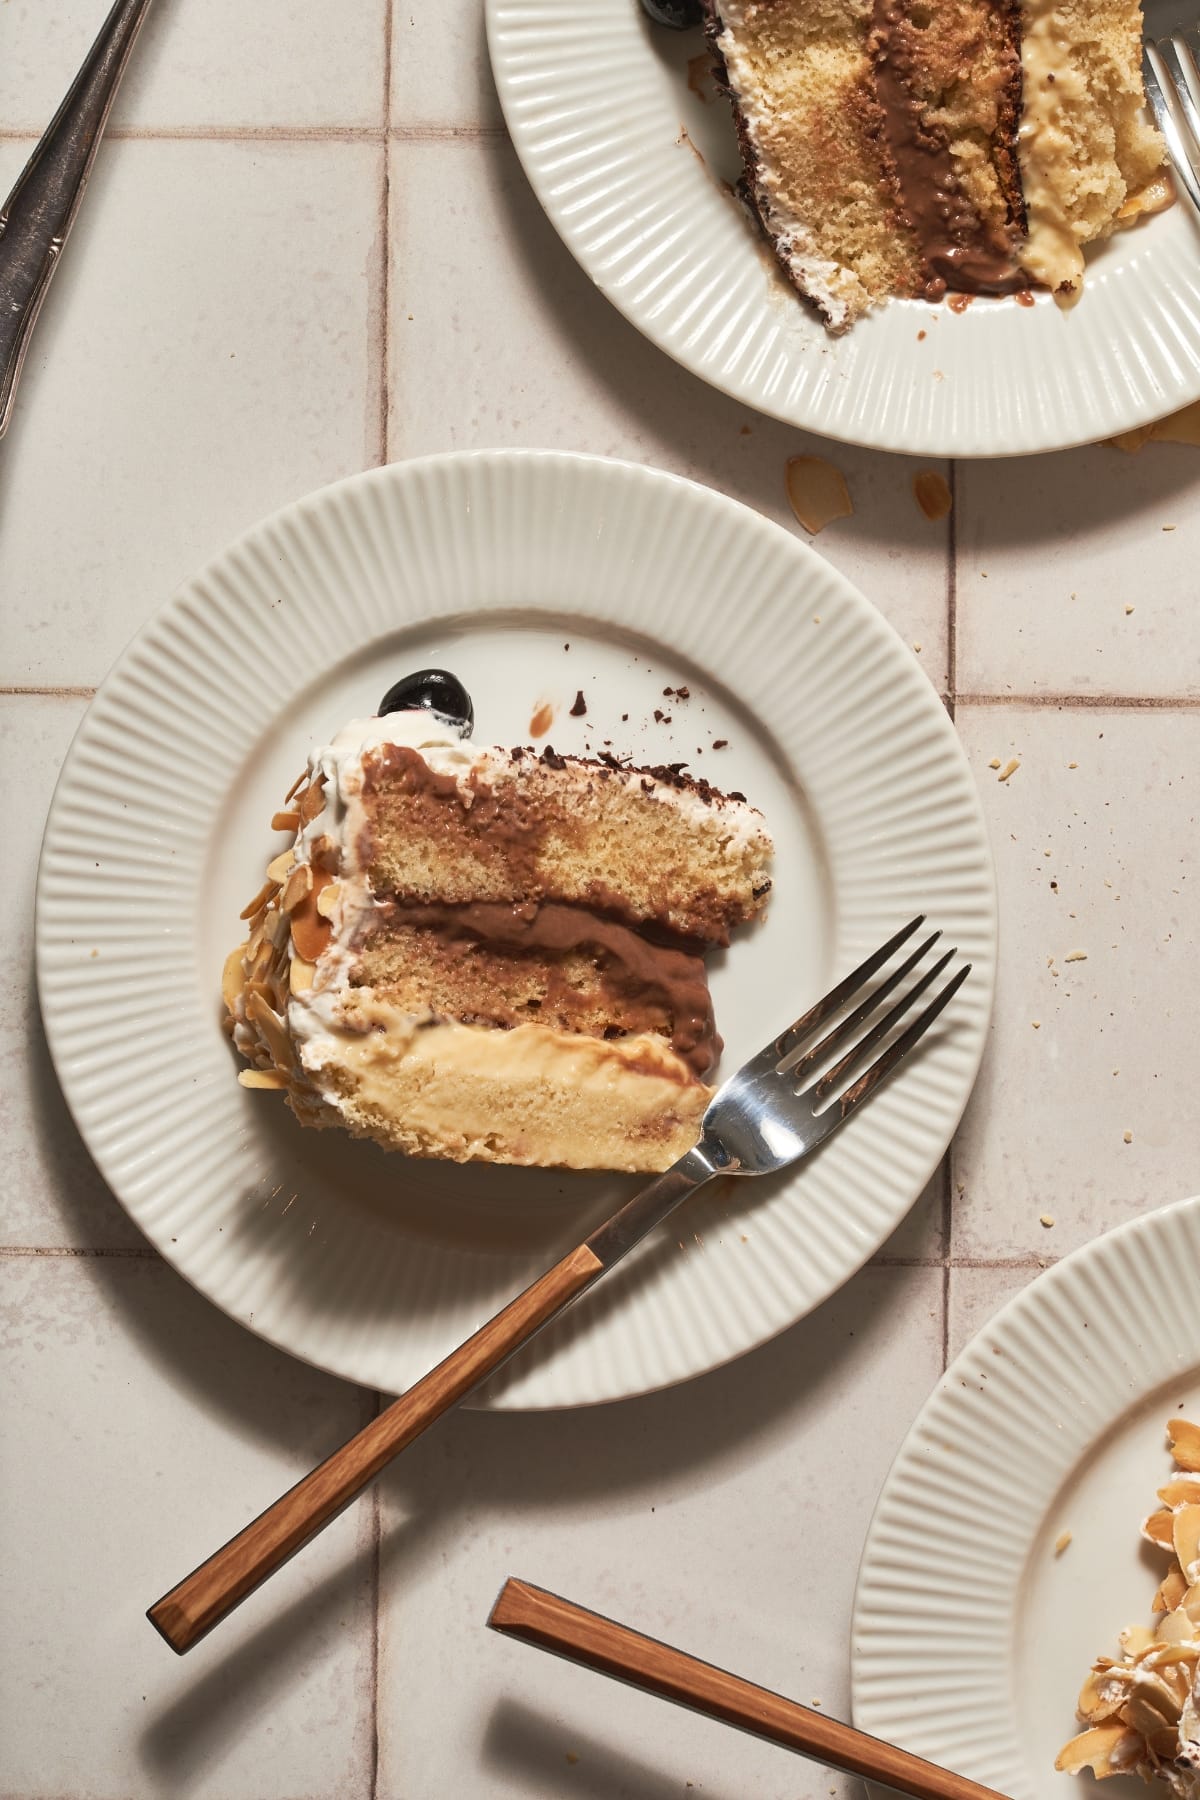
This Italian rum cake has three layers of sponge cake drizzled with rum syrup and then layered with generous portions of vanilla pastry cream and chocolate pastry cream.

The final touch is a fancy-looking whipped cream frosting with sliced almonds, chocolate shavings, and maraschino cherries for decoration.

  • 8-inch spring form pan to make the sponge cake.
  • stand or hand-held electric mixer with whisk attachment to mix the ingredients as well as whip the cream frosting
  • long serrated knife for cutting the cake into layers
  • sieve for sieving flour
  • spatula for mixing
  • 2 large bowls for mixing ingredients
  • metal bowl for whipping the cream frosting
  • wire cake rack for cooling off the sponge cake
  • medium saucepan for making the Italian pastry cream
  • strainer to strain the hot pastry cream mixture
  • frosting palette to decorate the cake
  • pastry bag and tip for decorating with the frosting

Ingredients for this cake

italian rum cake ingredients
  • Eggs (5 large + 6 egg yolks) – your eggs should be at room temperature when you use them. You will need 5 whole eggs for the cake and then 6 additional egg yolks for the pastry cream.
  • Sugar (¾ cup + ¾ cup ½ cup + 1 Tbsp superfine sugar) – you will need regular granulated sugar for the cake, the pastry cream and the syrup as well as superfine sugar for the whipped cream frosting, which can be substituted with powdered sugar if you prefer.
  • Vanilla extract (1 tsp + 2 tsp + 1 tsp) – you will need vanilla extract for the cake, the pastry cream and the whipped cream frosting. The vanilla gives depth to the flavor, but if you are not a fan you can certainly leave it out for a more neutral cream flavor instead of a vanilla cream flavor.
  • Flour (1 ¼ cups cake flour + 1/2 cup all-purpose flour) – this recipe calls for cake flour for the cake and all-purpose flour for the pastry cream, but in a pinch you can use them interchangeably.
  • Butter (as needed) – we love butter, so we use it to grease our cake pan for this recipe, but you can substitute with a mild vegetable oil if you prefer.
  • Whole milk (3 cups) – the pastry cream works best with whole milk because of the higher fat content, so we highly recommend using it for this recipe, but if you use another type of milk try adding slightly more flour so that you get the right dense consistency.
  • Lemon zest (1 long strip) – cut a long, thin strip of zest from an organic lemon. You should not make smaller shavings, as the strip is removed in a later step.
  • Dark chocolate (2 ounces + decoration) – use good quality dark chocolate and chop it up very finely to add to the pastry cream. We love dark chocolate shavings, so we use the same dark chocolate to create fanciful shavings for decorating the top of the cake. Dark chocolate chips are not as theatrical but will work just the same.
  • Water (1 cup) – we prefer to use bottled or filtered water for the syrup for a clean, fresh taste.
  • Dark rum (¼ cup) – you can add more dark rum or use a different type of rum or rum extract. You can also leave this flavoring out completely or switch with a kid-friendly flavor like vanilla or caramel.
  • Heavy whipping cream (1 cup) – this mouth-watering frosting needs a heavy whipping cream to get the right stiffness and spreadability.
  • Almond slices (1 cup) – you will need to purchase already sliced almonds to get the right look for this cake. Follow instructions below for lightly toasting them to bring out the strongest flavor. If you don’t like almonds, consider using finely chopped walnuts, peanuts or pistachios instead.
  • Maraschino cherries (optional) – the bright red of the cherries really stands out against the crisp white of the frosting for a dramatic presentation. You can substitute with fresh blueberries or strawberries if desired.

Making Italian rum cake step-by-step

Make the sponge cake: Butter an 8-inch spring form cake pan and then line completely with parchment paper. Preheat the oven to 340ºF (170ºC). Using either a hand mixer or stand mixer with whisk, beat the room temperature eggs with the sugar for about 12 minutes at the highest speed (photo 1). You will know it is ready when a frothy and firm cream forms (photo 2). Add the vanilla extract during the last minute of beating.

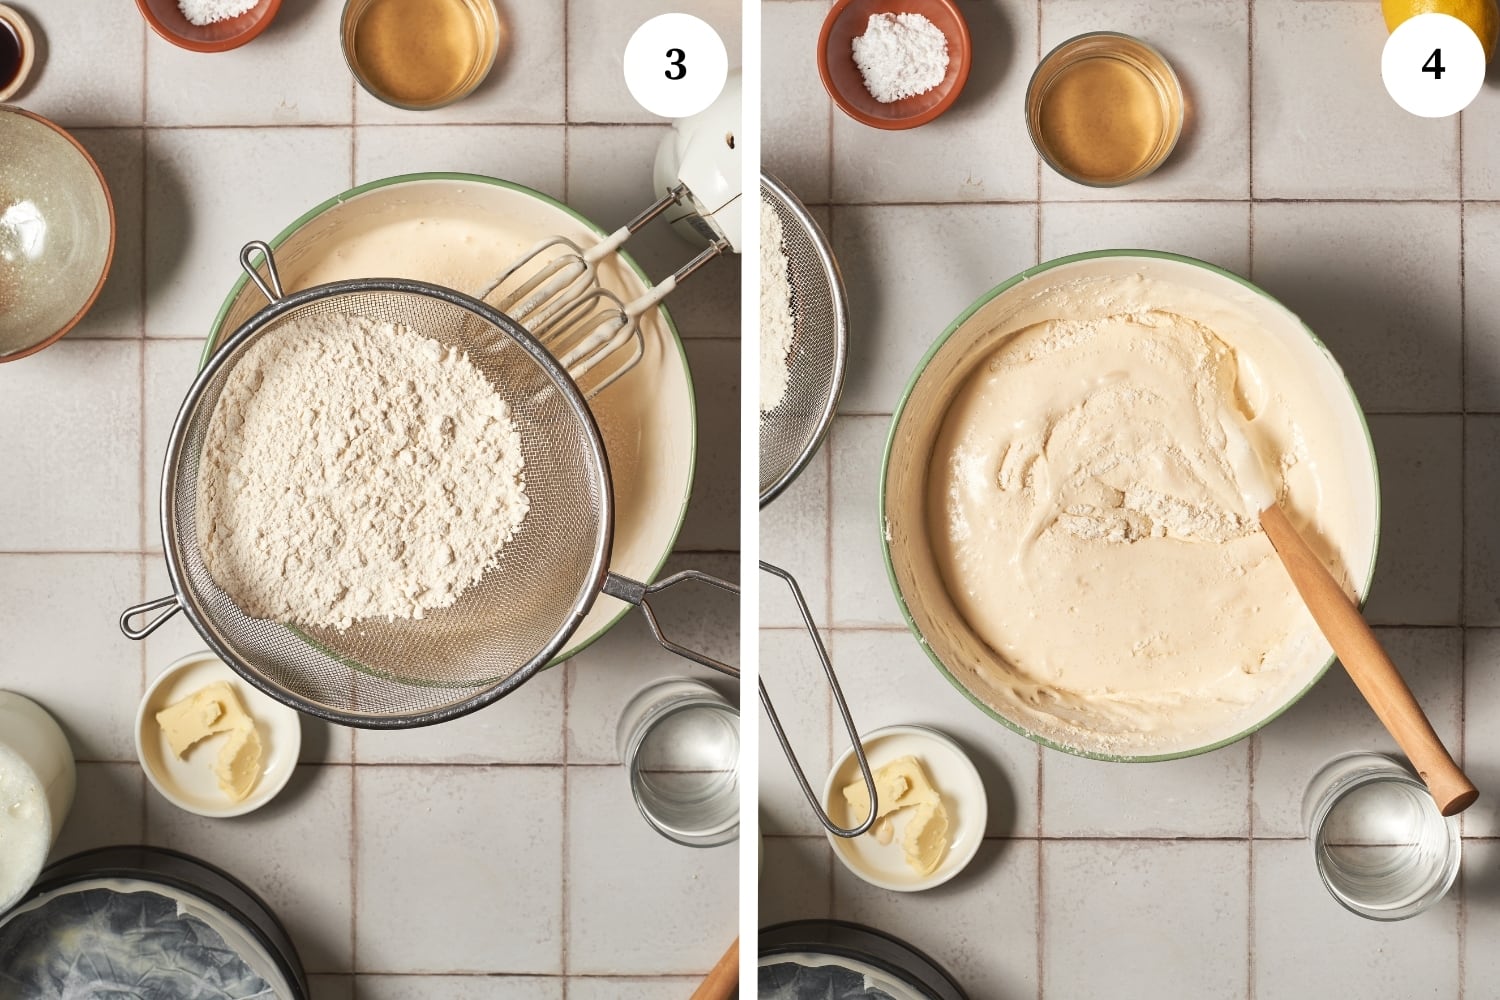
Sieve the flour and add it a little at a time (photo 3), incorporating it into the sugar and egg mixture with a spatula by folding it in carefully (photo 4) until all has been added and the mixture is uniform.

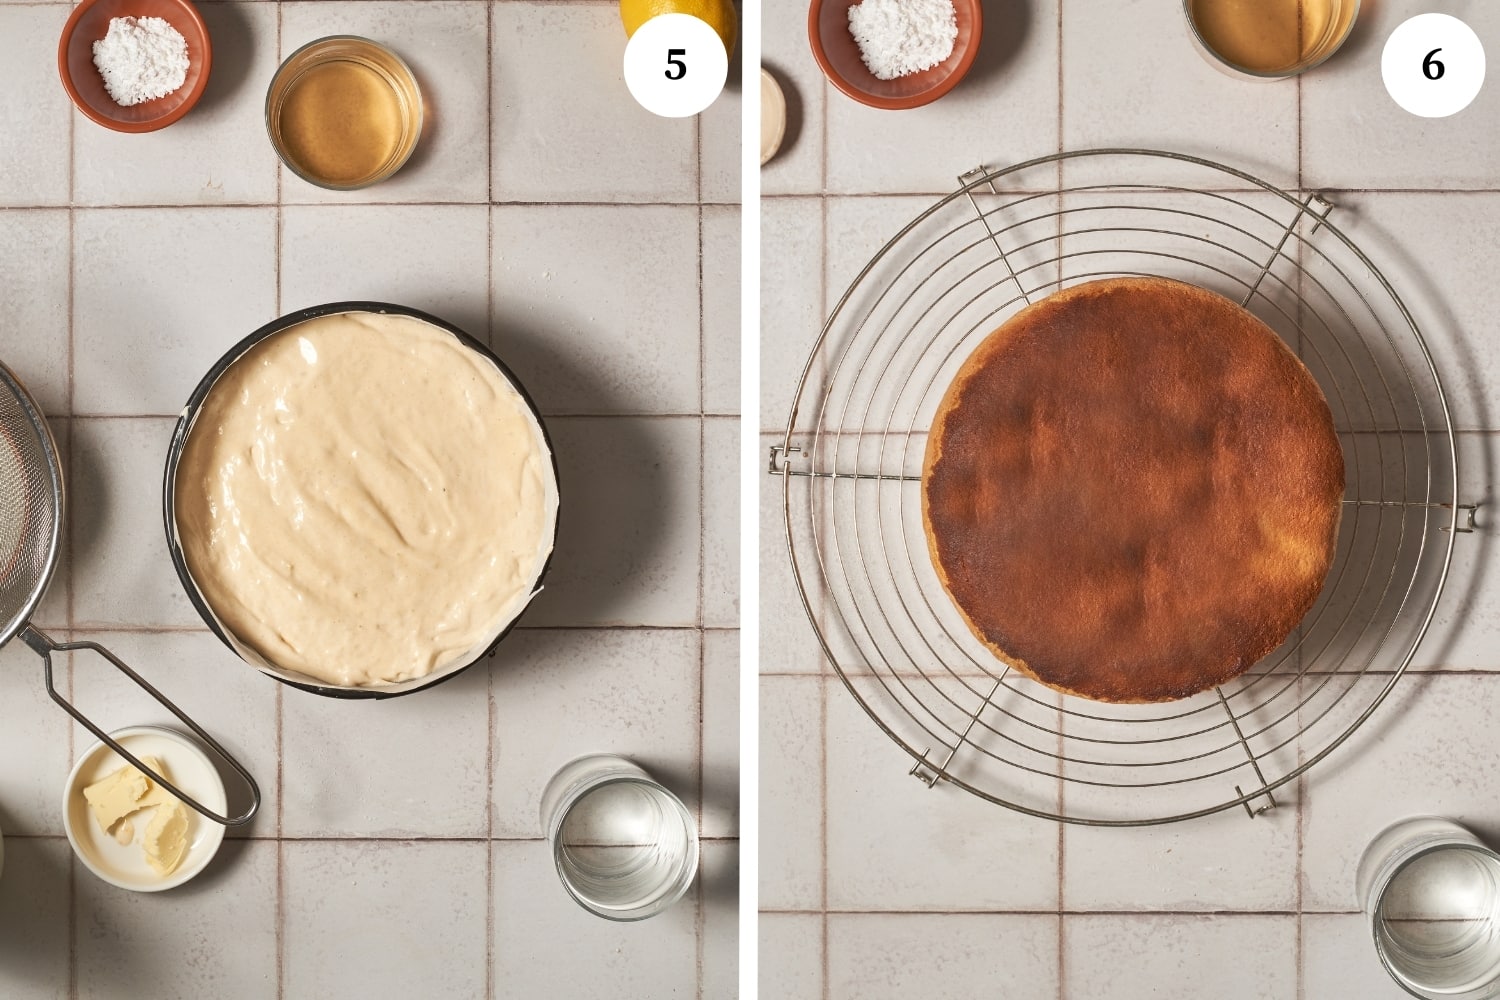
Carefully pour the cake batter into the prepped cake pan (photo 5) and put it into the preheated oven.

Bake the cake for approximately 25 minutes being sure not to open the door to check the cake for the first 20 minutes. After 20 minutes, you can test with a toothpick by inserting it into the center to see if it comes out clean.

When the toothpick comes out clean, turn off the oven but leave the cake inside with the door open for about 5 minutes to avoid deflating the cake. Remove the sponge cake from the oven, then carefully remove from the springform pan and place on a wire rack to cool completely (photo 6).

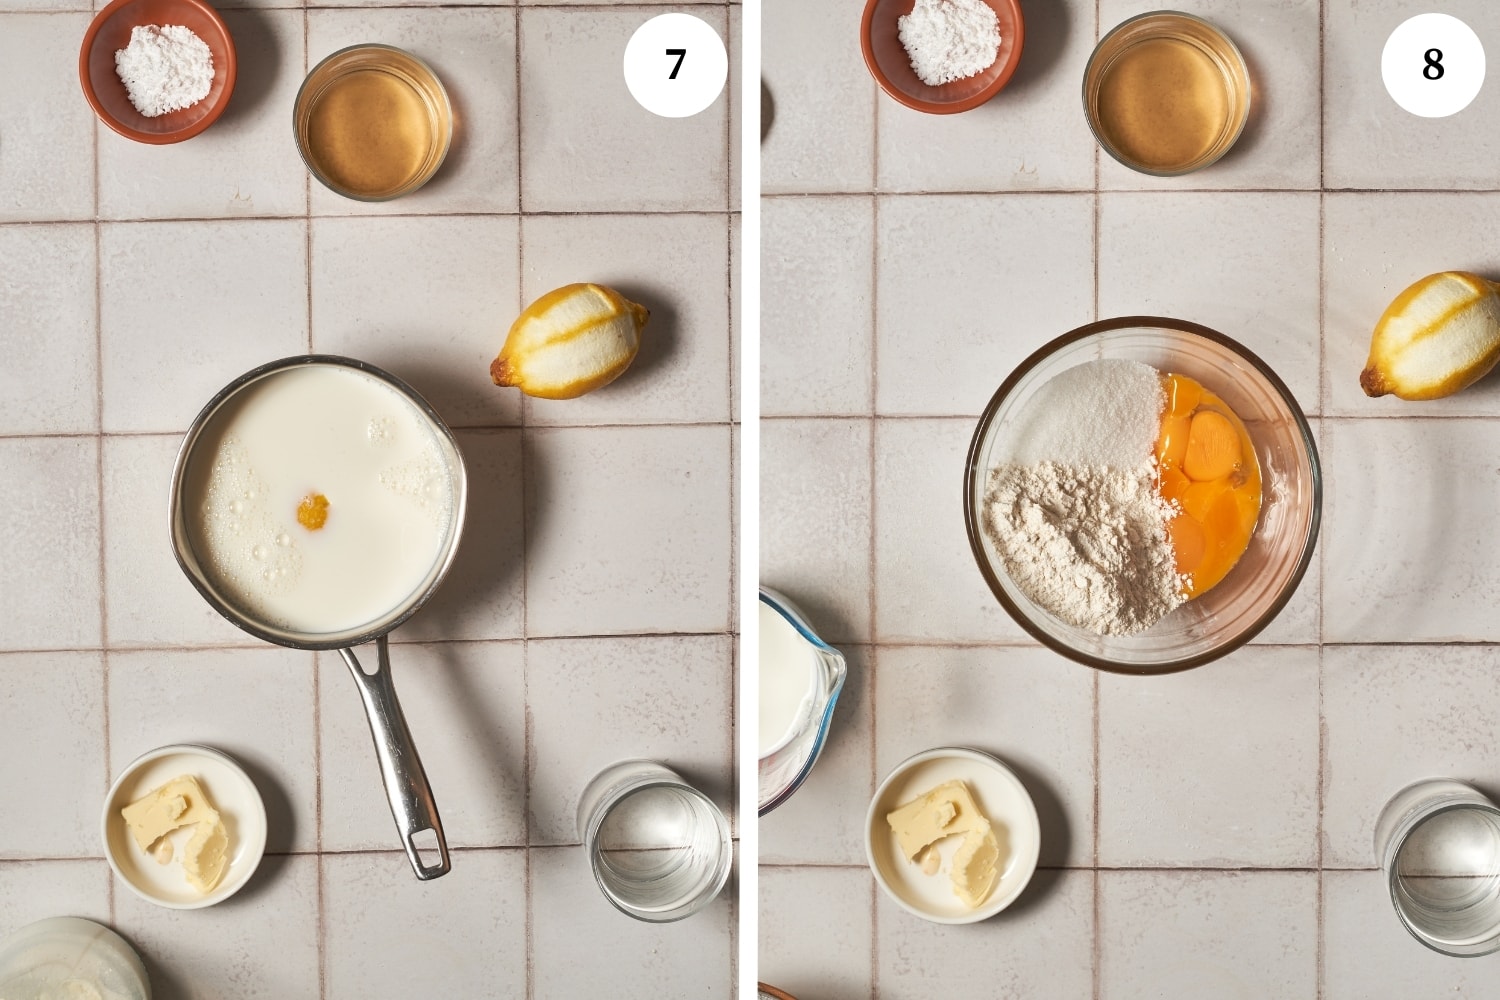
Prep the Italian pastry cream: In a medium saucepan put 2 1/2 cups of milk and the strip of lemon zest (photo 7) and heat over a medium flame until you see steam rising, but do not boil. Remove from heat once steam rises. In a separate bowl, beat egg yolks, sugar, and flour with a whisk (photo 8).

When smooth, add the remaining 1/2 cup of cold milk and whisk until smooth. Remove the lemon zest from the heated milk and toss (photo 10).

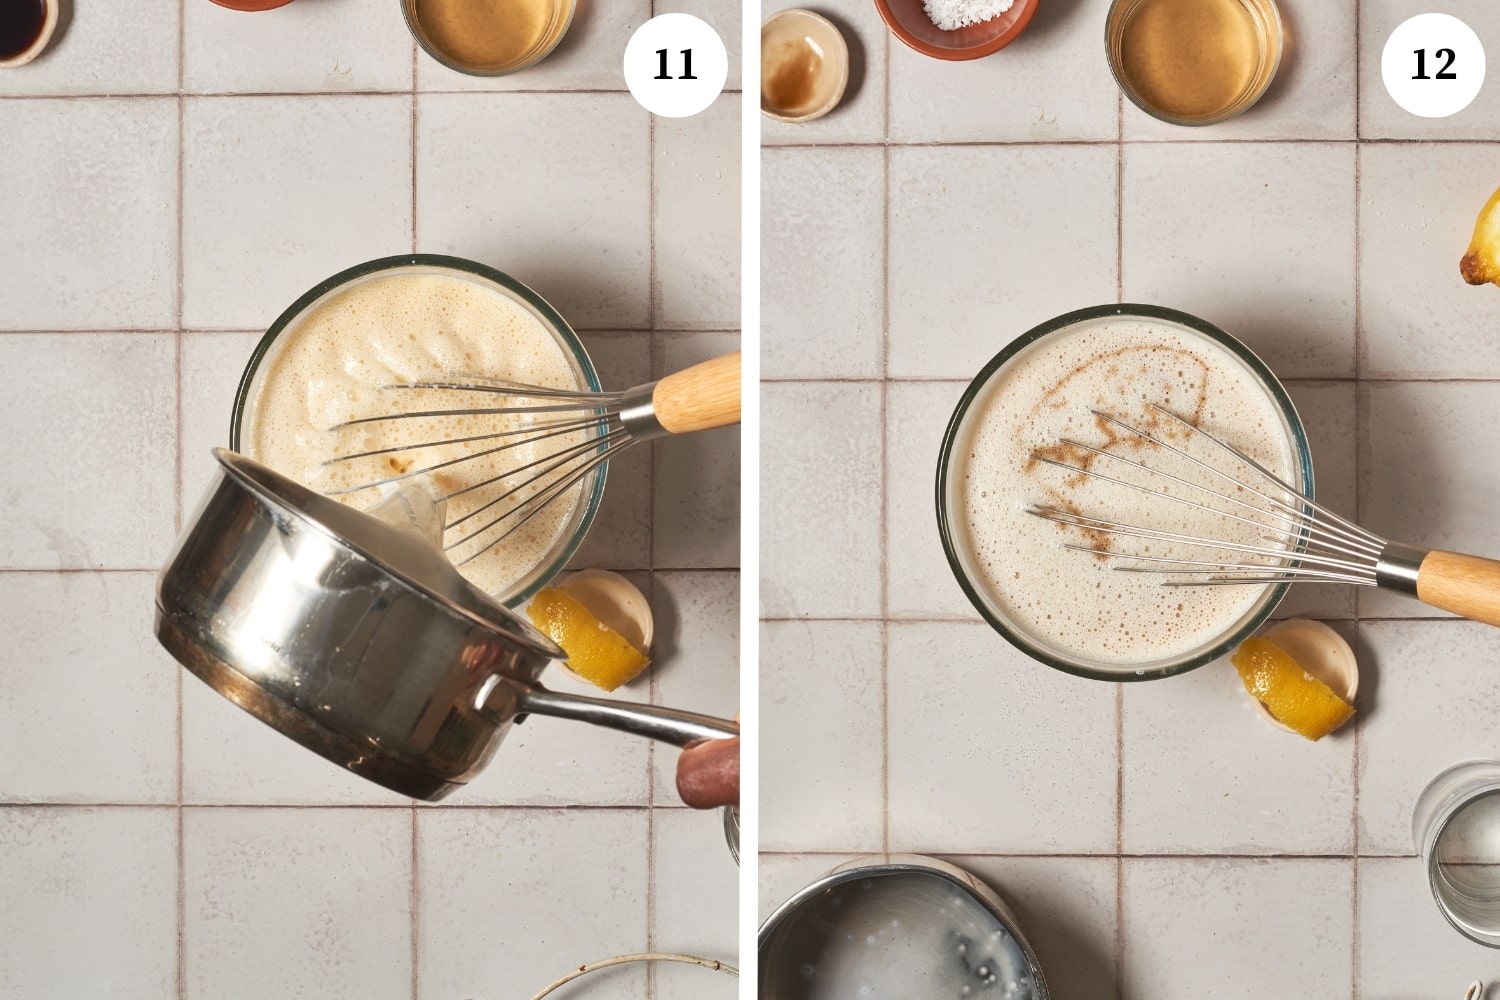
Slowly pour the hot milk into the egg yolk mixture while whisking (photo 11) and then add the vanilla extract (photo 12).

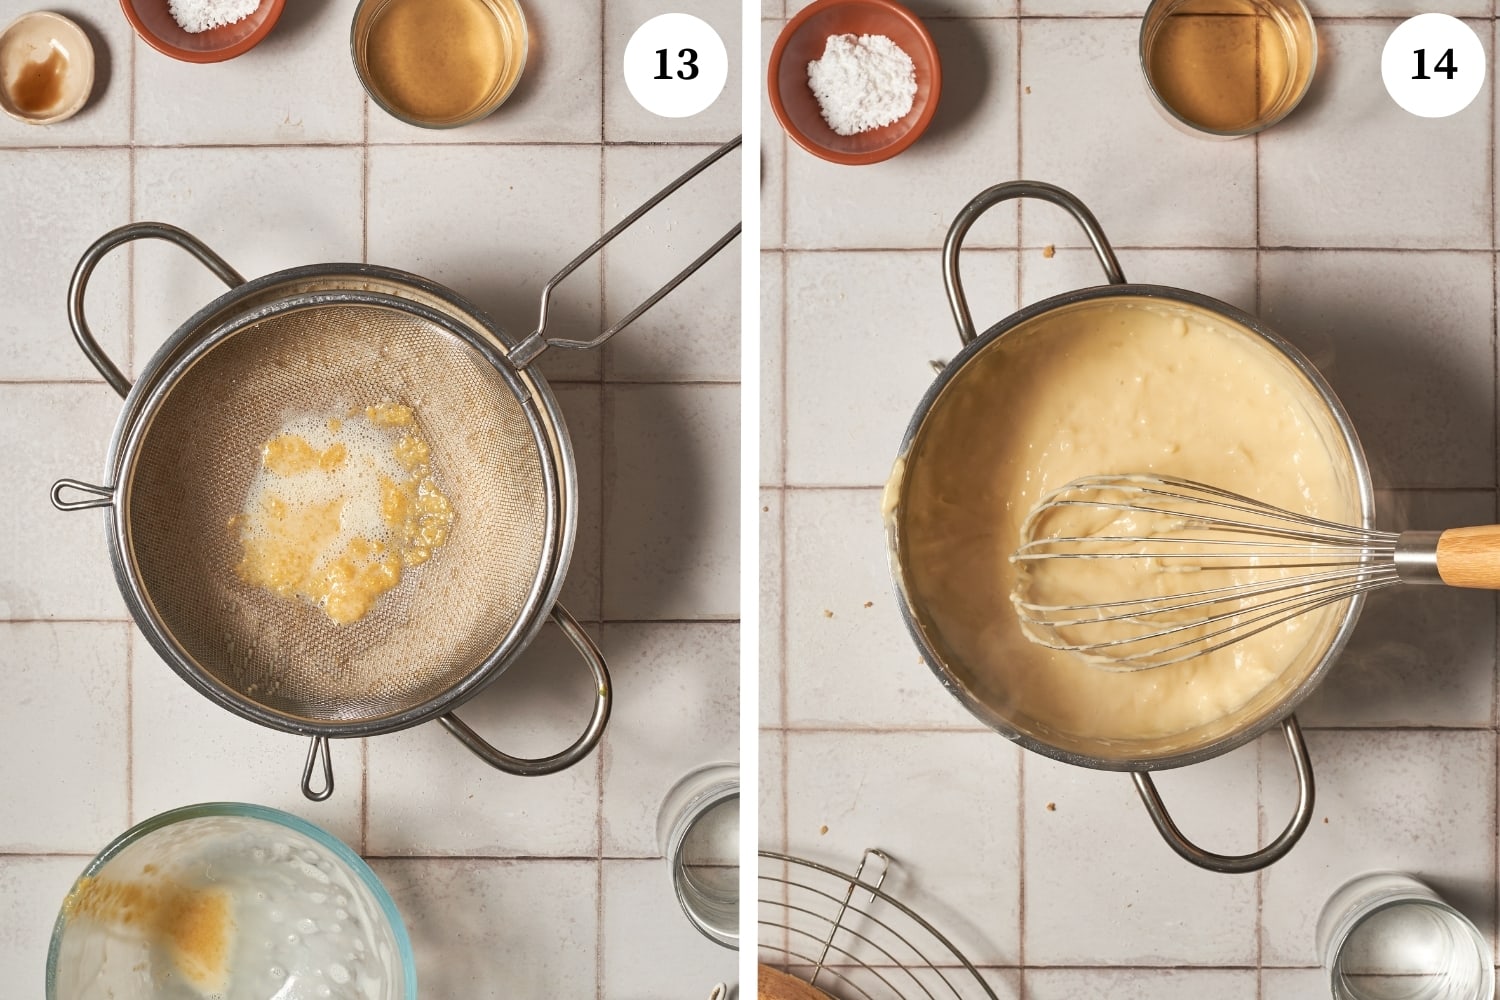
Pour the mixture through a strainer back into the saucepan (photo 13) and turn on medium heat. Let the mixture come to a boil, whisking constantly as it thickens, and let simmer for one minute (photo 14).

When thick, divide the hot pastry cream into two bowls or heat-safe containers.

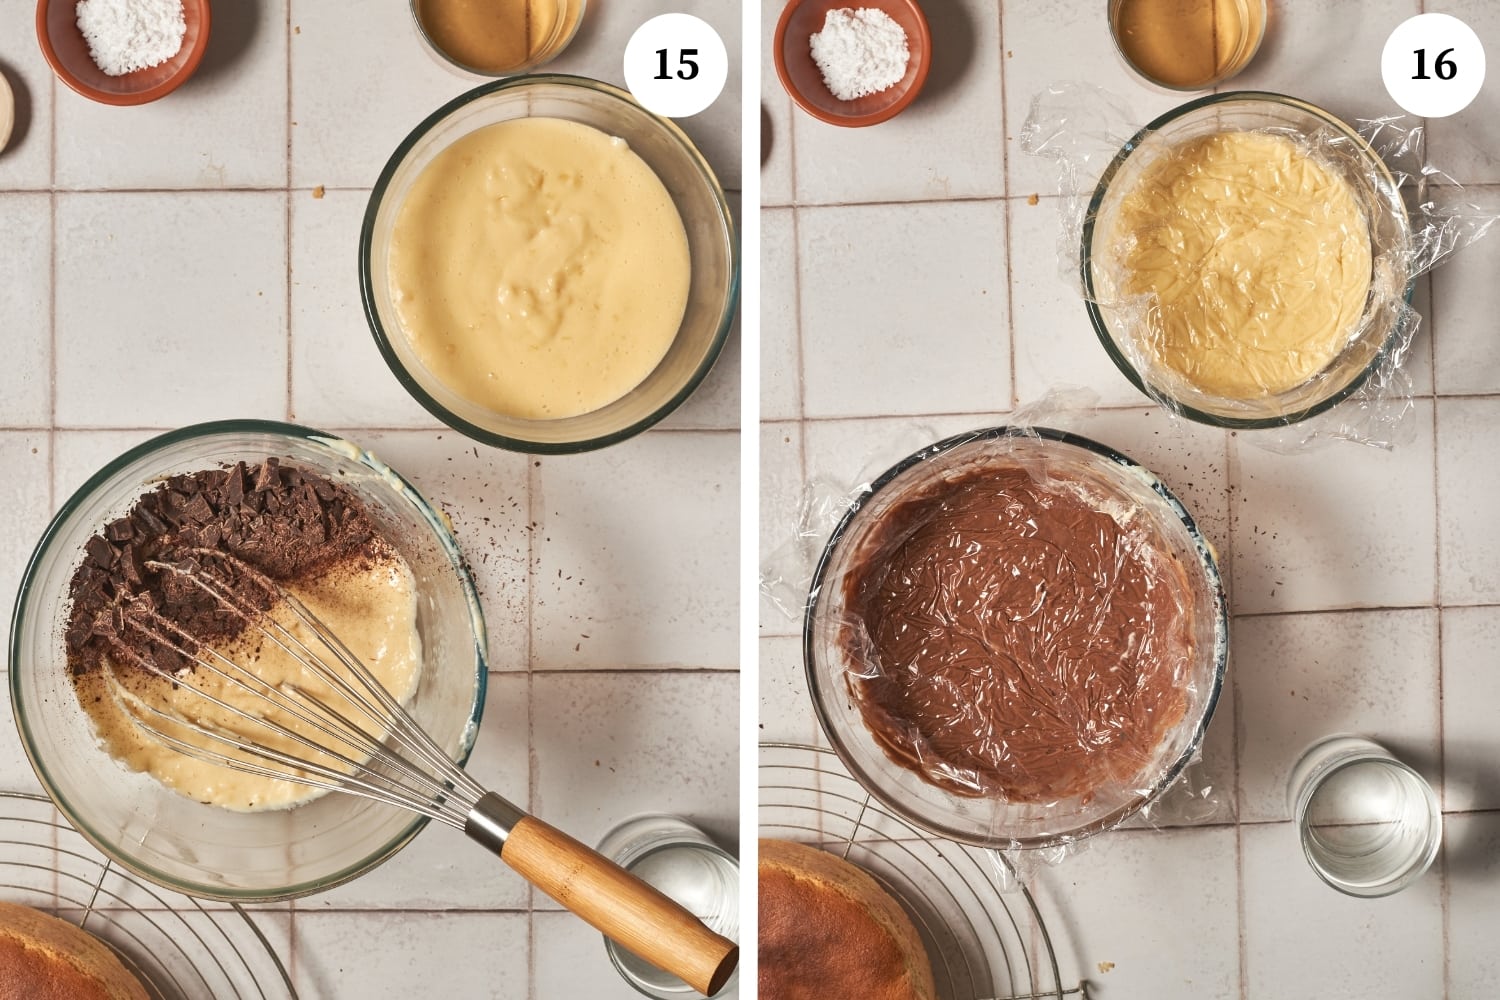
To make the chocolate pastry cream, stir the chopped chocolate into one of the bowls of cream until it melts and becomes a uniform color. Cover both the regular and chocolate custard with plastic wrap pressed directly onto the surface (photo 16), so a skin doesn’t form, and put in the refrigerator to chill.

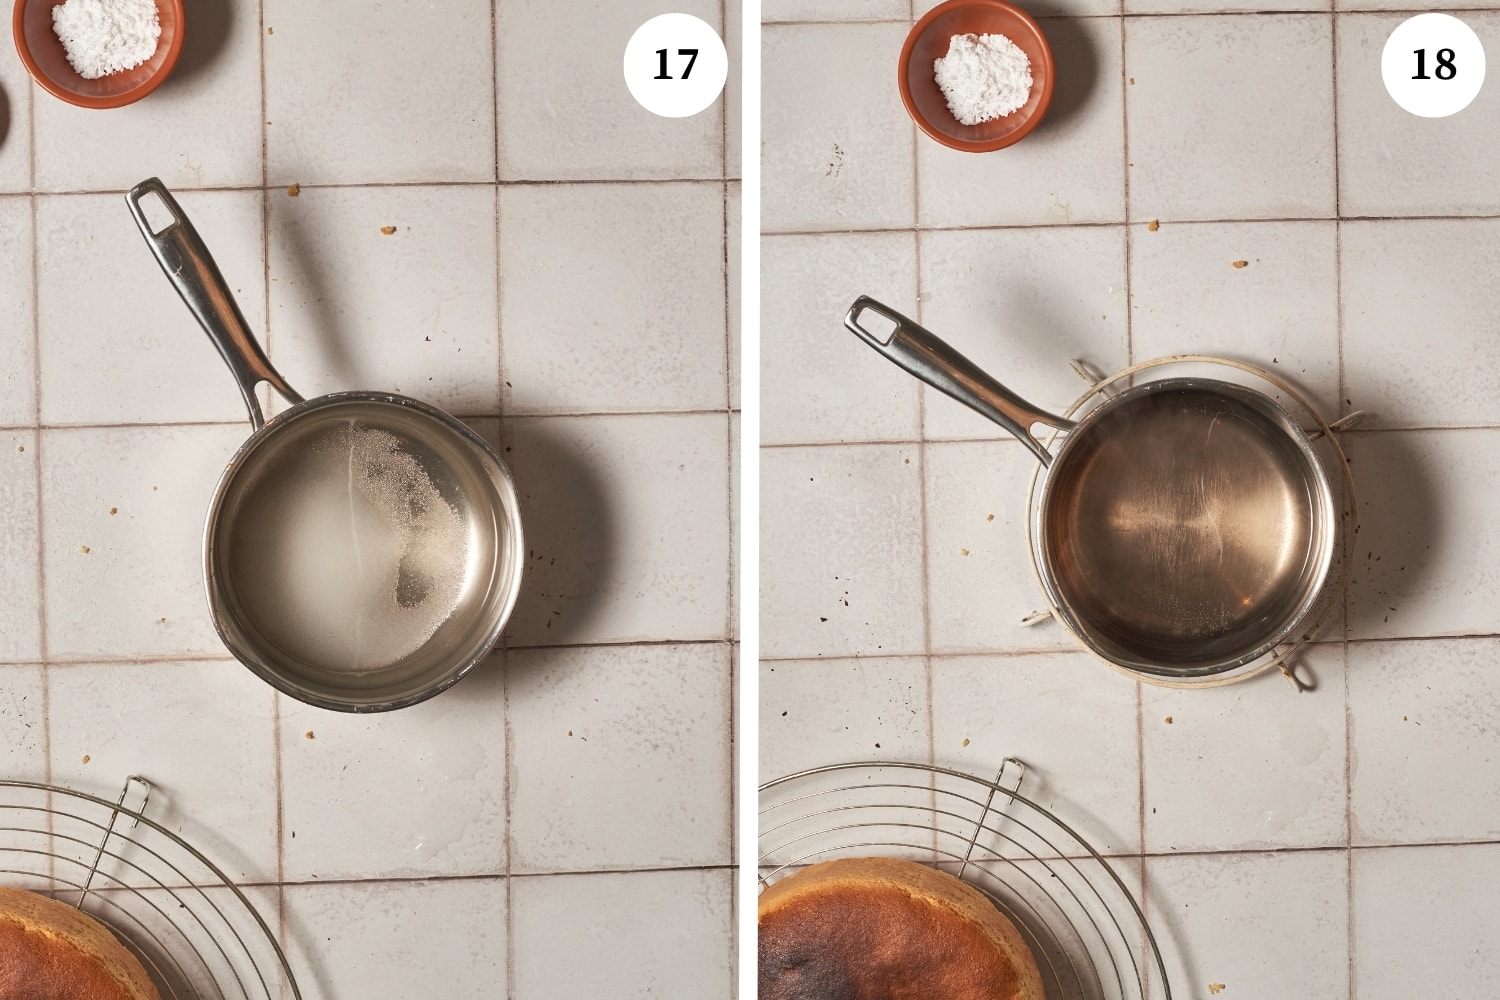
Create a delicious rum syrup: In a clean saucepan, combine the water and sugar (photo 17) over medium heat until the sugar dissolves, then turn off the heat and set aside until cool. Add the rum or rum extract and stir until combined and set aside until needed (photo 18).

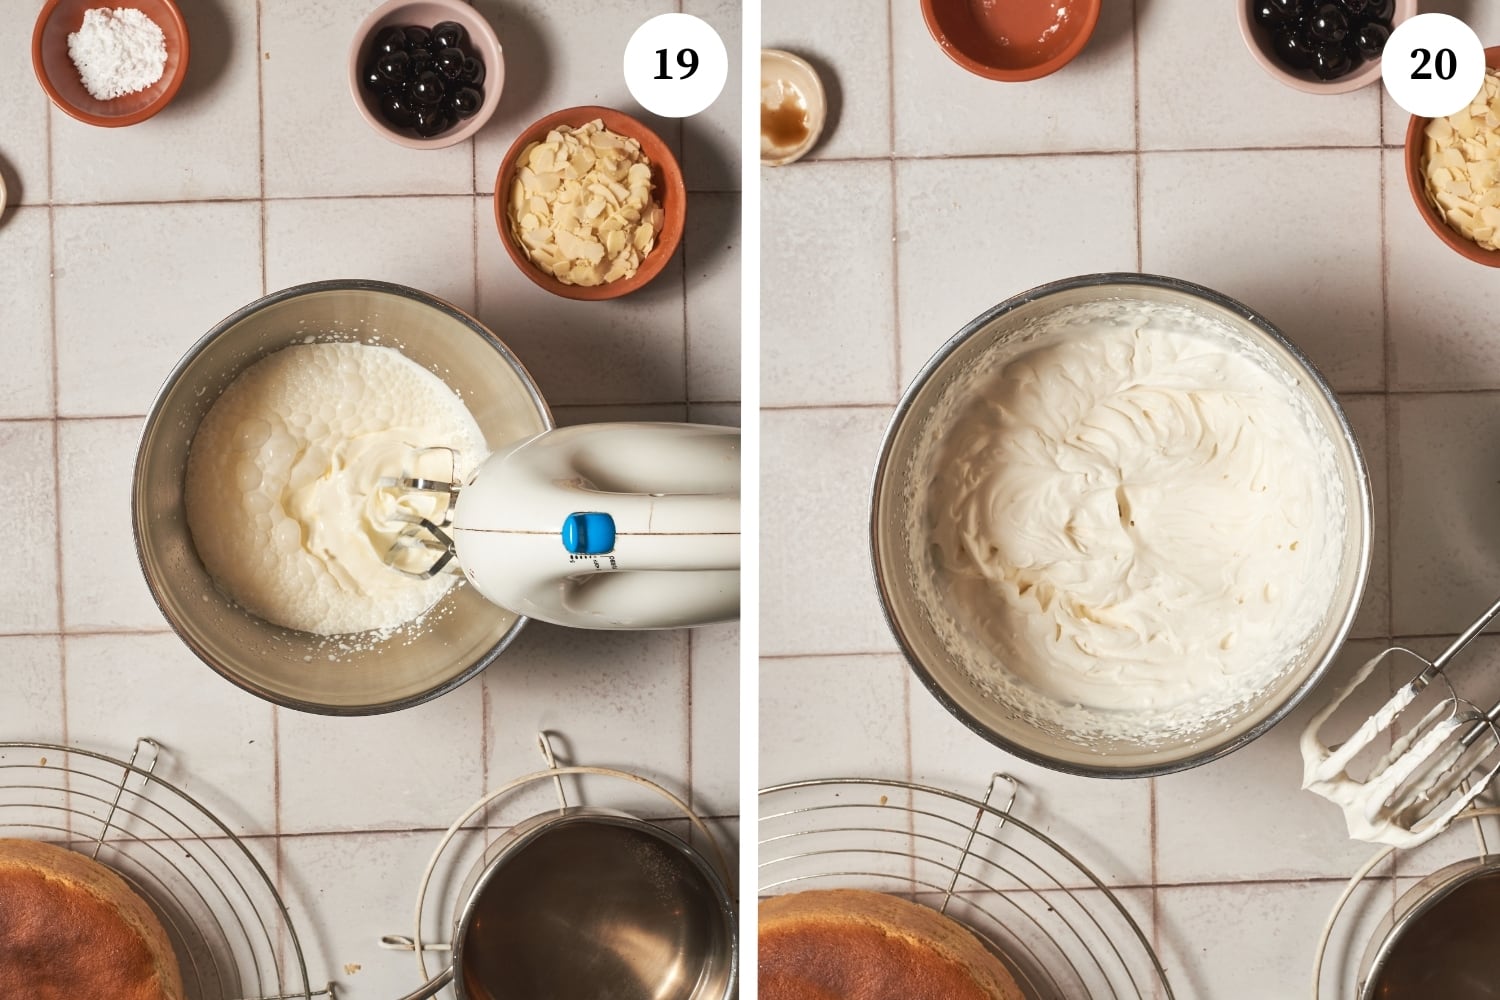
Whipped cream frosting: Put a metal mixing bowl and whisk into the freezer until they are very cold. When thoroughly chilled, remove and add the heavy whipping cream and use an electric mixer to whisk until the cream starts to thicken (photo 19). Add the superfine sugar gradually, while whisking and then the vanilla extract. Whip until stiff peaks form in the whipped cream (photo 20). Refrigerate until needed.

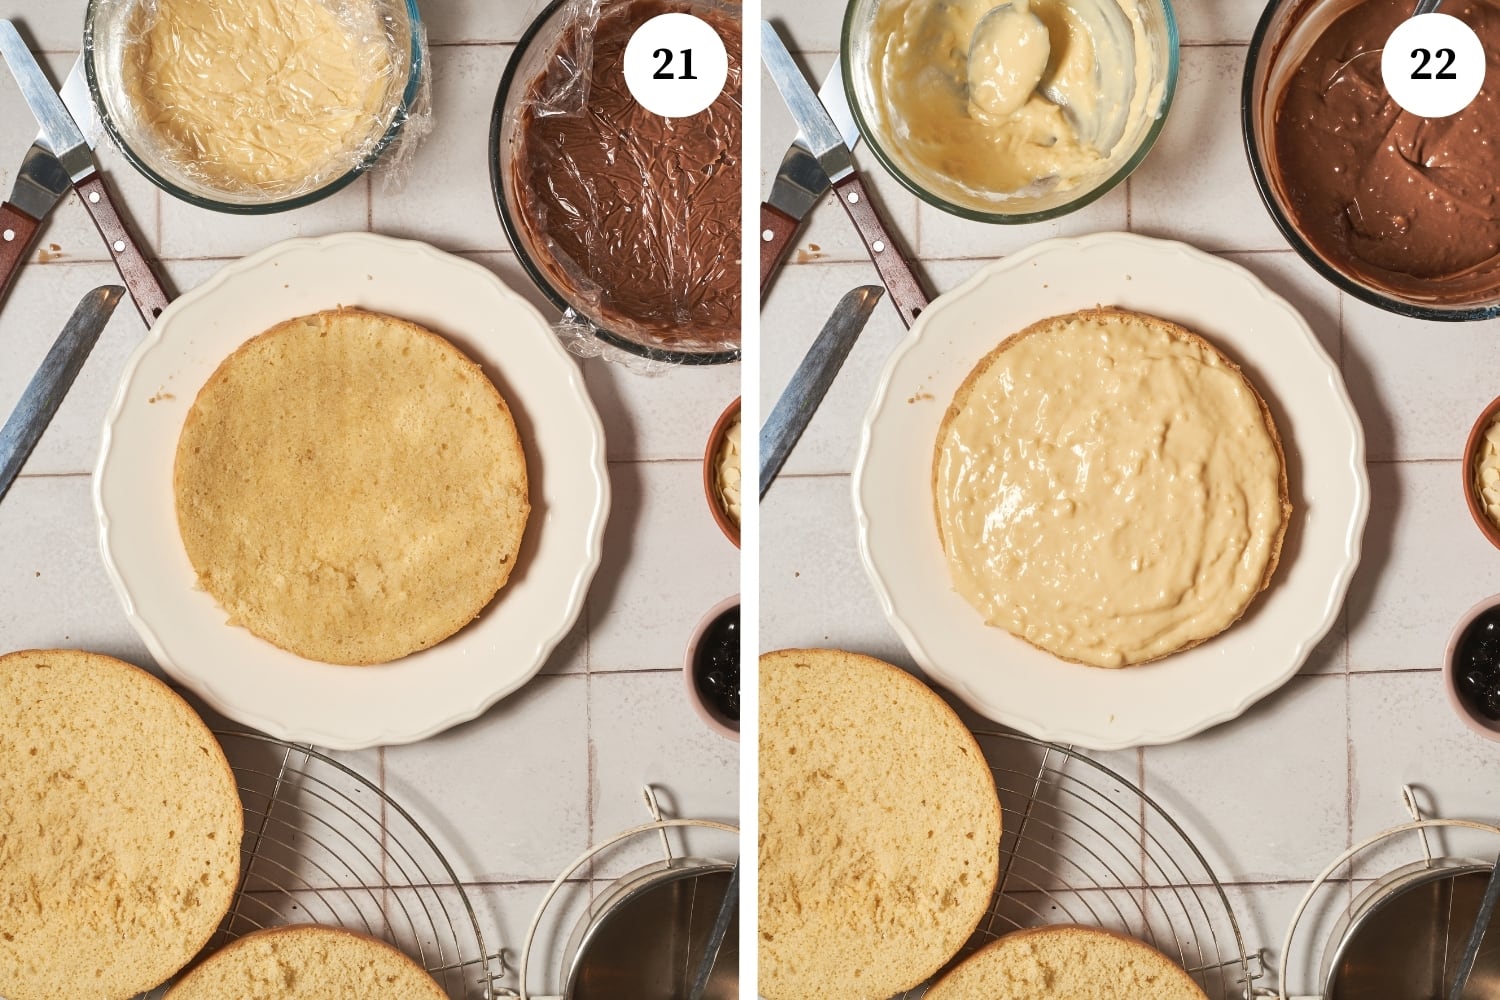
Assemble and decorate your Italian rum cake: Using a sharp serrated knife, cut the cake into three even layers horizontally that can then be reassembled. On a cake platter, put the bottom layer of cake and lightly pour 1/3 of the prepared rum syrup over it (photo 21) and then spread all the vanilla pastry cream to make a nice thick layer (photo 22).

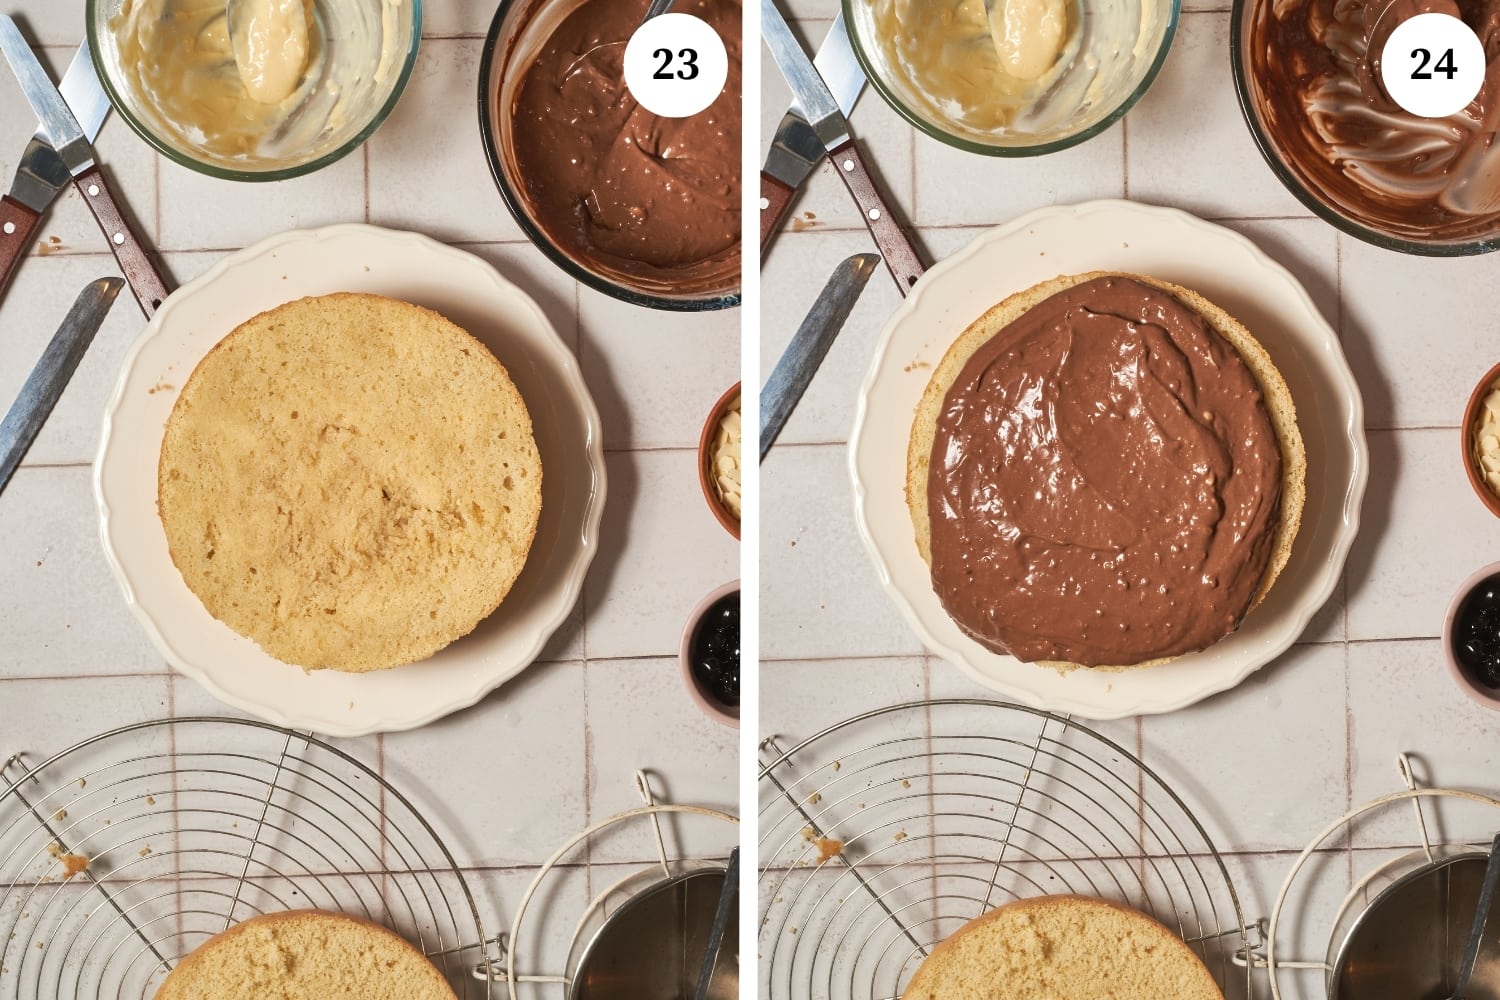
Place the second cake layer on the vanilla filling and press down gently but firmly so that it adheres. Pour another 1/3 of the rum syrup into the second cake layer (photo 23) and then create the chocolate layer with all the chocolate cream (photo 24).

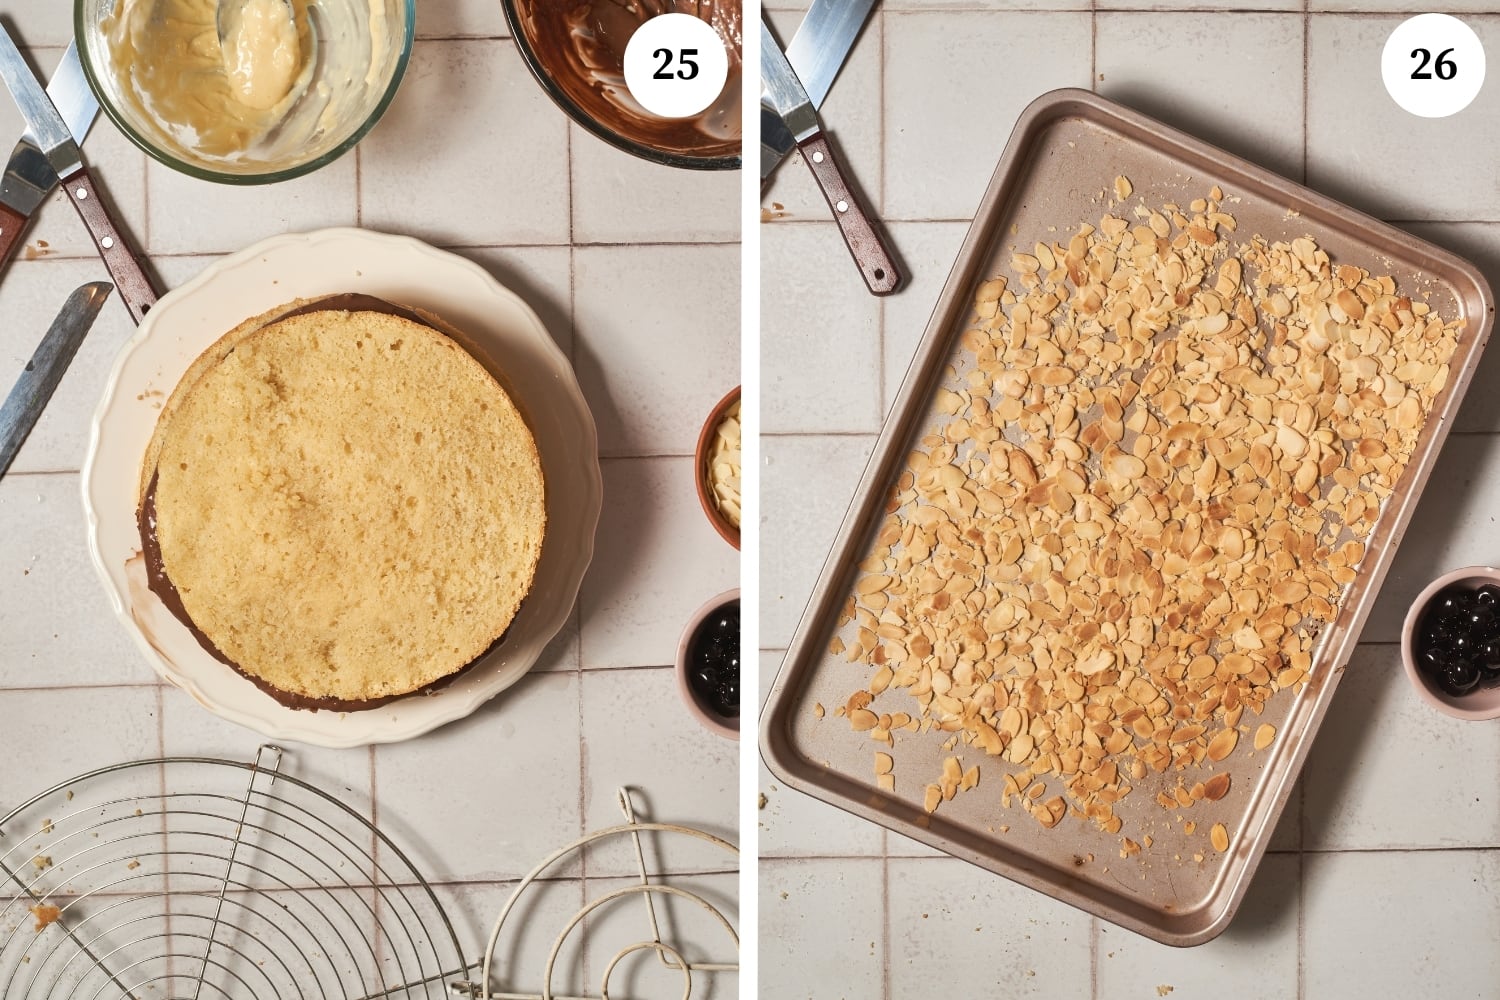
Add the final layer of cake, moisten with the remaining 1/3 of the rum syrup (photo 25). Place in the refrigerator for about one hour or the freezer for 30 minutes to set.

To toast the almonds, preheat the oven to 350ºF. Place the sliced almonds evenly on a baking sheet and put them in the oven for 10 minutes or until slightly browned (photo 26). Remove and let cool.

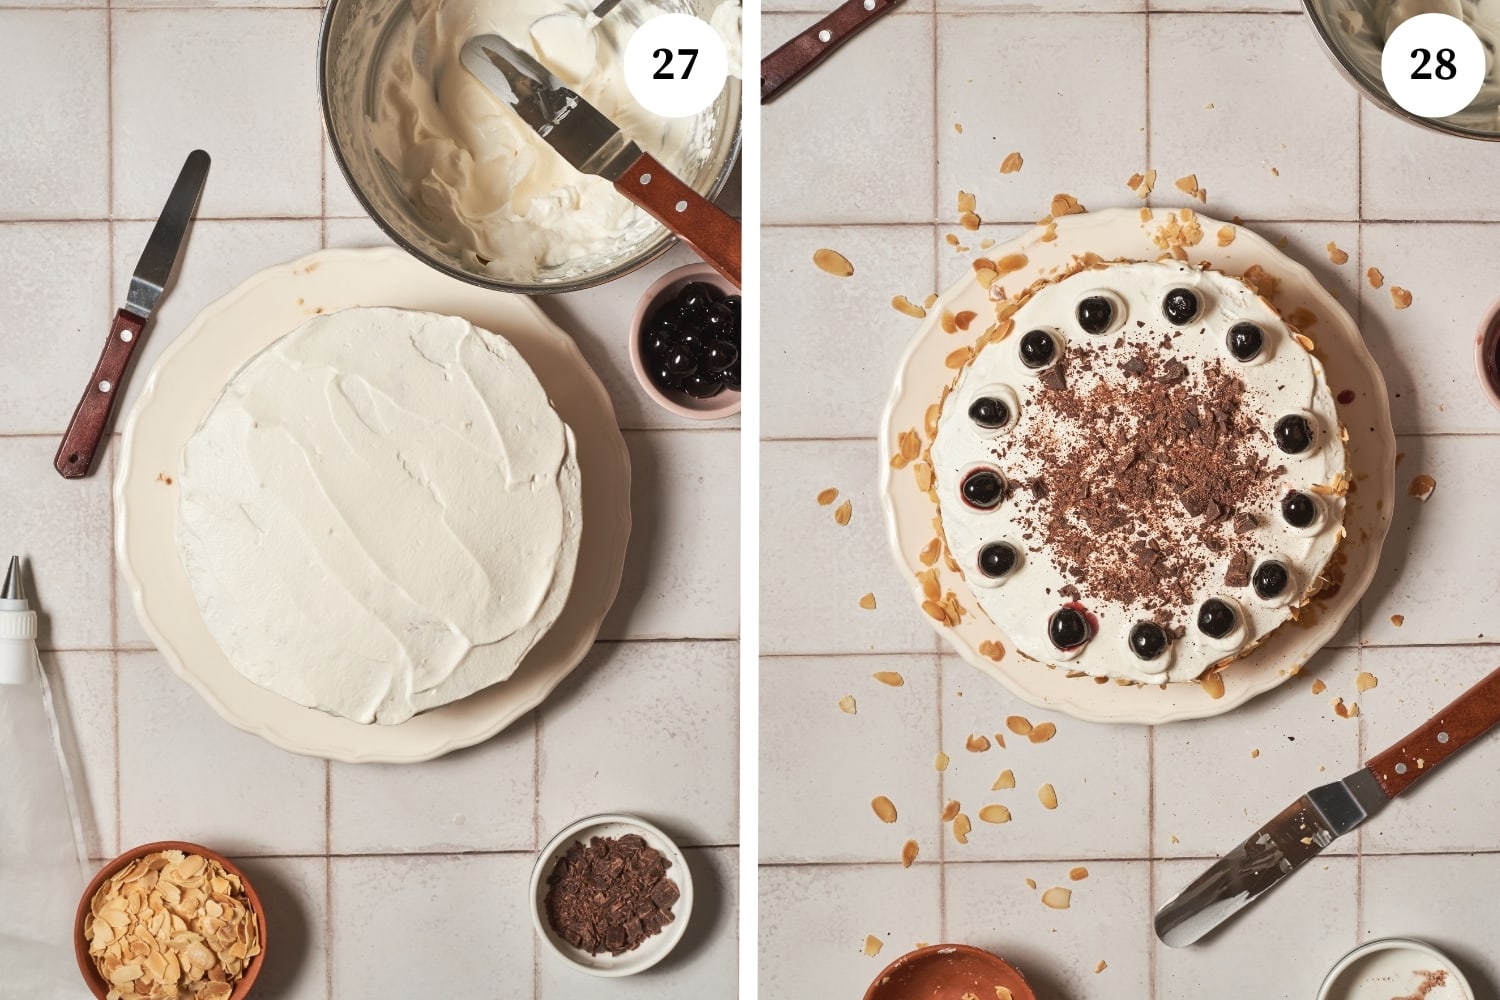
Now to frost, remove the assembled cake and the whipped cream frosting from the fridge and use a frosting knife or palette knife to gently spread the majority of the whipped cream in an even layer over the top and sides of the cake (photo 27).

Gently press the sliced almonds into the sides of the cake. Place the remaining whipped cream frosting in a piping bag with a tip you like and make piping or decorations as desired. Decorate the top with chocolate flakes and maraschino cherries (photo 28) and you are ready to show off your beautiful Italian rum cake!

Expert tips for making Italian rum cream cake

  • Stabilize your whipped cream frosting: If you want your Italian rum cream cake to look perfect for the longest time possible, you should make stabilized whipped cream frosting. The easiest way is by using a cold metal bowl, cold whisk and cold cream as described in this recipe. However, there are other ways to make it even more firm such as using gelatin, cornstarch, Greek yogurt or mascarpone as a thickening agent.
  • Use three cake pans instead of one: If you would like to avoid having to cut one larger cake into three, you can use three springform cake pans and pour one-third of the batter into each. Remember they will be thinner, so they will cook much quicker, so you can begin to check after just 8-10 minutes of cooking time if they are done.

Helpful recipes:

Variations

  • Kid-friendly non-rum cake: You can make this cake kid-friendly by doing it alcohol-free. Instead of rum you can use a flavored extract when making the syrup or just leave it plain.
  • Go nuts!: If you aren’t a fan of almonds, really any other nut will do as a decoration. While sliced almonds are a very dramatic look, crushed nuts that are gently pressed into the sides of the frosted cake can also look beautiful and taste great. Our favorites are finely chopped peanuts, pistachios or walnuts.

FAQs

How to store Italian rum cake leftovers

This cake is best eaten right away, but if you have leftover rum cake you can store it in a cake container, or fully covered, in the refrigerator for up to 3 days. However, we highly recommend removing the frosting if you are planning on keeping it for more than 1 day so your cake doesn’t become a soggy mess.

What should I serve with Italian rum cake?

This cake is great with sparkling cider, Prosecco or coffee drinks.

Can I make the various parts ahead of time?

Yes, you can make everything up to 48 hours ahead of time and put in the refrigerator, except the whipped cream which needs to be made fresh.

Step by Step PhotosMost of our recipes come with step by step photos, helpful tips and tricks to make it perfectly first time and even video!

Save

#wprm-recipe-user-rating-0 .wprm-rating-star.wprm-rating-star-full svg * { fill: #343434; }#wprm-recipe-user-rating-0 .wprm-rating-star.wprm-rating-star-33 svg * { fill: url(#wprm-recipe-user-rating-0-33); }#wprm-recipe-user-rating-0 .wprm-rating-star.wprm-rating-star-50 svg * { fill: url(#wprm-recipe-user-rating-0-50); }#wprm-recipe-user-rating-0 .wprm-rating-star.wprm-rating-star-66 svg * { fill: url(#wprm-recipe-user-rating-0-66); }linearGradient#wprm-recipe-user-rating-0-33 stop { stop-color: #343434; }linearGradient#wprm-recipe-user-rating-0-50 stop { stop-color: #343434; }linearGradient#wprm-recipe-user-rating-0-66 stop { stop-color: #343434; }

4.69 from 16 votes

Save

Print Recipe
Pin Recipe

Authentic Italian Rum Cake

Nothing says festive like a beautiful Italian rum cake, whether it’s a birthday cake, for an anniversary party or just a beautiful end to a lovely Italian meal. While the recipe has many different steps to follow, they are all very easy and you will love the final delicious outcome.

Author:

Prep Time 1 hour
Cook Time 30 minutes
Total Time 1 hour 30 minutes
Servings 6 people

Equipment

  • 1 8-inch spring form pan
  • 1 stand or hand-held electric mixer with whisk attachment
  • 1 long serrated knife
  • 1 sieve
  • 1 Spatula
  • 2 large bowls
  • 1 metal bowl
  • 1 wire cake rack
  • 1 medium saucepan
  • 1 strainer
  • 1 frosting palette
  • 1 pastry bag

Ingredients 

1x2x3x

Sponge cake

  • 5 large eggs
  • ¾ cup white sugar
  • 1 teaspoon vanilla extract
  • 1 ¼ cups cake flour
  • butter (as needed)

Pastry cream

  • 3 cups whole milk
  • 1 long strip lemon zest
  • 6 egg yolks
  • ¾ cup white sugar
  • ½ cup flour
  • 2 teaspoon vanilla extract
  • 2 ounces chocolate (chopped)

Rum syrup

  • 1 cup water
  • ½ cup white sugar
  • ¼ cup dark rum (or to taste)

Whipped cream frosting

  • 1 cup heavy whipping cream
  • 1 tablespoon superfine sugar
  • 1 teaspoon vanilla extract

To decorate

  • 1 cup almonds (sliced)
  • Maraschino cherries (as desired)
  • Chocolate shavings (to decorate)

Instructions

Sponge cake

  • Butter an 8-inch spring form cake pan and then line completely with parchment paper.
  • Preheat the oven to 340ºF (170ºC).
  • Using either a hand mixer or stand mixer with whisk, beat the room temperature eggs with the sugar for about 12 minutes at the highest speed. You will know it is ready when a frothy and firm cream forms. Add the vanilla extract during the last minute.
  • Sieve the flour and add it a little at a time, incorporating it into the egg and sugar mixture with a spatula by folding it in carefully, until all has been added and the mixture is uniform.
  • Carefully pour the cake batter into the prepped cake pan and put it into the preheated oven. Bake the cake for approximately 25 minutes, being sure not to open the door to check the cake for the first 20 minutes. After 20 minutes, you can test with a toothpick by inserting it into the center to see if it comes out clean. When the toothpick comes out clean, turn off the oven but leave the cake inside with the door open for about 5 minutes to avoid deflating the cake.
  • Remove the sponge cake from the oven, then remove from the spring form and place on a wire rack to cool completely.

Pastry cream

  • In a medium sauce pan put 2 1/2 cups of milk and the strip of lemon rind and heat over a medium flame until you see steam rising, but do not boil. Remove from heat once steam rises.
  • In a separate bowl, beat egg yolks, sugar and flour with a whisk and then, when smooth, add the remaining 1/2 cup of cold milk and whisk until smooth.
  • Remove the lemon zest from the heated milk and toss.
  • Slowly pour the hot milk into the egg yolk mixture while whisking and then add the vanilla extract.
  • Pour the mixture through a strainer back into the sauce pan and turn on medium heat. Let the mixture come to a boil, whisking constantly as it thickens and let simmer for one minute.
  • When thick turn off heat and divide the hot pastry cream into two bowls or heat-safe containers.
  • Stir the chopped chocolate into one of the bowls to make the chocolate pastry cream.
  • Cover both the regular and chocolate custard with plastic wrap pressed directly onto the surface so a skin doesn’t form and put in the refrigerator to chill.

Rum syrup

  • In a clean sauce pan, combine the water and sugar over medium heat until the sugar dissolves, then turn off the heat and set aside until cool.
  • Add the rum or rum extract and stir until combined and set aside until needed.

Whip cream frosting

  • Put a metal mixing bowl and whisk into the freezer until they are very cold.
  • When thoroughly chilled, remove and add the heavy whipping cream and use an electric mixer to whisk until the cream starts to thicken. Add the superfine sugar gradually, while whisking, and then the vanilla. Whip until stiff peaks form in the whipped cream. Cover and refrigerate until needed.

Assemble and decorate

  • Using a sharp serrated knife, cut the cake into three even horizontal layers that can then be reassembled. On a cake platter, put the bottom layer of cake and lightly pour 1/3 of the prepared rum syrup over it and then spread all the vanilla pastry cream to make a nice thick layer. Place the second cake layer on the vanilla filling and press down gently but firmly so that it adheres. Pour another 1/3 of the rum syrup into the second cake layer and then create the chocolate layer with all the chocolate pastry cream. Add the final layer of cake, moisten with the remaining 1/3 of the rum syrup. Place in the refrigerator for about one hour or the freezer for 30 minutes to set.
  • To toast the almonds, preheat the oven to 350ºF. Place the sliced almonds evenly on a baking sheet and put them in the oven for 10 minutes or until slightly browned. Remove and let cool.
  • Now to frost, remove the assembled cake and the whipped cream frosting from the fridge and use a frosting knife or palette knife to gently spread the majority of the whipped cream in an even layer over the top and sides of the cake.
  • Gently press the sliced almonds into the sides of the cake.
  • Place the remaining whipped cream frosting in a piping bag with a tip you like and make piping or decorations as desired.
  • Decorate the top of the cake with chocolate flakes and maraschino cherries and you are ready to show off y beautiful Italian rum cake! Tanti auguri a te!
Tried this recipe?Mention @nonnabox or tag #nonnabox!

This article https://ift.tt/SACents appeared first on Nonna Box

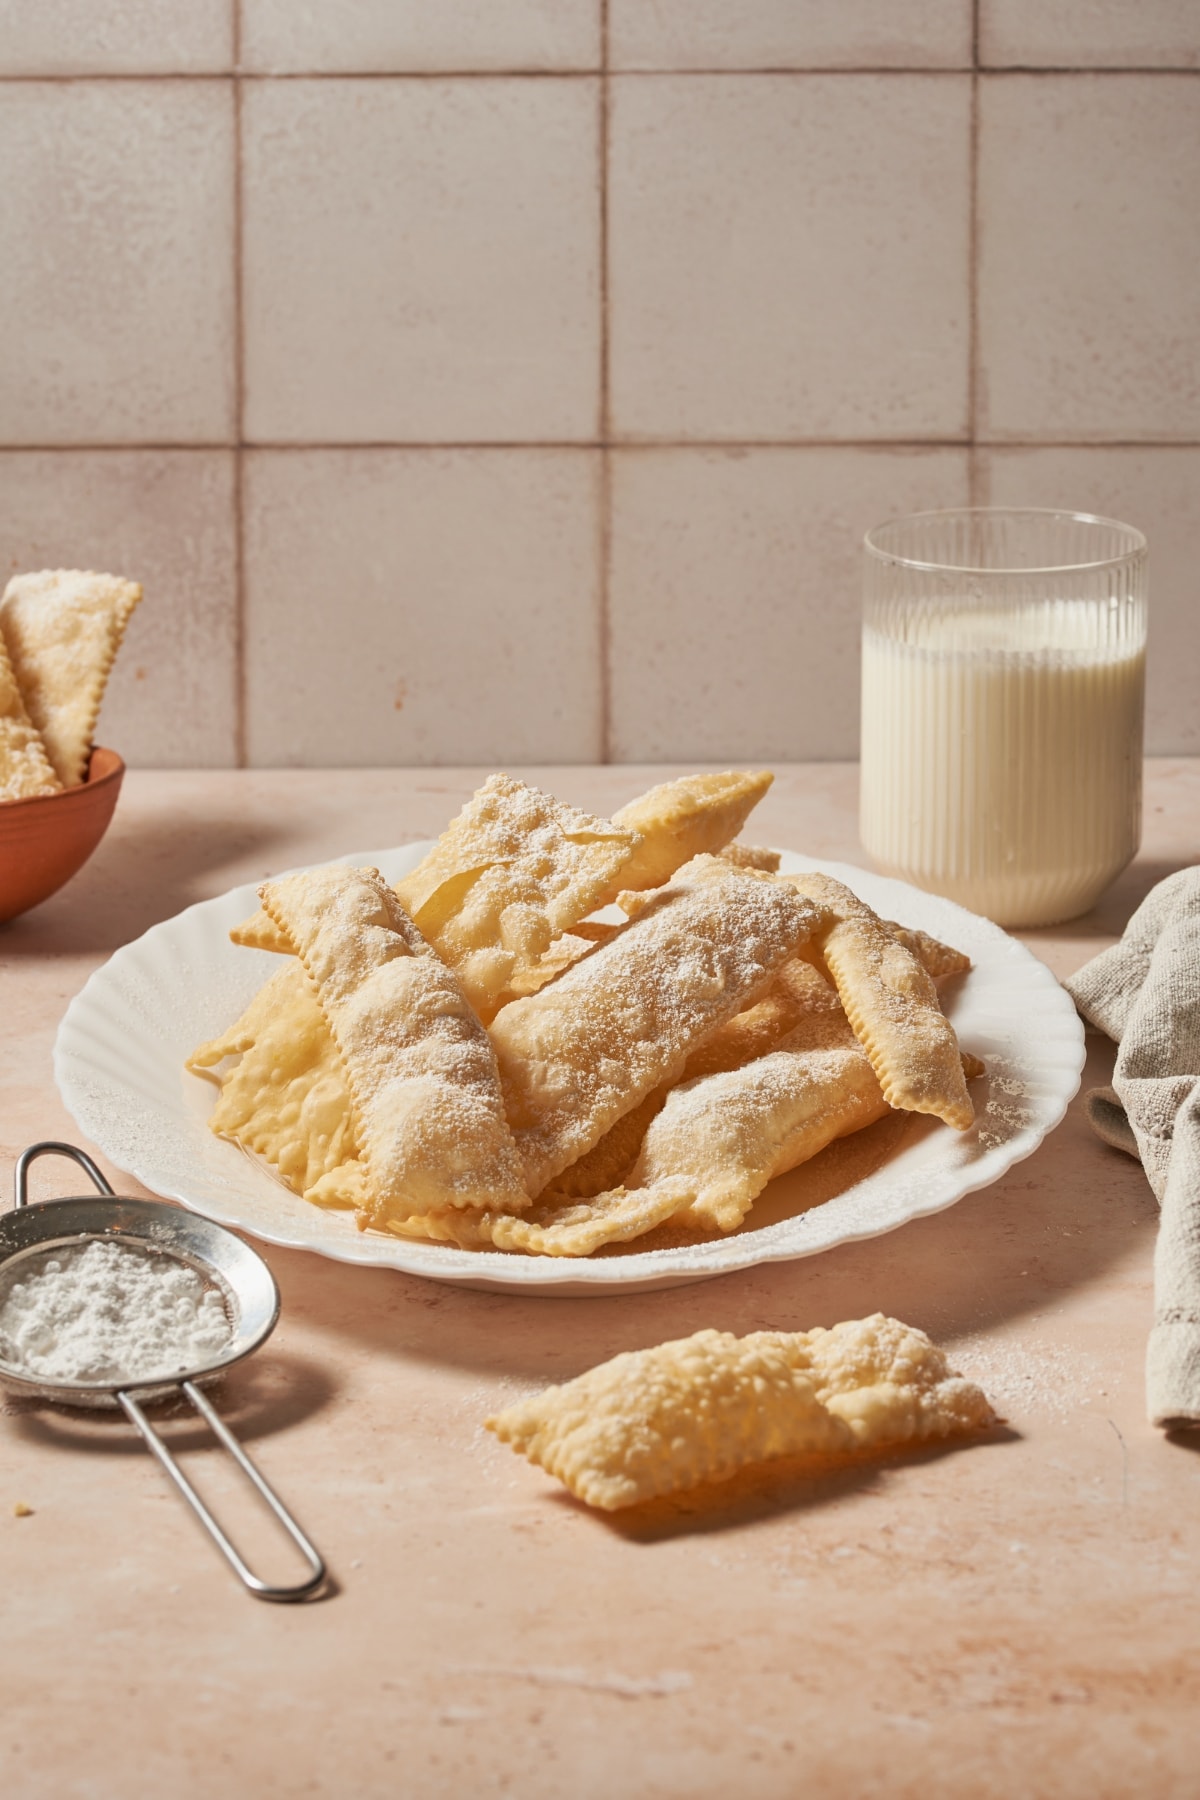
Crostoli with Powdered Sugar Recipe

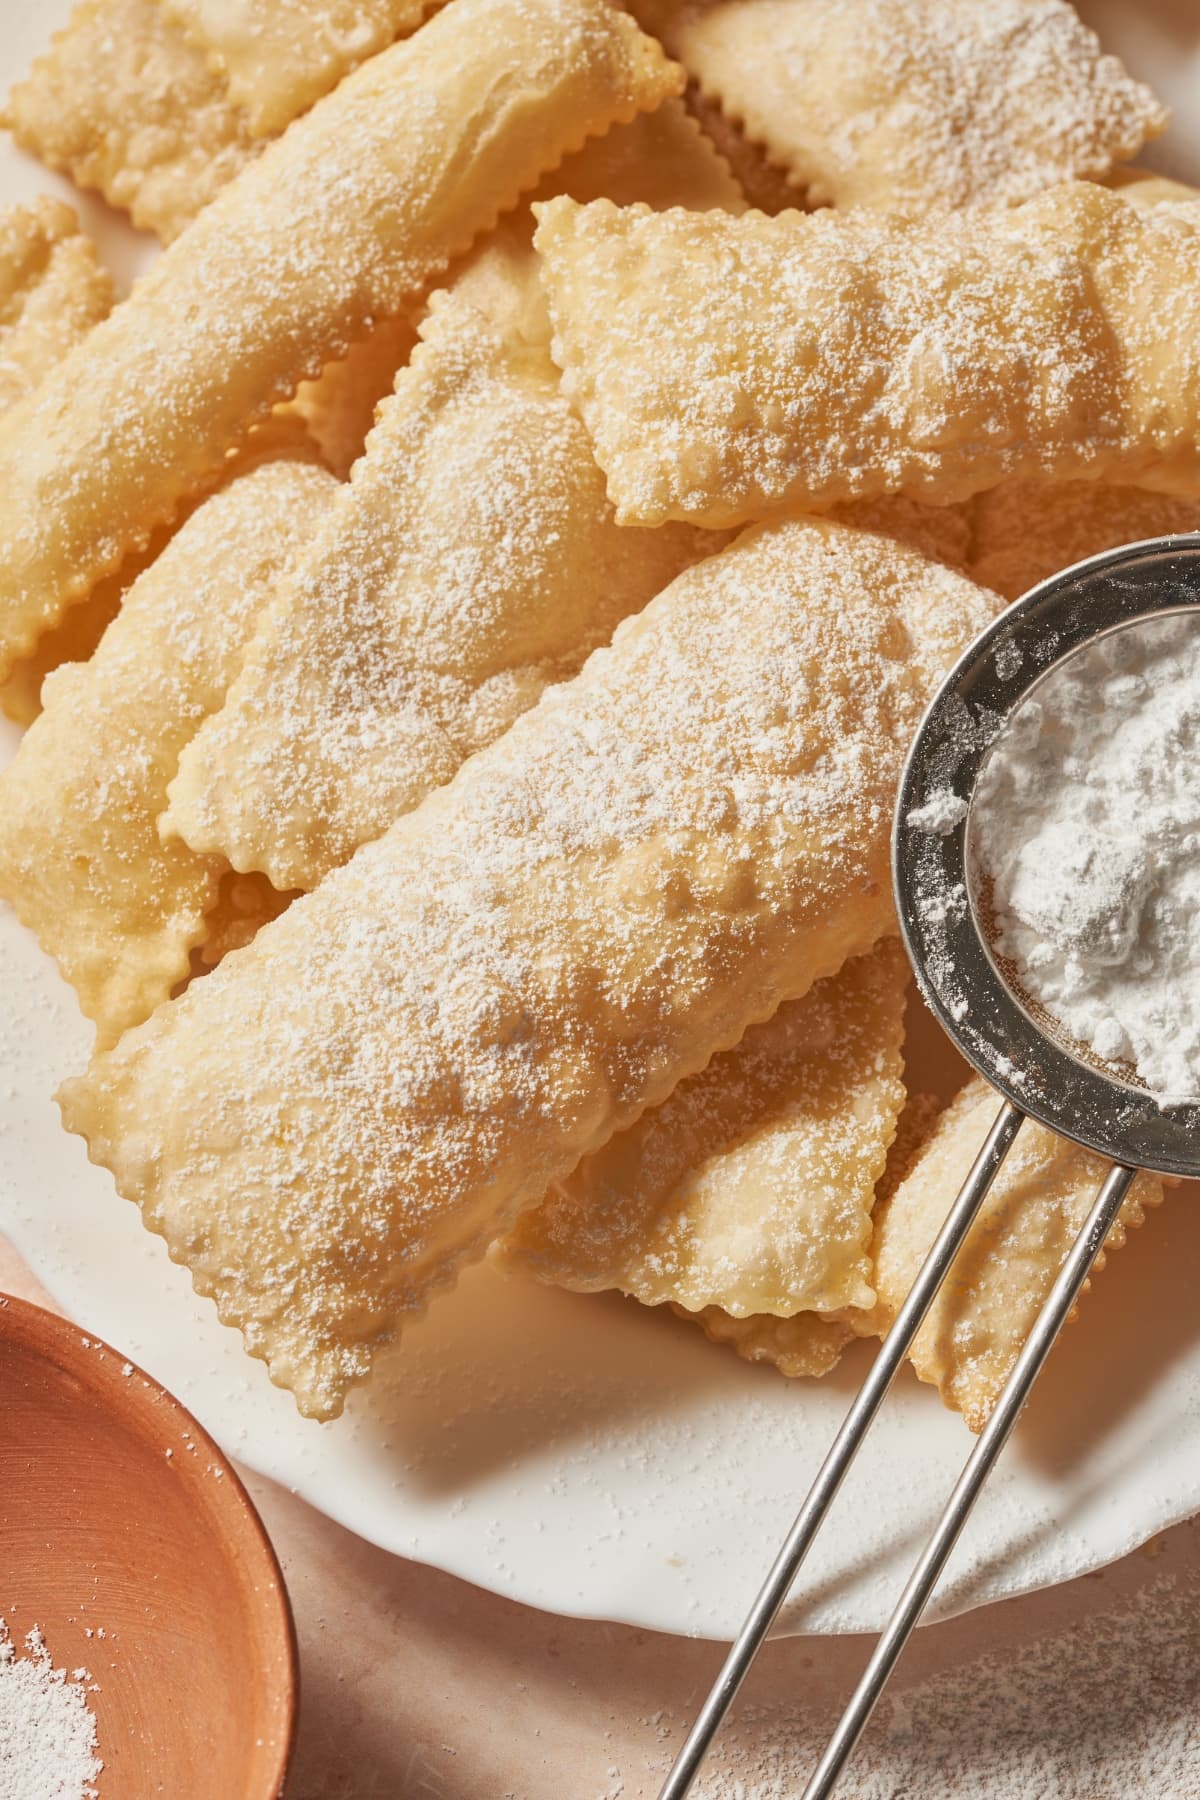
Crispy, crunchy, sugary crostoli are a sweet treat from the area around Venice in Northern Italy.

They are made from flour, egg and sugar and then the dough is rolled out very thinly and cut into strips before being deep fried in oil and getting a generous sprinkling of powdered sugar on top.

These delicious sweets are sold in bakeries and street food kiosks during the Mardi Gras carnival season, more or less the entire month of February, (depending on when Easter falls). They go hand-in-hand with happy costumed children running through the squares of small towns tossing confetti at each other as parades go by.

Crostoli are popular to make and eat in Central Italy and the rest of the country as well, where they go by different names such as cenci, frappe, bugie, galani, chiacchiere and many others depending on which town or city you happen to be in.

But beware, these carnival sweets are as delicious as they are messy- you will most likely end up covered in a fine dusting of powdered sugar before you’re done eating them!

Equipment

Here is what you will need to make these crispy, golden sweets covered in icing sugar.

  • rolling pin
  • mixing bowl
  • flat surface or cutting board
  • pasta machine (optional)
  • fryer or high-sided frying pan
  • fork
  • fluted pastry roller

The whole process to make this crostoli recipe takes almost exactly one hour from start to finish, including rest time for the dough, and then they can be enjoyed right away with a generous amount of powdered sugar sprinkled all over them.

Ingredients

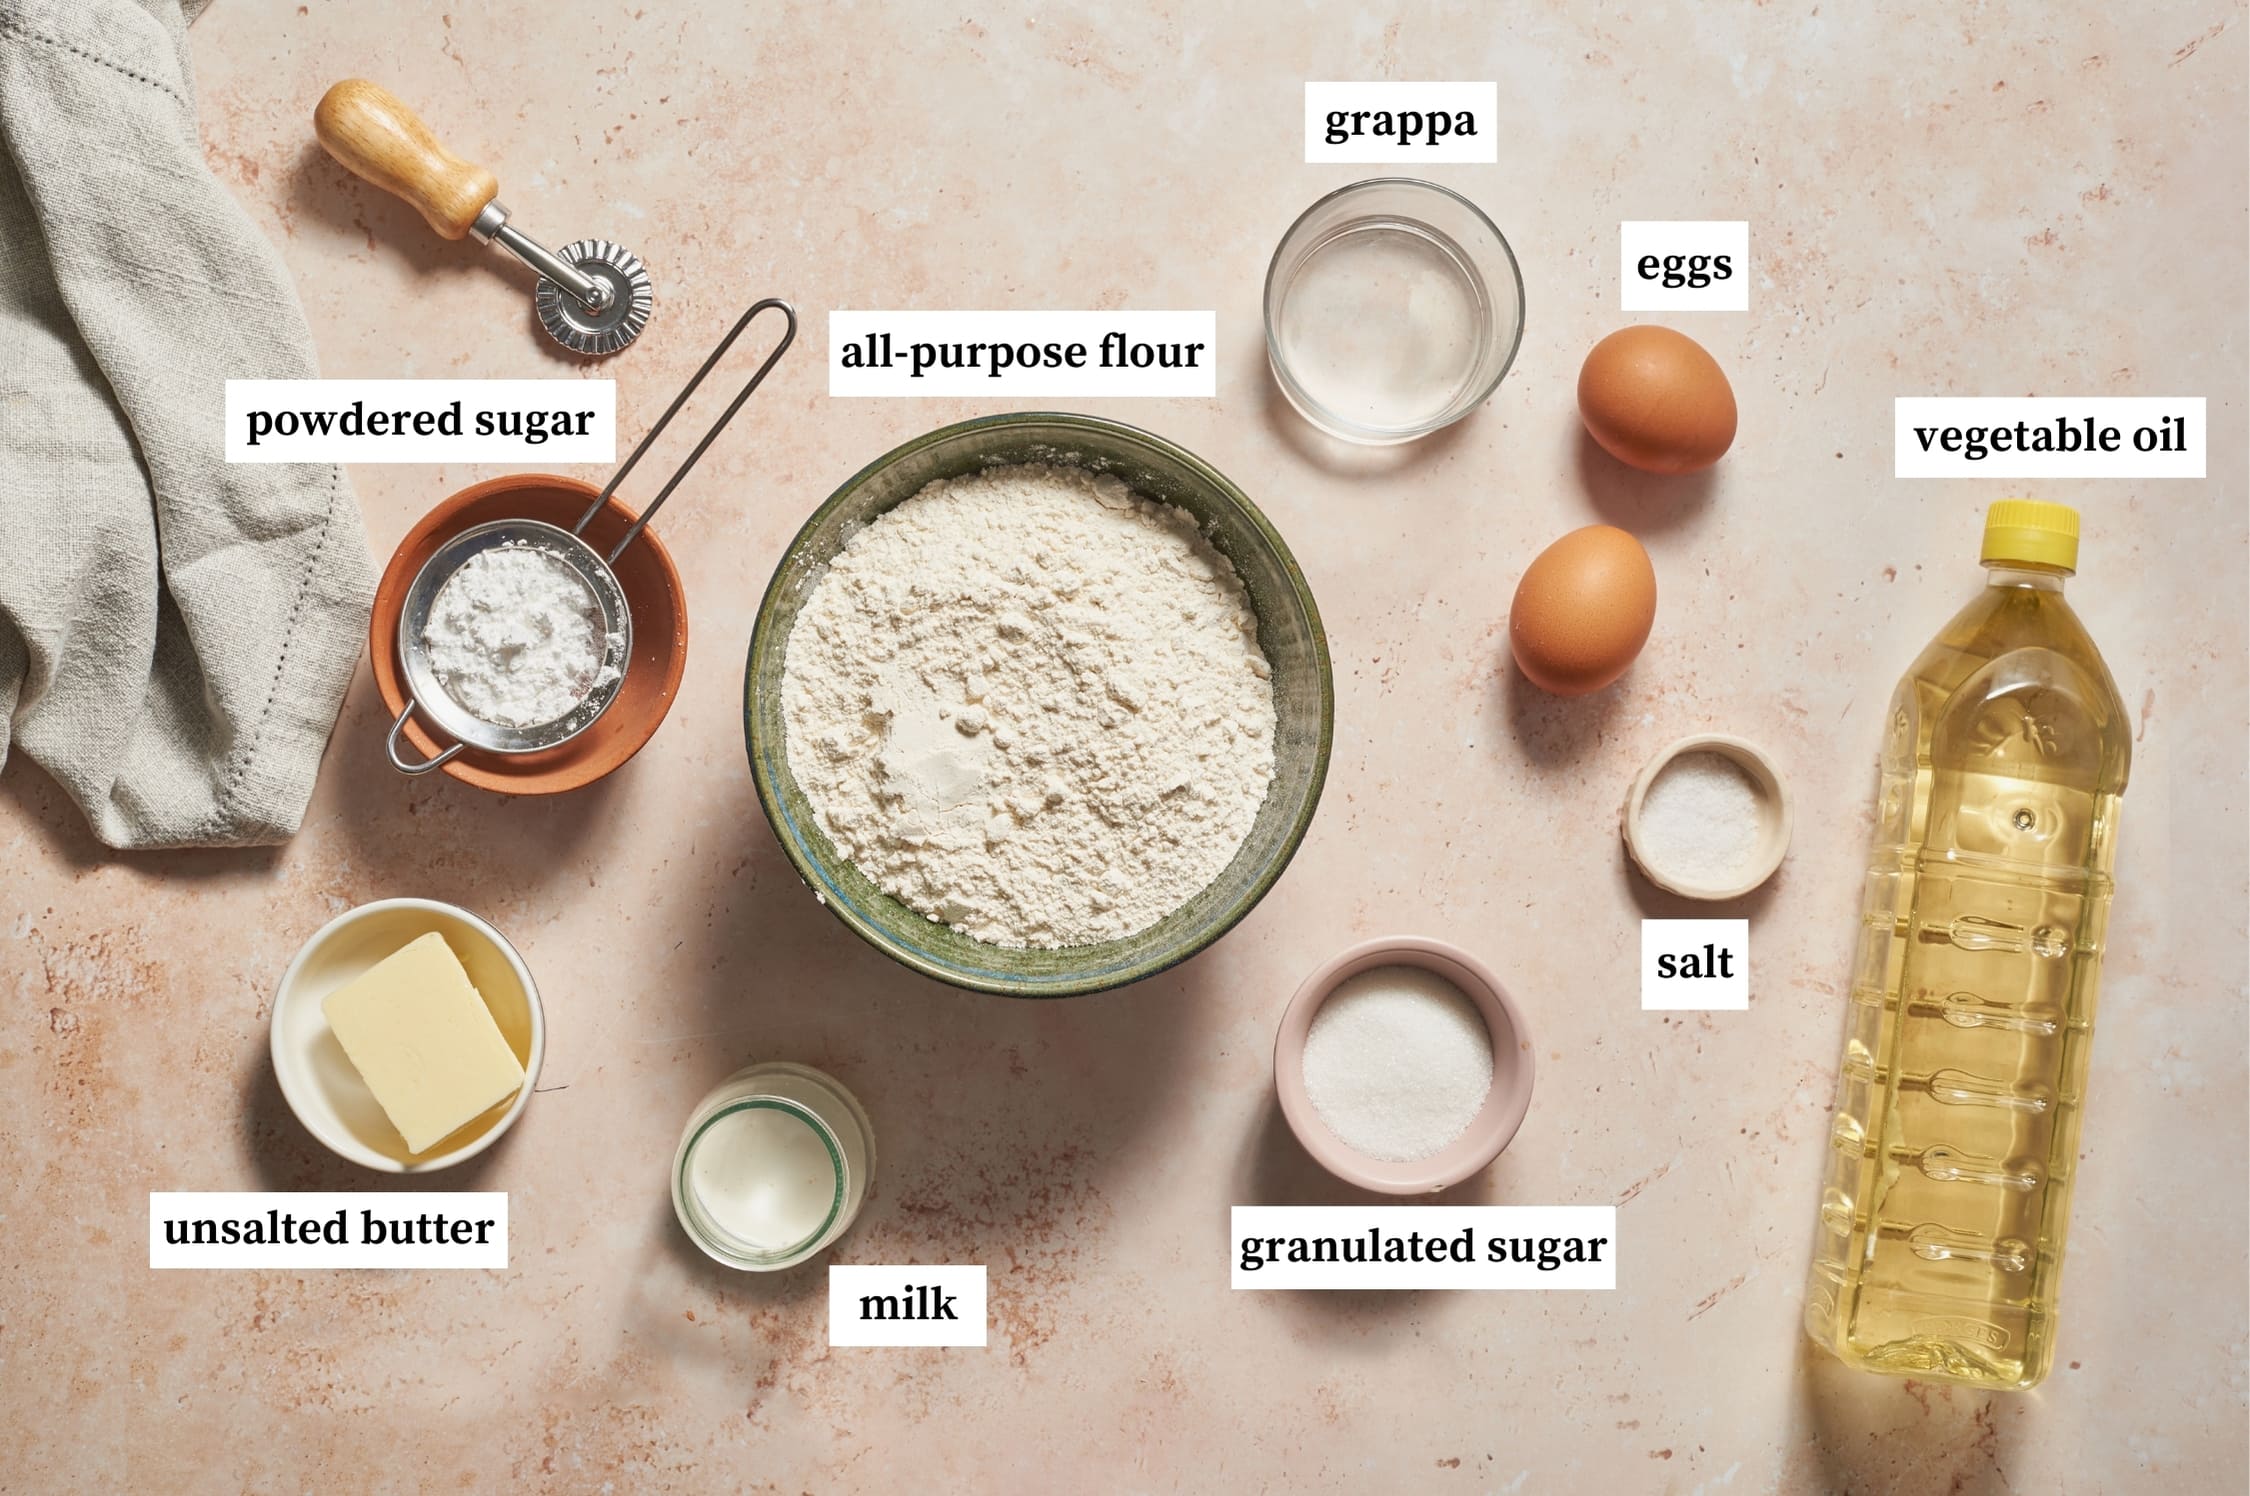
This crostoli recipe calls for basic dessert ingredients like flour, sugar, butter and egg, but you might be surprised to find grappa is a part of the recipe too!

  • All-purpose flour (300 grams) – we like to start out this recipe with sifted flour to avoid any lumps.
  • Granulate sugar (40 grams) – this sugar isn’t the star of the show like the powdered sugar, it is just used to make the crostoli slightly sweet. If you are planning to use crostoli as a savory treat you can skip it.
  • Salt (1 pinch) – just a little pinch is all you need.
  • Eggs (2 medium) – you can add them as lightly beaten eggs to mix with the rest of the ingredients.
  • Grappa (60 grams) – if you don’t have grappa you can substitute with another liquor like schnaps or rum. If you prefer to leave out the alcohol you can use the same amount of orange juice.
  • Unsalted butter (30 grams) – if at all possible, get unsalted because it works much better in this recipe. You can melt it in a bain-marie or in the microwave.
  • Milk (2 tablespoons) – the milk should be added only if the dough is too hard and needs to be softened a little bit with more liquid.
  • Lemon (1 large) – you will need the zest of one organic lemon rind. If you are skipping the liquor and using orange juice instead, you can substitute with another citrus zest like orange zest.
  • Vegetable oil (1 liter) – while our preference is for sunflower oil, you can also use peanut oil or another oil that is good for frying. Some people do fry in extra virgin olive oil but we don’t think it is worth the additional cost.
  • Powdered sugar (for garnish) – in Italy you can purchase vanilla flavored powdered sugar, something that is harder to find in the Unites States. Consider flavoring your confectioners sugar with a little vanilla or you can simply use regular icing sugar.

Step-by-step instructions for making crostoli

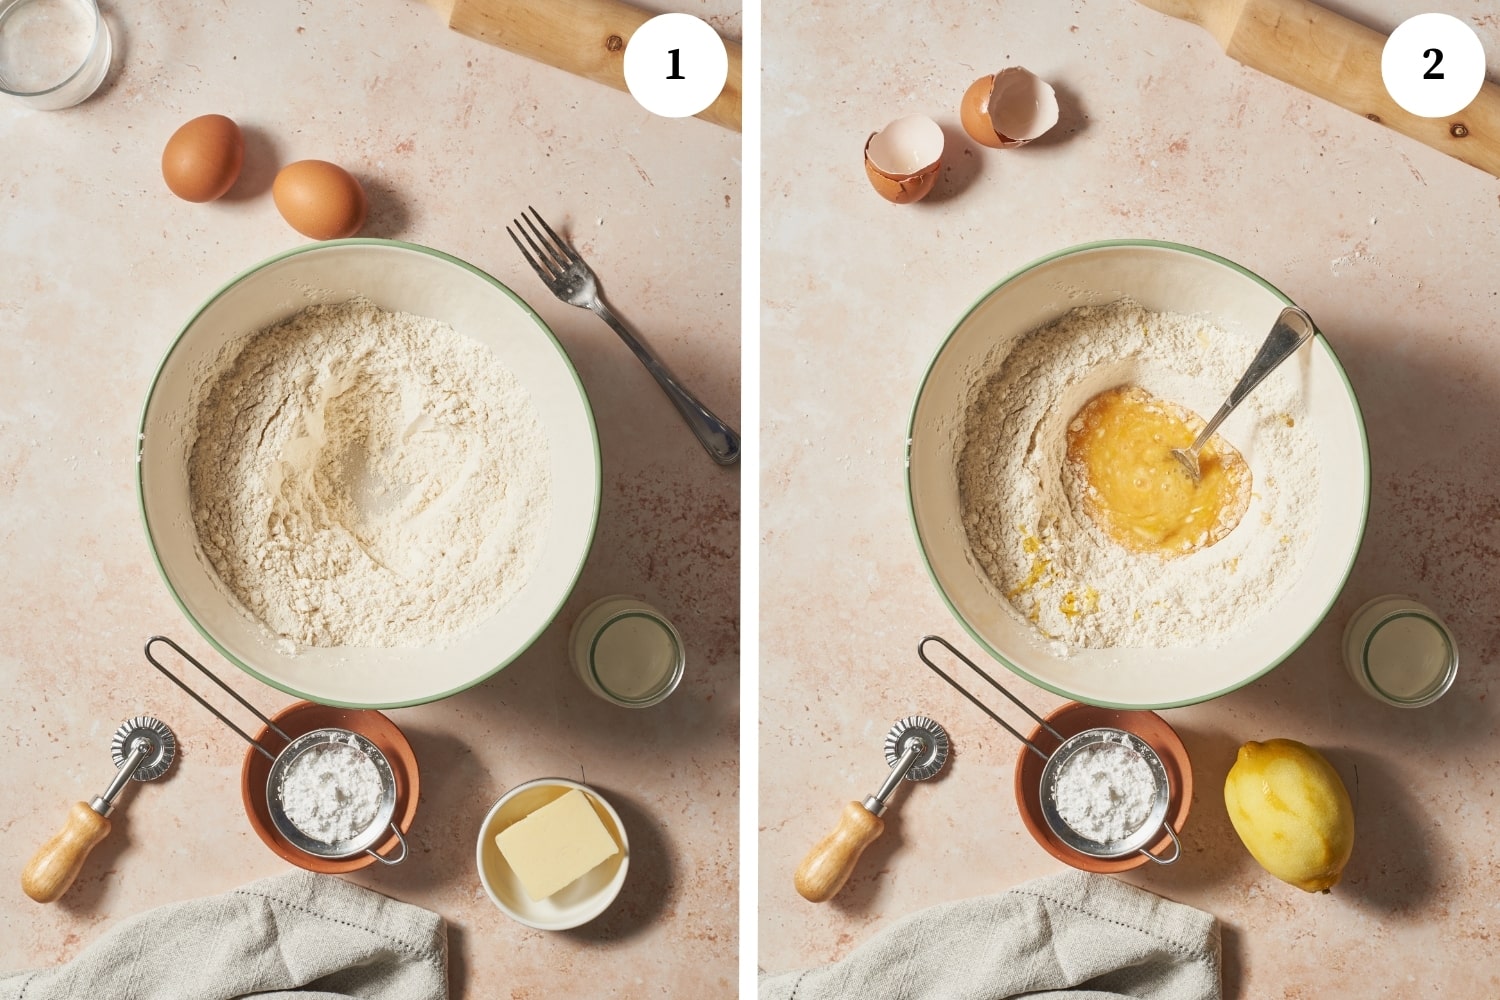
To prepare the dough, first add the dry ingredients of flour, white sugar and salt in a mixing bowl and make a hole in the center (photo 1).

Put the eggs, the melted butter and the grated lemon zest in the hole and stir together with a fork, starting from the center, to combine until creamy (photo 2).

Now add the grappa or other alcohol of your choice into the center and incorporate it using a fork.

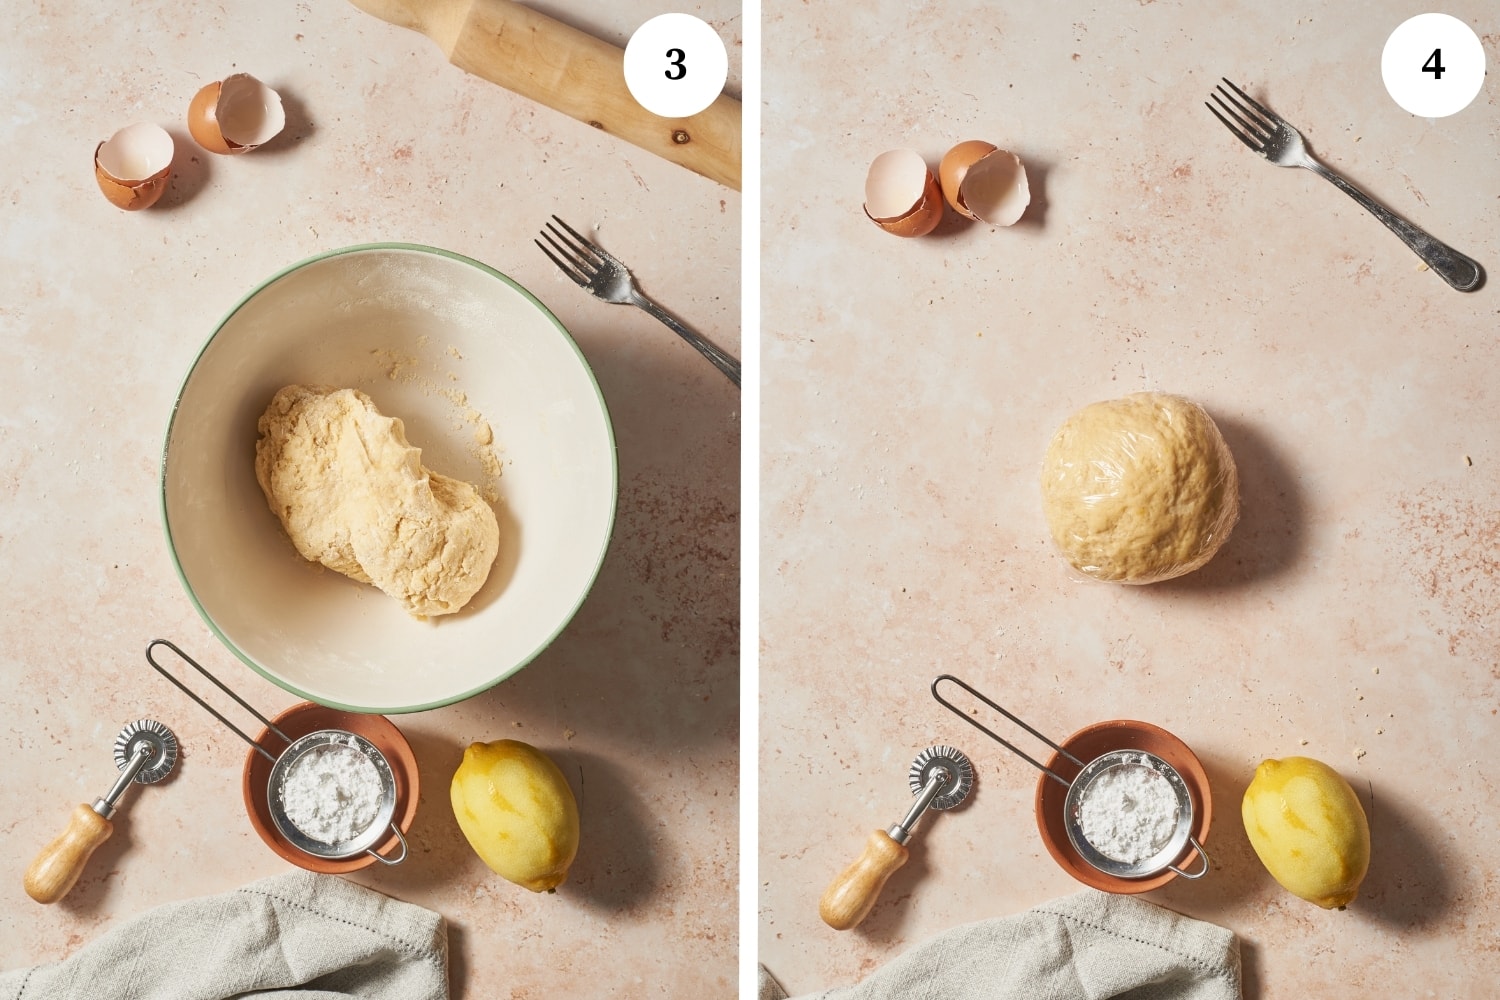
When the dough is a little more solid, you can transfer it to clean work surface and knead it by hand, folding and pushing until it is homogeneous. If it’s too hard, you can add a very small amount of milk (up to 2 tablespoons).

Form it into a smooth ball, cover it with plastic wrap, and let it rest at room temperature for 30 minutes (photo 4).

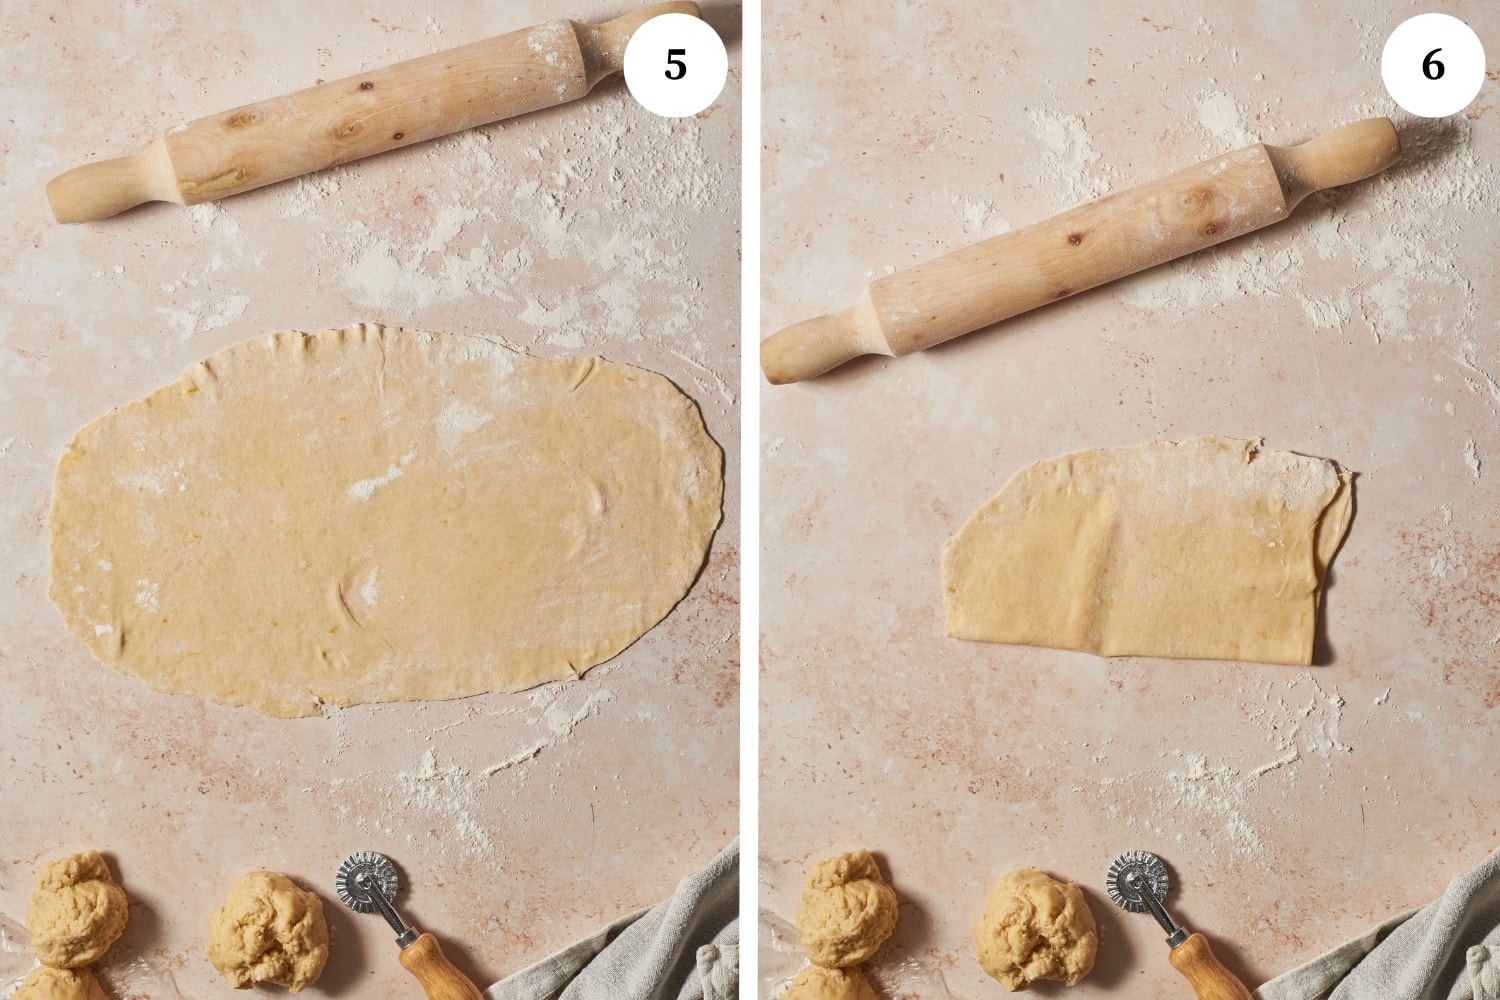
To roll out by hand: Divide into 5 parts, roll the dough out one piece at a time. On a well-floured flat surface, roll out one part with a rolling pin until the sheet becomes as paper-thin as possible (photo 5). Fold it onto itself and roll out again several times to get long straight strips as well as lots of bubbles when frying (photo 6).

To roll out with a pasta machine: Cut into five parts. Take one piece and flatten it with your hands to a length of about 10 to 12 cm. Now insert it into the machine set on medium (usually number 3 or 4) or even the widest setting and roll it through. Fold in half and put it through the machine again. You will then set the machine to either 1 or 2 (the thinnest settings) and put it through several times until the sheet is thin, nearly sheer.

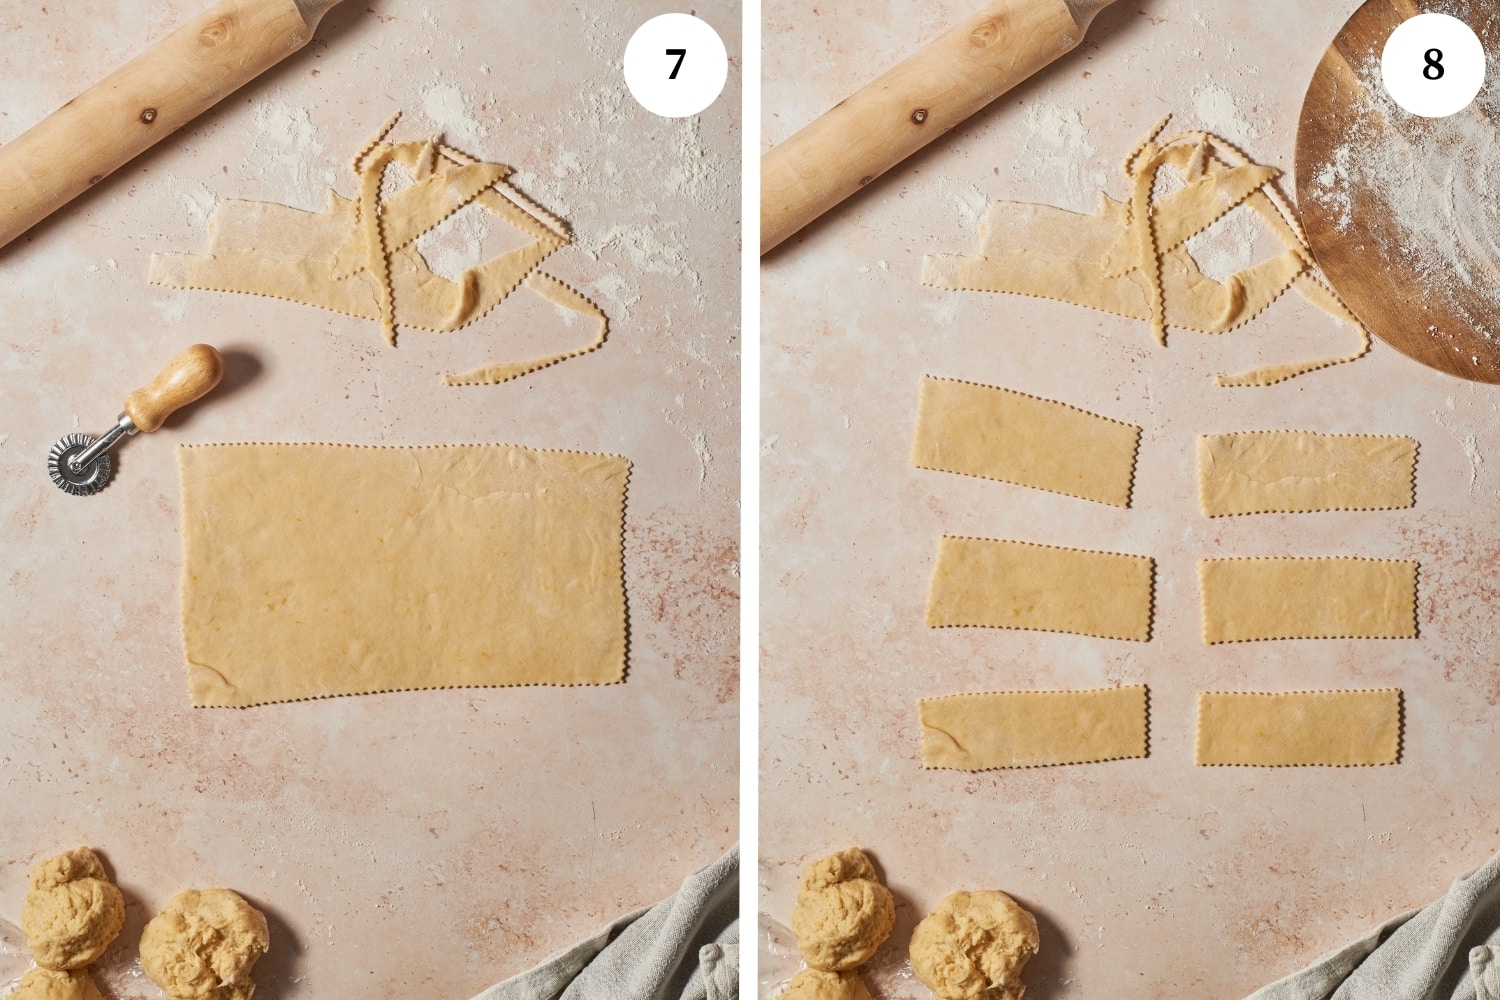
To cut the shapes: Using a fluted pastry roller, cut along the edges of each sheet of pastry to make them even (photo 7) and then cut the dough into individual medium-sized rectangles (photo 8) (you can also cut on an angle). Place each even rectangle on a lightly floured cutting board or large plate spaced out so they don’t stick together. Some recipes say to cut a slit lengthways, in the middle of the crostoli, but this is optional.

To fry: Use a deep fryer or, if you prefer, a high-sided medium-sized saucepan. Fill it with the oil and heat over high or medium heat until it reaches a temperature of 175° C. You will know the oil temperature is right when you do a test to see if a small piece of dough begins to sizzle and fills with bubbles.

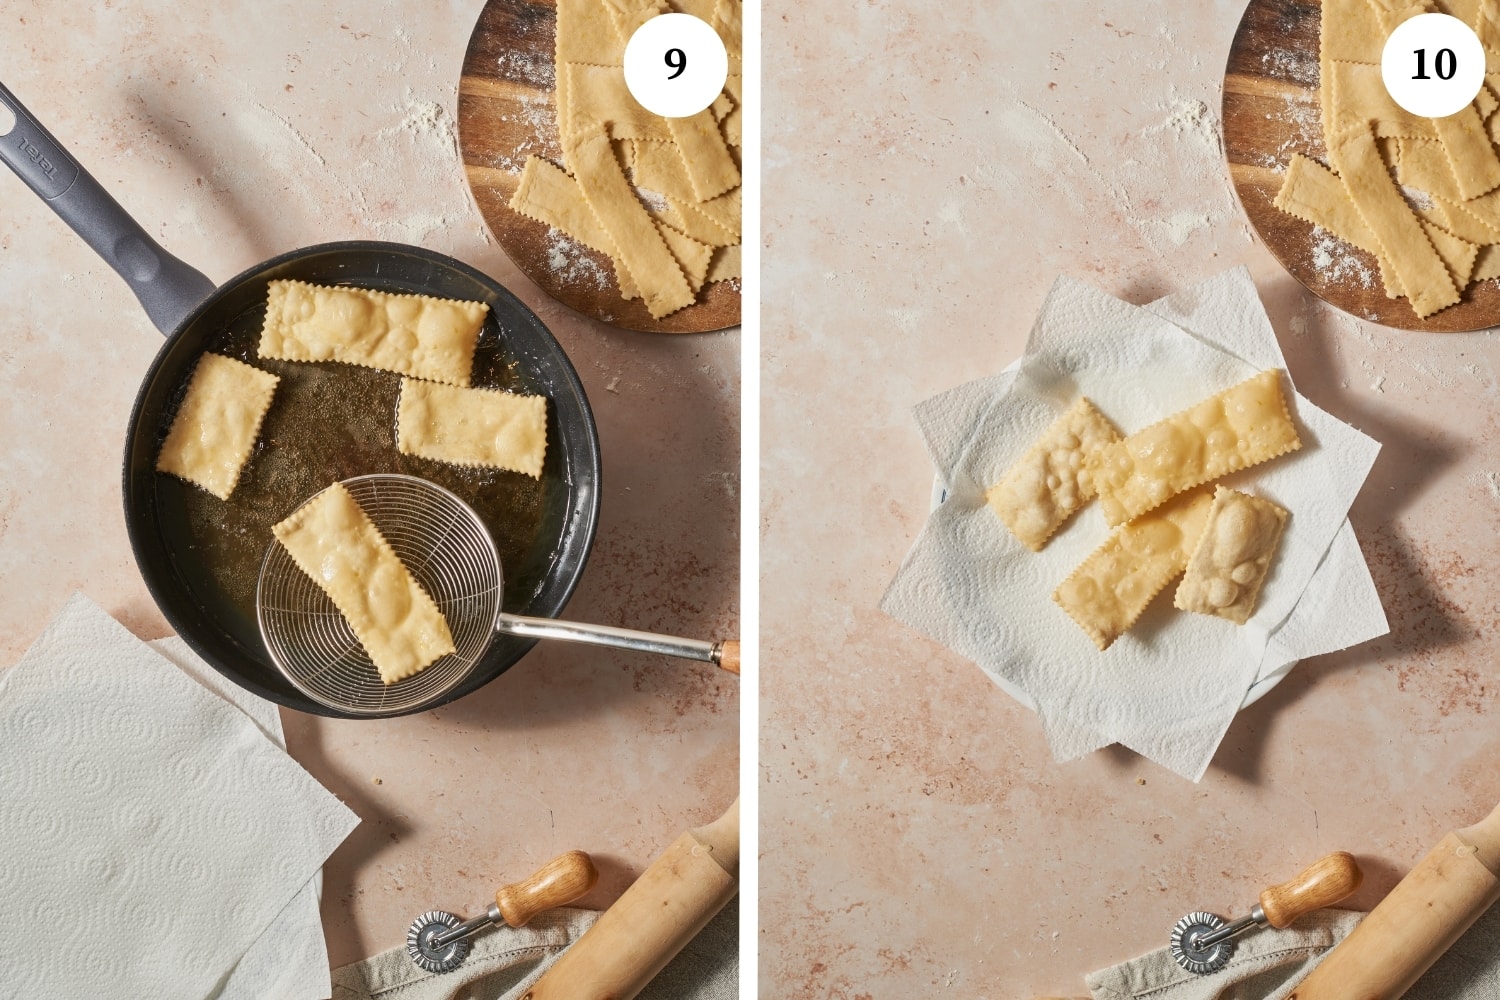
Start frying when the oil is ready and at the ideal temperature. You can cook in batches a few pieces at a time in the hot oil for 30 – 40 seconds per side. They will immediately puff and fill with air bubbles (photo 9). Remove the crostoli with a slotted spoon when they are golden but do not let them turn brown. Place them on a paper towel to remove excess oil (photo 10).

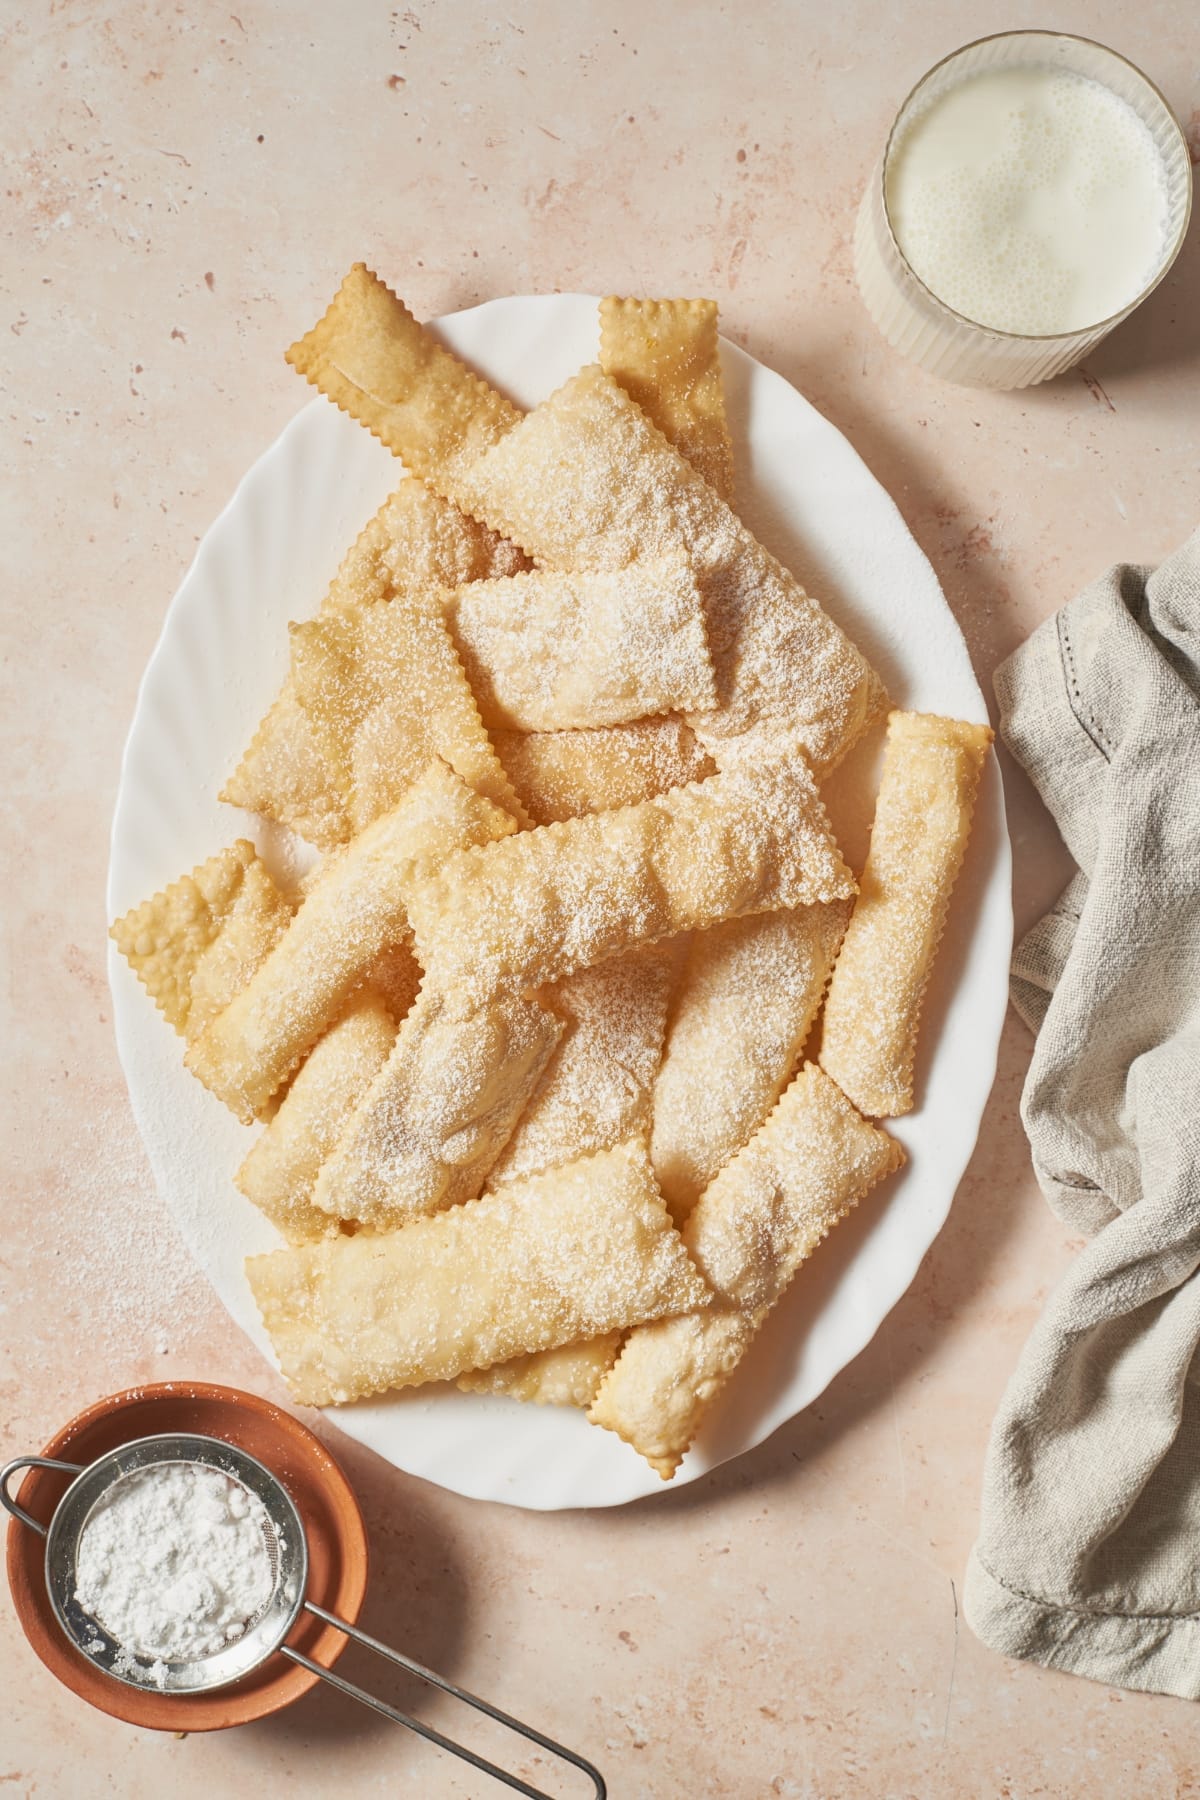
Finally, dust with a generous amount of powdered sugar and enjoy eating crostoli immediately.

Expert tips for the perfect crostoli

  • Do not let them brown. Crostoli, cenci or frappe… no matter what you call them, they are not supposed to be brown. Do not overcook the crostoli, they just need to be fried for a few seconds (about 30 second) on each side and then removed while a light golden white.
  • Add milk to dough. If your dough is too hard, add a little milk to soften it up and make it more flexible to work with. You can add up to 2 tablespoons if you need to.

Variations of crostoli

  • Oven-baked. If you need to avoid fried foods, you can bake the crostoli instead. After making the chiacchiere rectangles, place them at a small distance from each other on a baking sheet covered with parchment paper. Put in a pre-heated oven at 180° C and bake for 10 minutes or until lightly golden. Remove immediately from the baking tray onto a serving plate and dust with powdered sugar when they have slightly cooled and serve.
  • Cut slits in them. A lot of frappe or chiacchiere recipes call for two small horizontal lines to be cut into the crostoli before they are fried. Some cooks think that this helps the frappe to puff up and be airy and even lighter.

Other festive recipes for you to try:

FAQs

How to properly store crostoli

Once the crostoli have completely cooled, store them in an airtight container in a cool dry place for up to 3 days.

Can I freeze crostoli dough?

Yes, you can freeze the dough as a ball. Completely cover it in plastic wrap and freeze for up to 1 month. Let it defrost slowly in the fridge and then work the dough a little with your hands to soften it up completely before putting it through the pasta maker or rolling it out to form the crostoli themselves.

What is carnival?

Carnival is a Christian celebration which happens over about a month long period in February or sometimes early March, depending on when Easter falls that specific year. The carnival season is filled with parades, parties, and public celebrations culminating in Mardi Gras, which is “Fat Tuesday” the wildest party before Lent begins the next day on Ash Wednesday a period of fasting.

Step by Step PhotosMost of our recipes come with step by step photos, helpful tips and tricks to make it perfectly first time and even video!

Save

#wprm-recipe-user-rating-0 .wprm-rating-star.wprm-rating-star-full svg * { fill: #343434; }#wprm-recipe-user-rating-0 .wprm-rating-star.wprm-rating-star-33 svg * { fill: url(#wprm-recipe-user-rating-0-33); }#wprm-recipe-user-rating-0 .wprm-rating-star.wprm-rating-star-50 svg * { fill: url(#wprm-recipe-user-rating-0-50); }#wprm-recipe-user-rating-0 .wprm-rating-star.wprm-rating-star-66 svg * { fill: url(#wprm-recipe-user-rating-0-66); }linearGradient#wprm-recipe-user-rating-0-33 stop { stop-color: #343434; }linearGradient#wprm-recipe-user-rating-0-50 stop { stop-color: #343434; }linearGradient#wprm-recipe-user-rating-0-66 stop { stop-color: #343434; }

5 from 1 vote

Save

Print Recipe
Pin Recipe

Crostoli

Crostoli go by many different names such as frappe, bugie, galani and chiacchiere. The important thing about any of these recipes is that they make thin, crispy fried treats and have plenty of powdered sugar dust on them.

Author:

Prep Time 20 minutes
Cook Time 15 minutes
Rise Time 30 minutes
Total Time 1 hour 5 minutes
Servings 50 pieces

Ingredients 

1x2x3x

MetricUS Customary
  • 300 grams all-purpose flour
  • 40 grams granulated sugar
  • 1 pinch salt
  • 2 medium eggs
  • 60 gr grappa or schnaps or rum
  • 30 grams unsalted butter (melted)
  • 2 tablespoons milk (only if necessary)
  • 1 large lemon zest (organic)
  • 1 liter sunflower or other oil (for frying)
  • Powdered sugar (for garnish can be vanilla flavored)

Instructions

  • To prepare the dough, put the flour, white sugar and salt in a large mixing bowl and make a hole in the center.
  • Put the eggs, the melted butter and the grated lemon zest in the hole and stir the flour mixture in with a fork, starting from the center until combined, the dough should be creamy.
  • Now mix in the grappa or other alcohol of your choice by pouring it into the center and incorporate it using a fork.
  • When the dough is a little more solid, you can transfer it to a flat surface and knead it by hand, folding and pushing until it is smooth and homogeneous. Only if the dough is too hard you can add a very small amount of milk.
  • Form the dough into a smooth ball, cover it with plastic wrap and let it rest at room temperature for 30 minutes.
  • To roll out by hand: Divide into 5 parts, roll the dough out one piece at a time. On a well-floured flat work surface, roll out one part with a rolling pin until the sheet becomes as paper thin as possible. Fold it onto itself and roll out again several times to get straight edges as well as lots of bubbles when frying.
  • To roll out with a pasta machine: Cut down into at least 5 pieces. Take one piece and flatten it with your hands to a length of about 10 to 12 cm. Now lightly flour the piece and insert it into the machine set on medium (usually number 3 or 4) and roll it through. Fold in half and add a good amount of flour on each side and put it through the machine again. You will then set the machine to either 1 or 2 (the thinnest settings) and put it through several times until the sheet is smooth and nearly sheer.
  • To cut the shapes: Using a fluted pastry roller, cut the contours of each sheet of pastry and then cut the dough into individual medium sized rectangles (you can also cut on an angle). Place the rectangles on a lightly floured cutting board or serving plate spaced so that they don’t stick together.
  • To fry: Use a deep fryer or, if you prefer, a high-sided frying pan. Fill it with the vegetable oil and heat on high until it reaches a temperature of 175° C. You will know the oil temperature is right when you do a test to see if a small piece of dough starts to sizzle and fills with bubbles.
  • Start frying when the oil is ready and at the ideal temperature. You can deep fry a few pieces at a time in the hot oil for 30 – 40 seconds per side. They will immediately puff and fill with bubbles. Remove the crostoli with a slotted spoon when they are golden but do not let them reach golden brown. Place them on a plate lined with paper towels.
  • Finally, sprinkle with powdered sugar and enjoy eating crostoli immediately.
Tried this recipe?Mention @nonnabox or tag #nonnabox!

This article https://ift.tt/yU42sVg appeared first on Nonna Box

Torta Paesana with Amaretti Cookies and Dark Chocolate

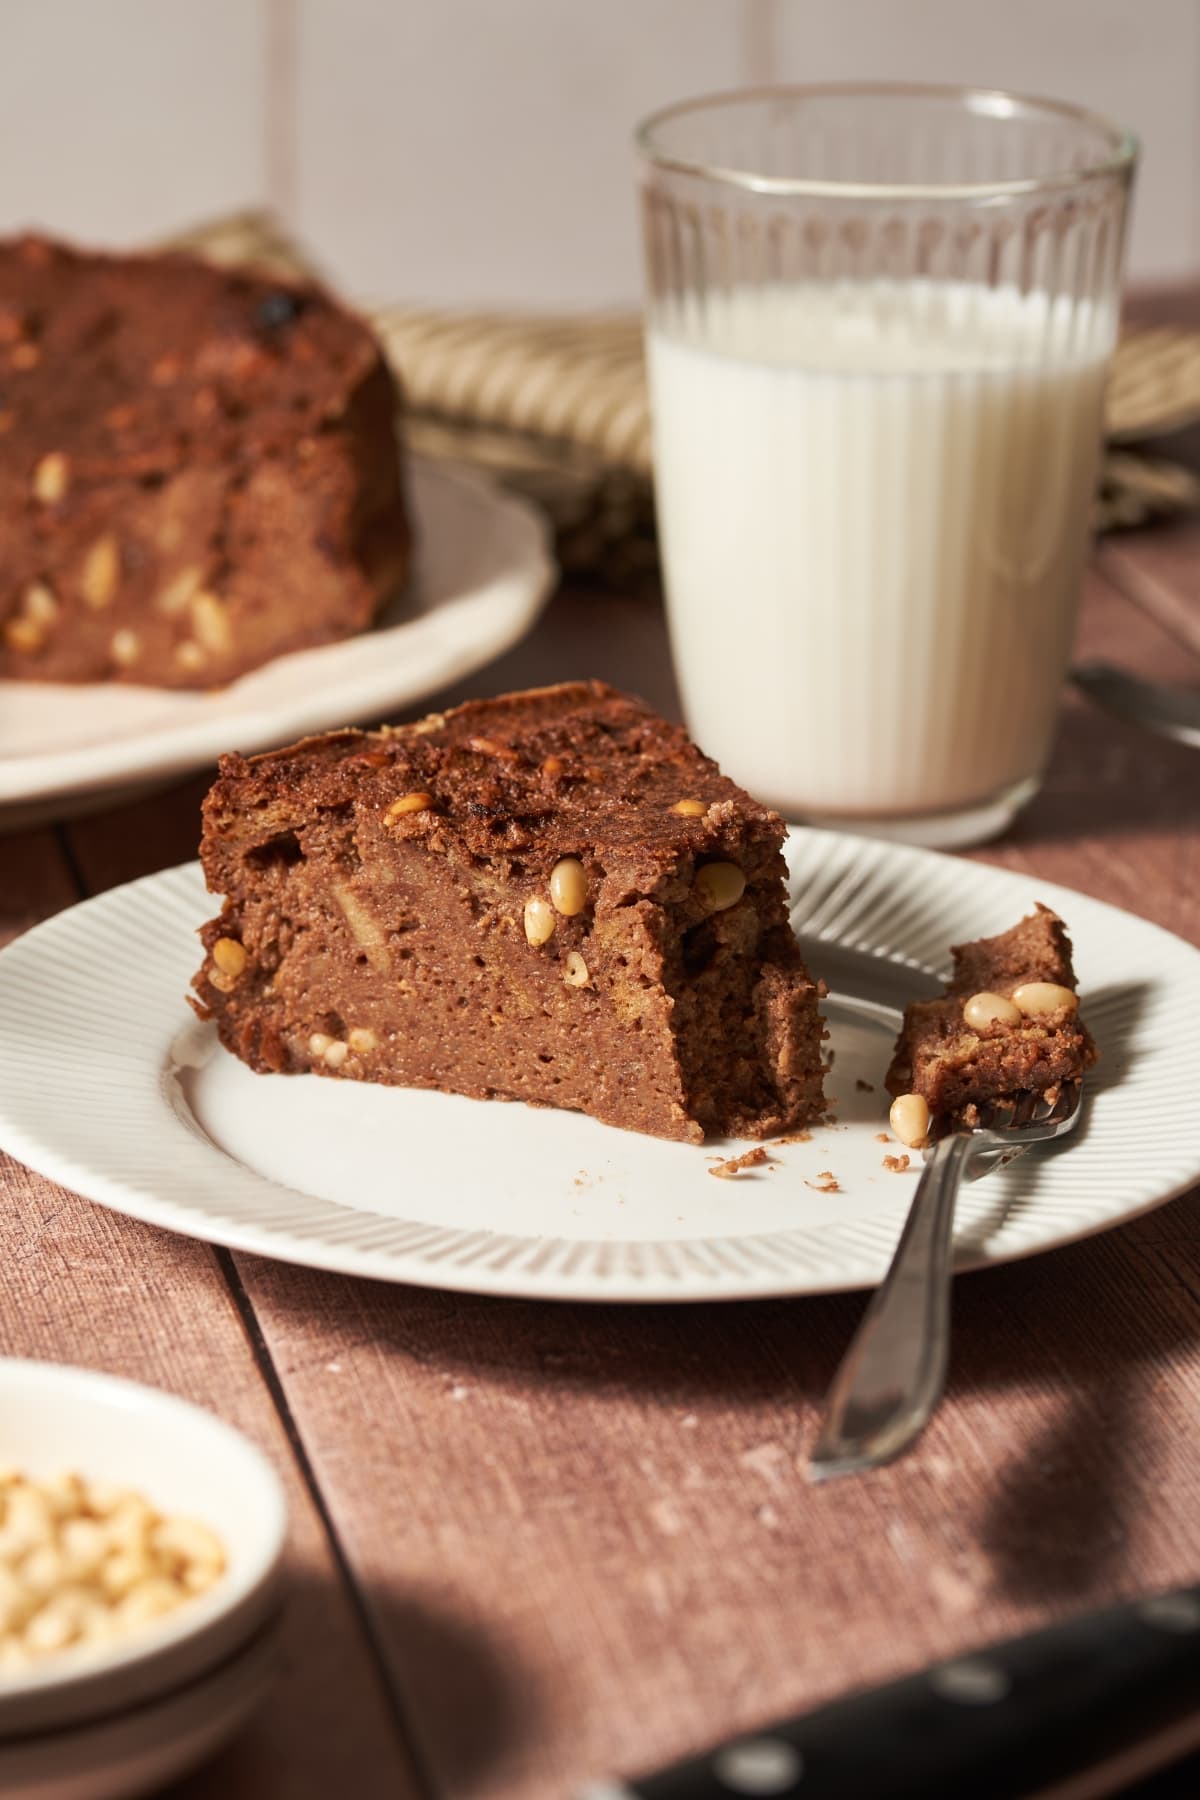
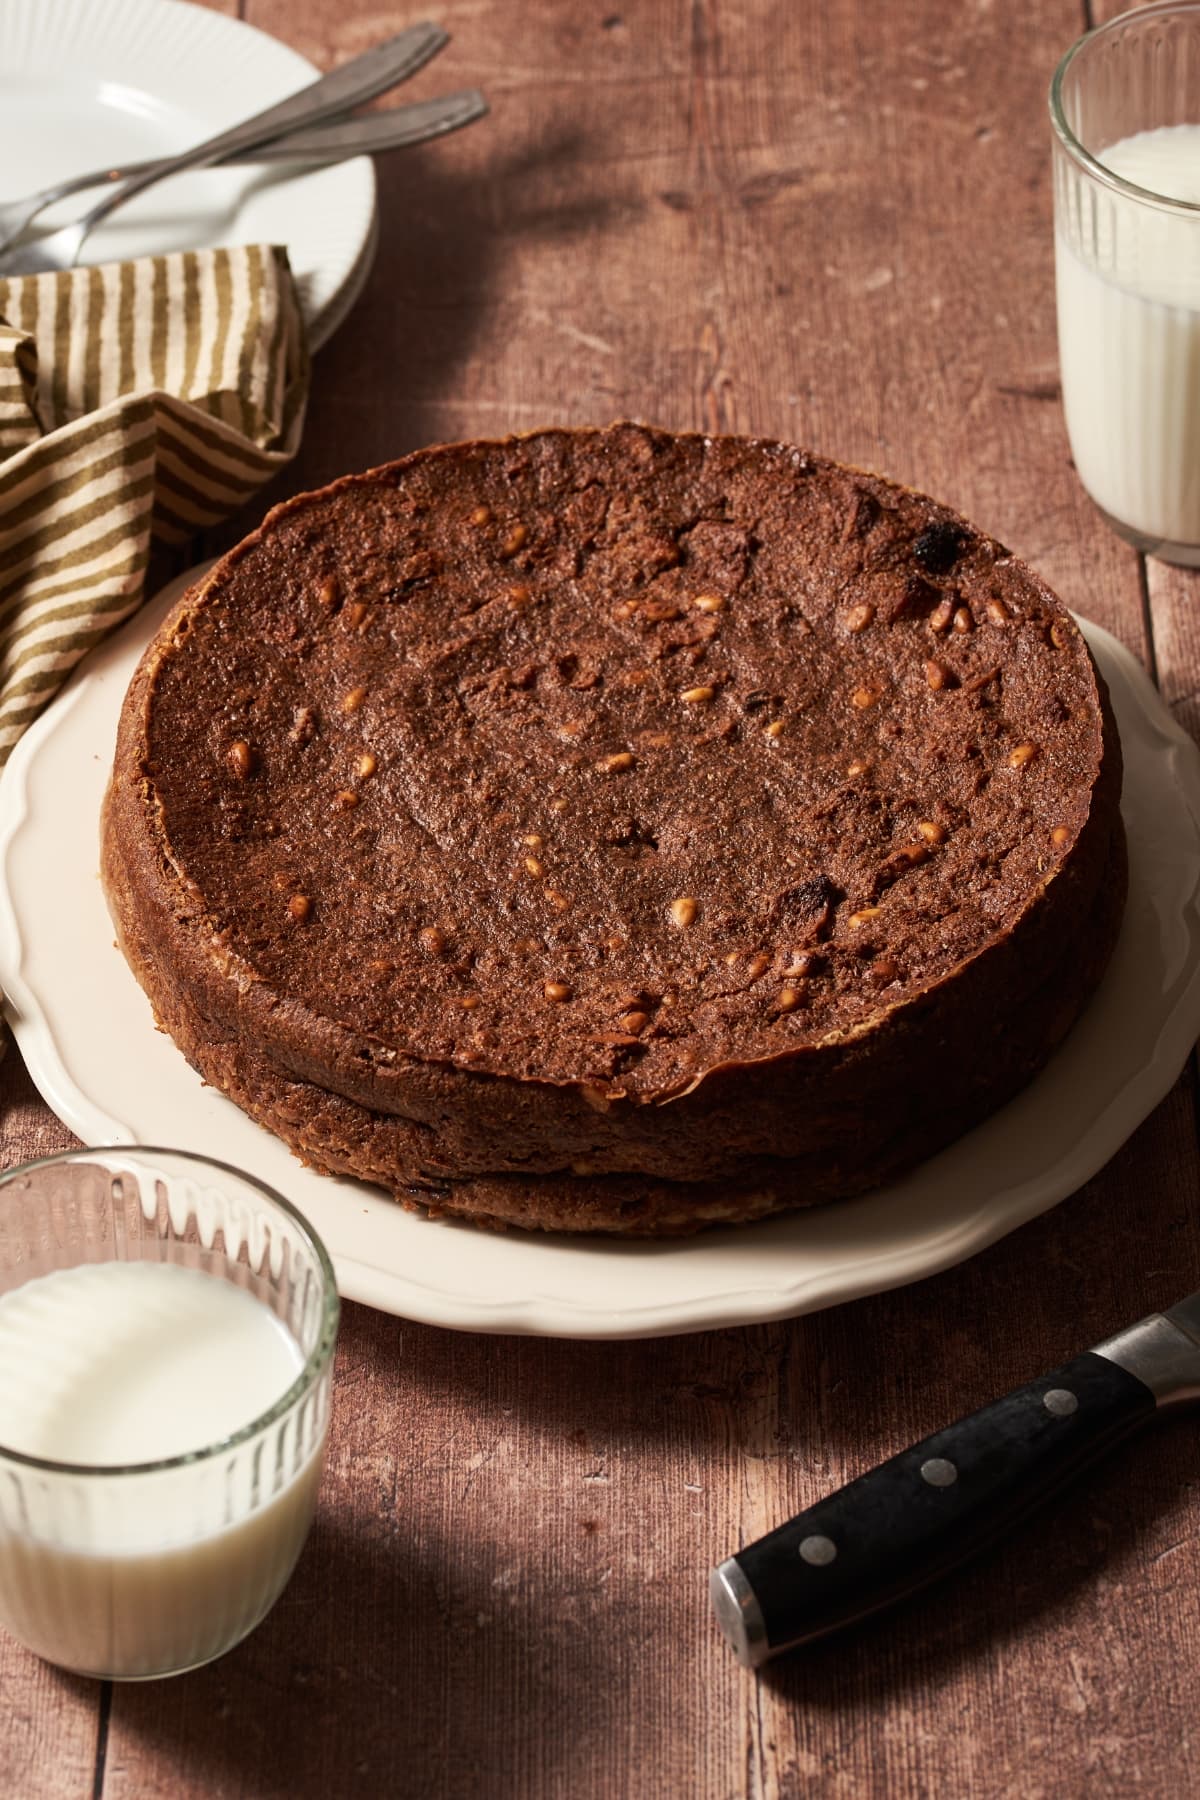
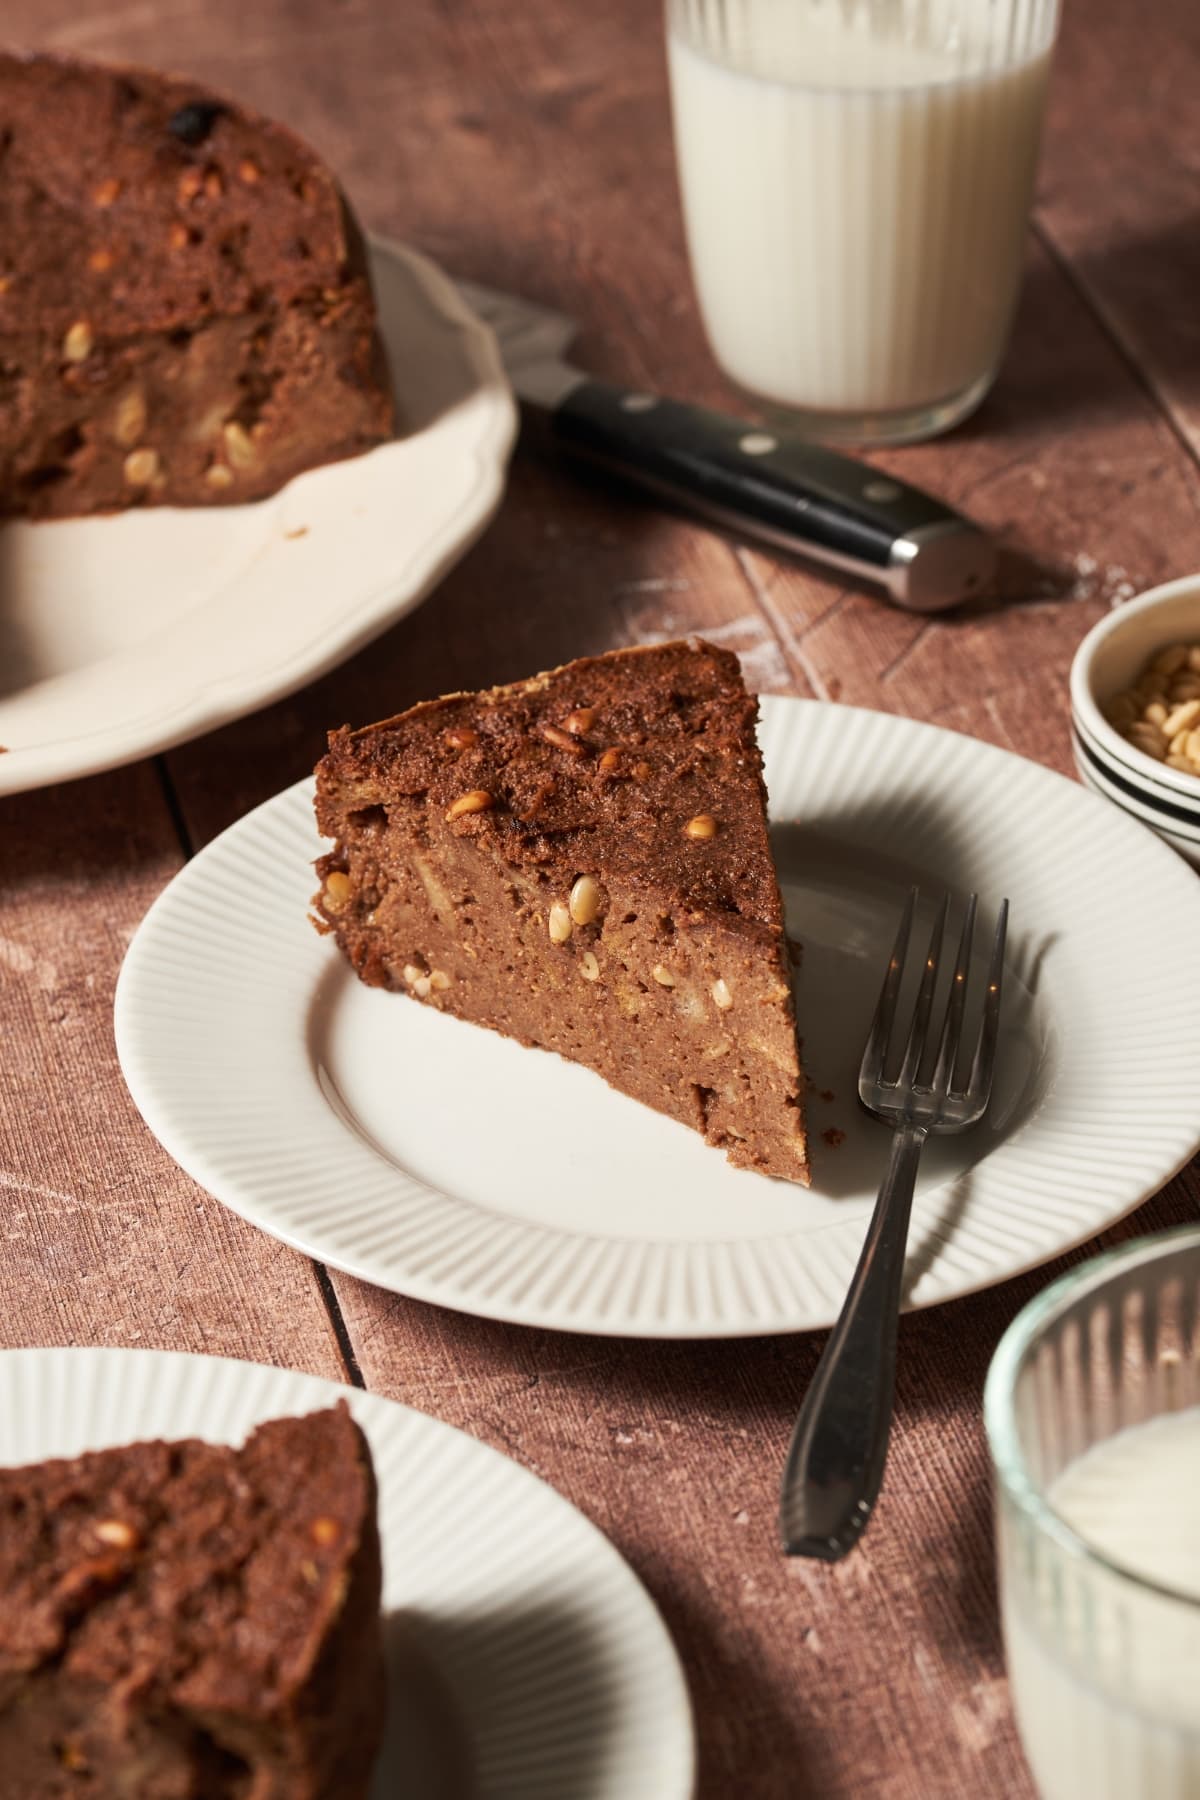
Torta paesana is a delicious typical dessert from the Lecco, Monza, and Brianza areas of Lombardy, in the north of Italy. It is a humble dessert prepared with dried or fresh fruit, which is used to obtain a natural sweet flavor that is rich and inviting.

In times past, sugar was a rarity found only in the pantries of the upper classes. As a result, this cake contains very little white sugar, making it healthier than other desserts but just as delicious because of the sweetness from the other ingredients.

Today the torta paesana is mostly consumed as a dessert, but in the past it was sometimes eaten instead of a full meal. It was also often served on special occasions, such as holidays like Christmas and Easter, where it could be found on the tables of the masses.

I made this recipe for the first time years ago as it was one of the recipes included in the Nonna Box Lombardy Box. I was surprised by its simple yet delicious taste using stale bread and just a few ingredients.

Equipment

  • small saucepan for heating milk
  • zester or small grater for making grated orange zest
  • 2 medium bowls for mixing ingredients
  • wooden spoon for stirring
  • blender to crush cookies, not required (you can also crush by hand)
  • sieve or colander to drain the raisins
  • 10-inch cake pan to bake the torta paesana cake

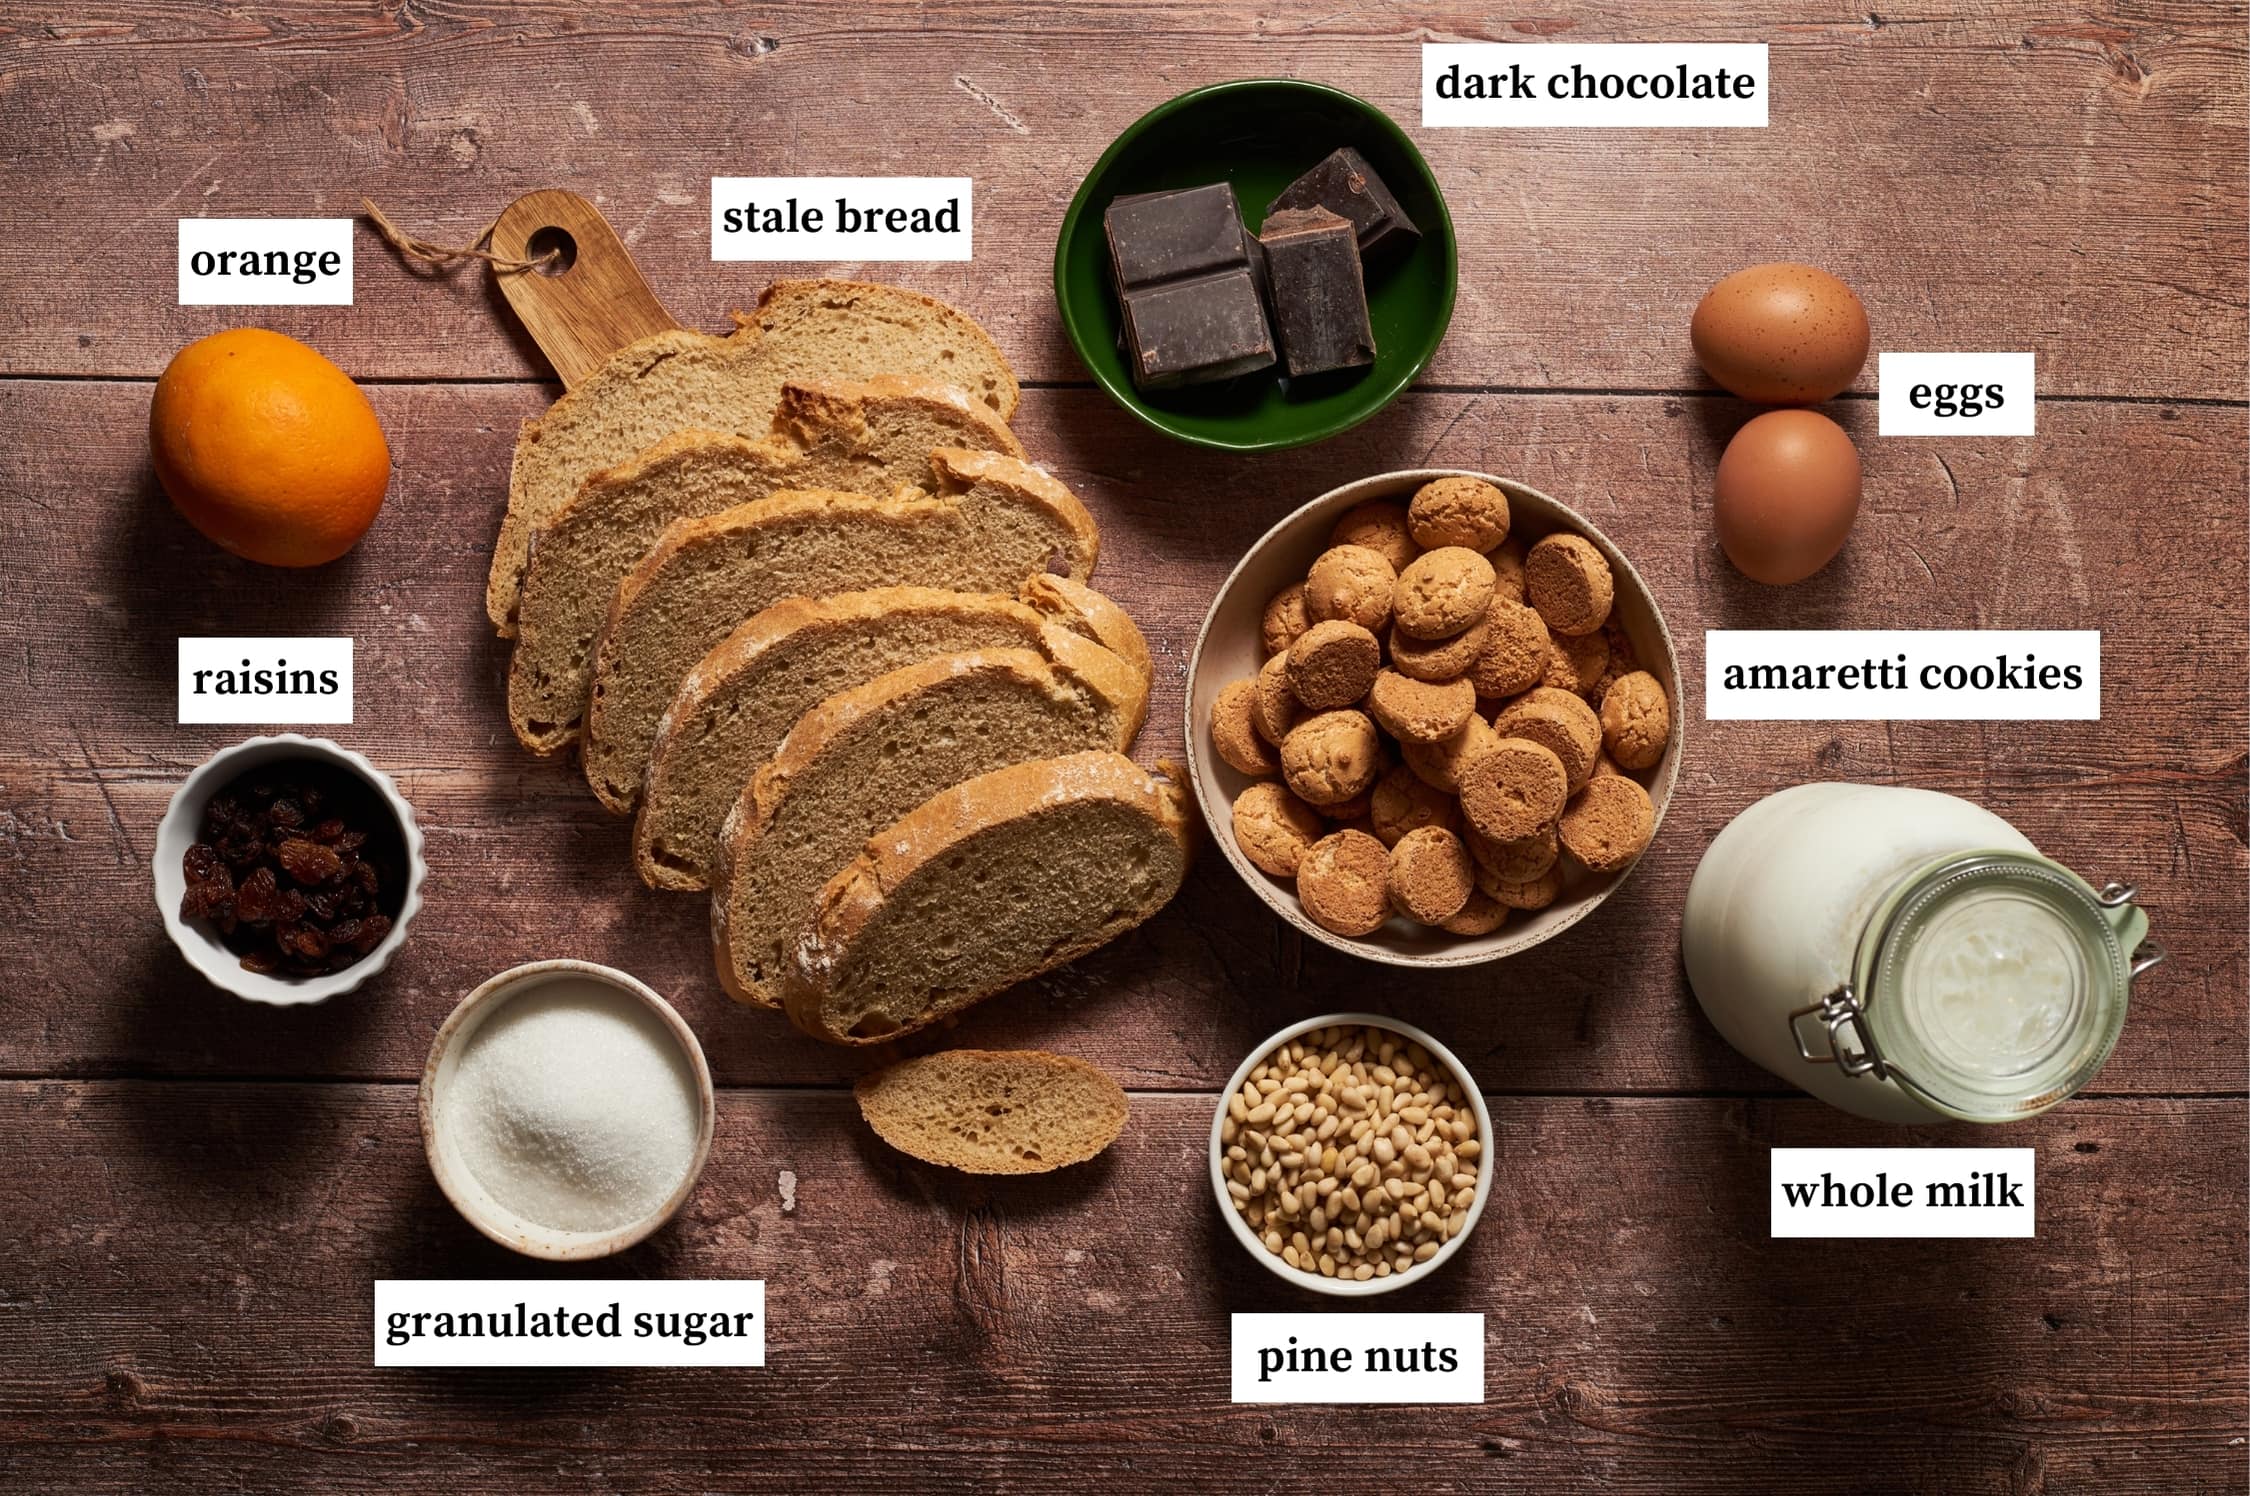
Ingredients

For US measurements, look down in the recipe card.

  • Stale bread (300 grams) – also called day-old bread. I highly recommend white crusty bread that has been left out uncovered for several hours and is at least one day old, but could even be more. Always check your bread for signs of mold and do not use it if suspected.
  • Whole milk (1 liter) – whole milk is recommended, but you can substitute if you want to with 1 or 2 %, in which case you should add a little more bread.
  • Eggs (2 medium) – let the eggs sit out at room temperature for an hour before using and then beat them with a whisk or fork before adding to the cake batter.
  • Hard amaretti cookies (120 grams) – I happen to really love amaretti cookies and use them in all kinds of recipes. For this recipe, the hard store-bought cookies, which are often called Amaretti di Saronno, are the best.
  • Dark chocolate (100 grams) – use a good quality dark chocolate and melt it completely before adding to the mixture.
  • Granulated sugar (120 grams) – although not a part of the original recipe, I have found that the addition of a little sugar is important because modern preferences are for sweeter cakes.
  • Raisins (70 grams) – choose nice, plump raisins if you have them available. If you aren’t a raisin fan, you can leave them out or add another dried fruit such as cranberries or even candied orange peel that is chopped into small pieces.
  • Pine nuts (50 grams) – as pine nuts have gotten to be very expensive, you can substitute with another of your favorite nuts, perhaps chopped walnuts or almonds.
  • Orange (1) – you will need an organic orange as you will be using the zest so it is important that there are no pesticides or other chemicals on the peel. First carefully squeeze all the juice from the orange and remove any pulp and seeds and set the juice aside. Then grate the zest and set aside as well.

How to make torta paesana step-by-step

Preheat the oven: Preheat the oven to 350° F.

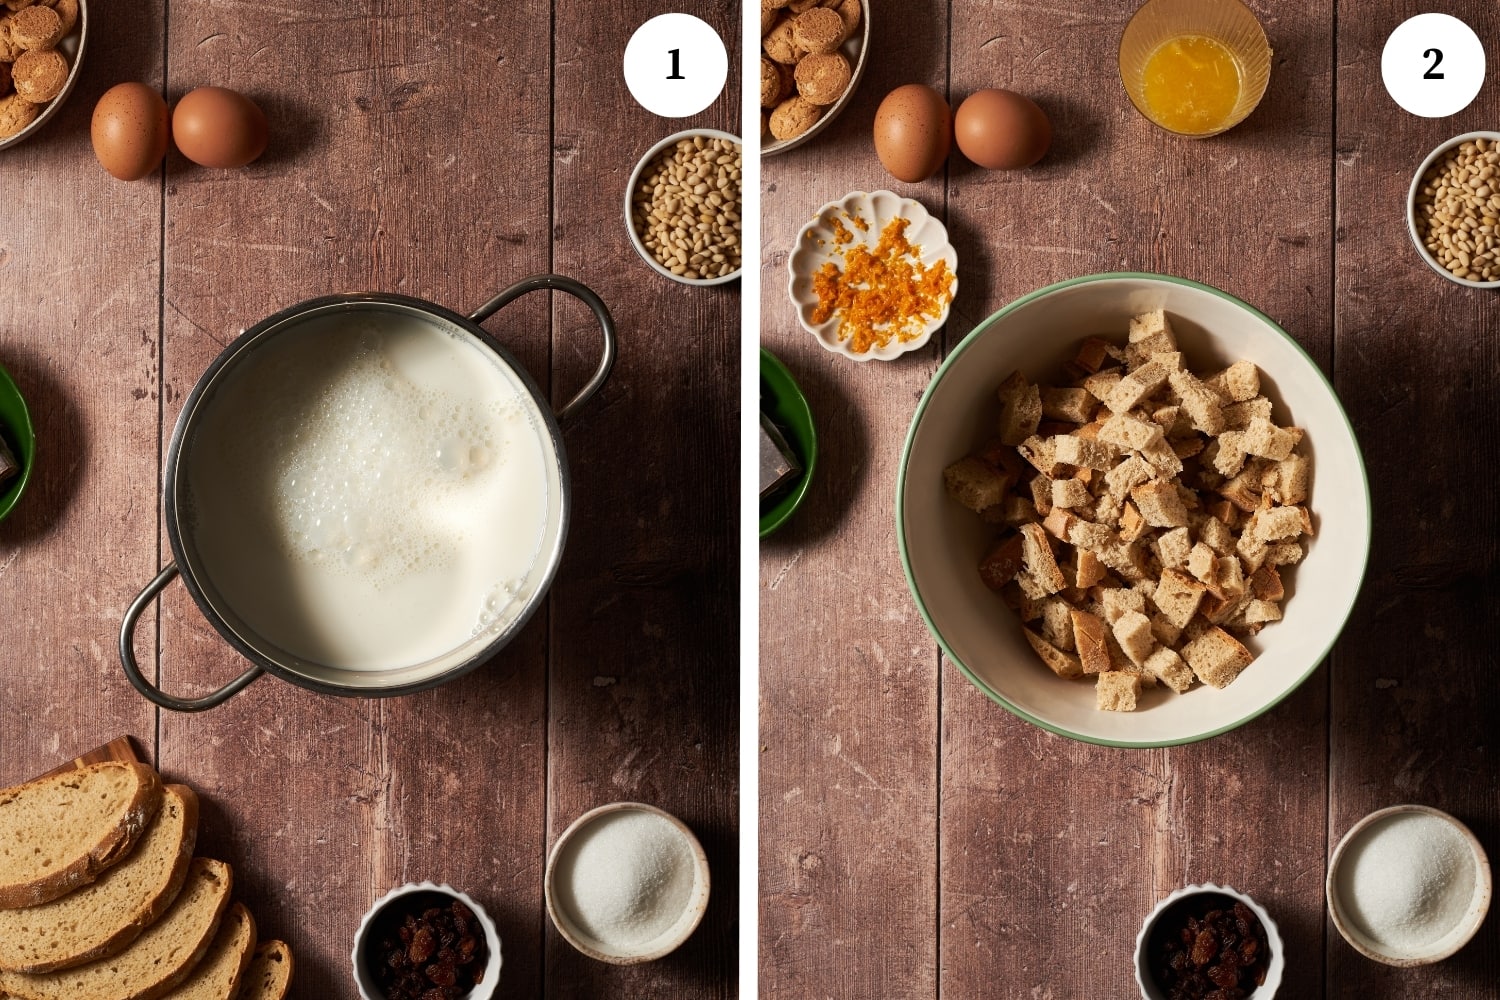
Bread and milk mixture: In a small saucepan, warm the milk slowly over a low flame until hot but without bringing it to a boil (photo 1). Cut the stale bread into little cubes and place in a bowl (photo 2).

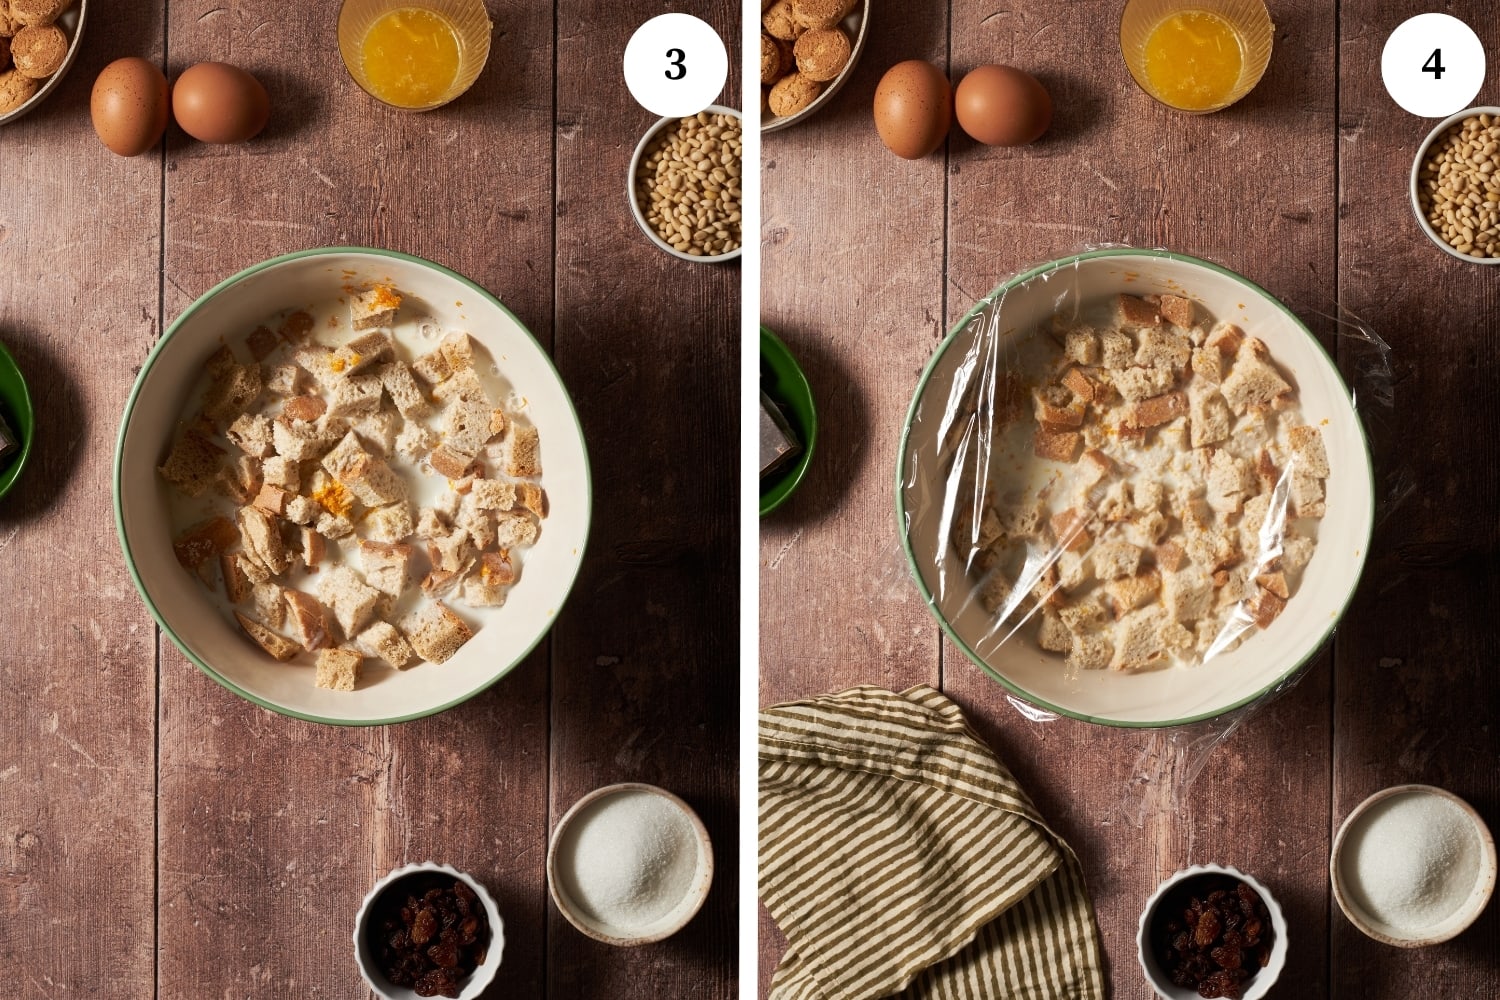
Put the grated orange zest (grated ahead of time) into the bowl with the bread. Add the warm milk to the bread and orange zest and combine everything together with a wooden spoon (photo 3). Cover the bowl with plastic wrap (photo 4) and then set aside to soak for 30 minutes, mixing occasionally.

Raisins and orange juice mixture: In another bowl, mix the raisins and orange juice (photo 5) that you squeeze ahead of time and set aside until later.

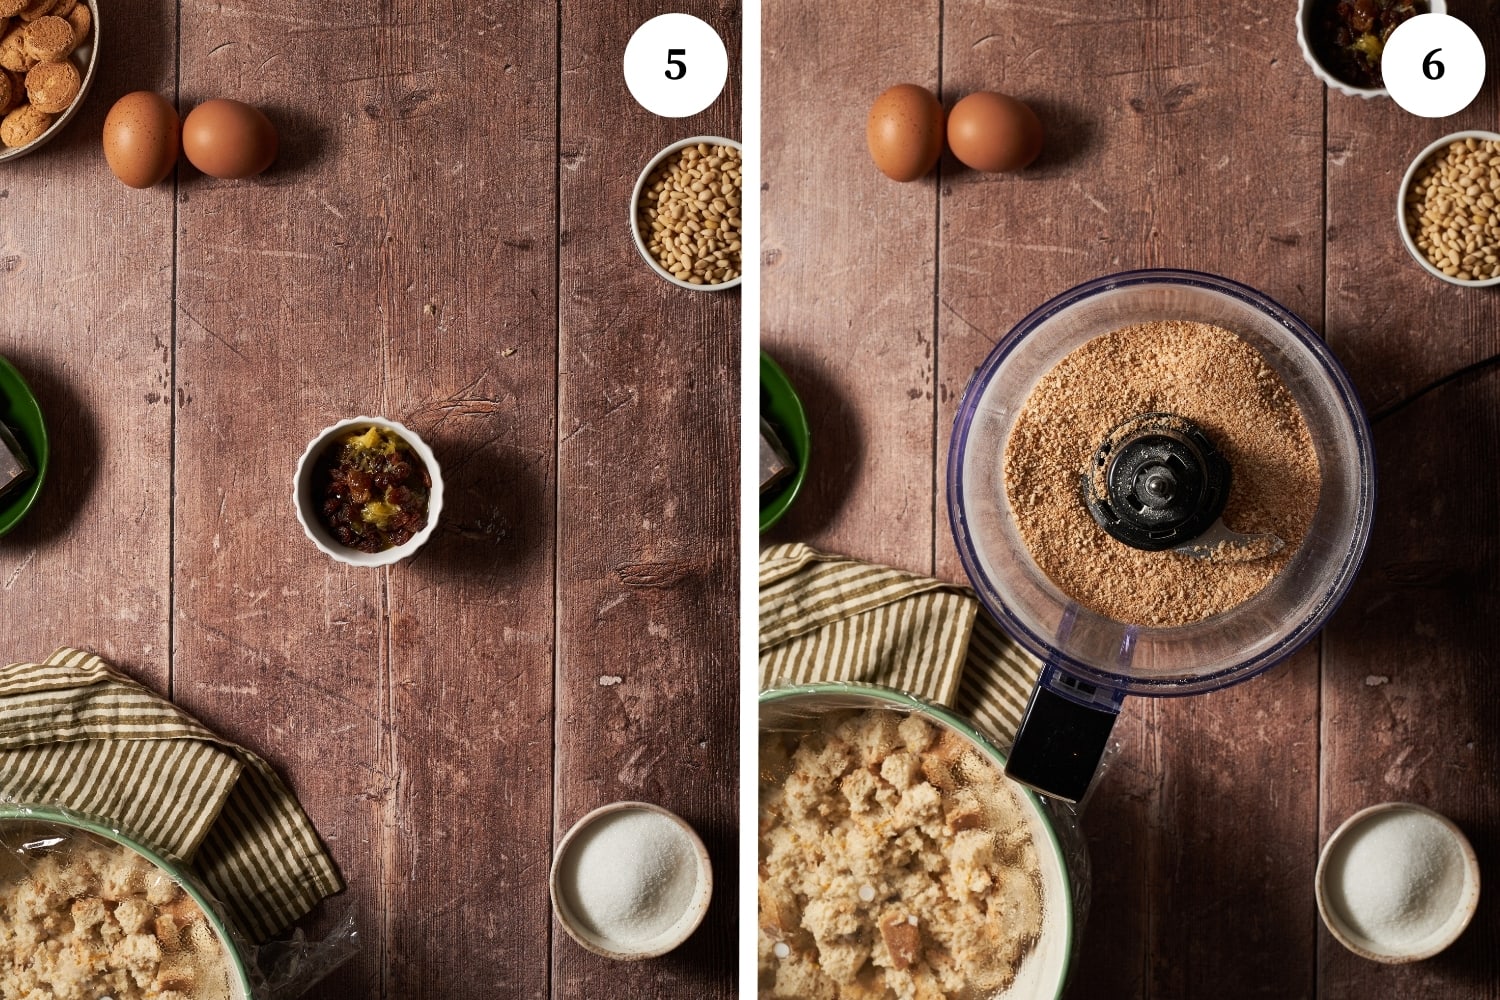
Prep and add additional ingredients to the bread: Grind the amaretti cookies into a powder, either with a blender or by placing them in a bag and crushing them by hand (photo 6). Add the ground amaretti to the bread mixture.

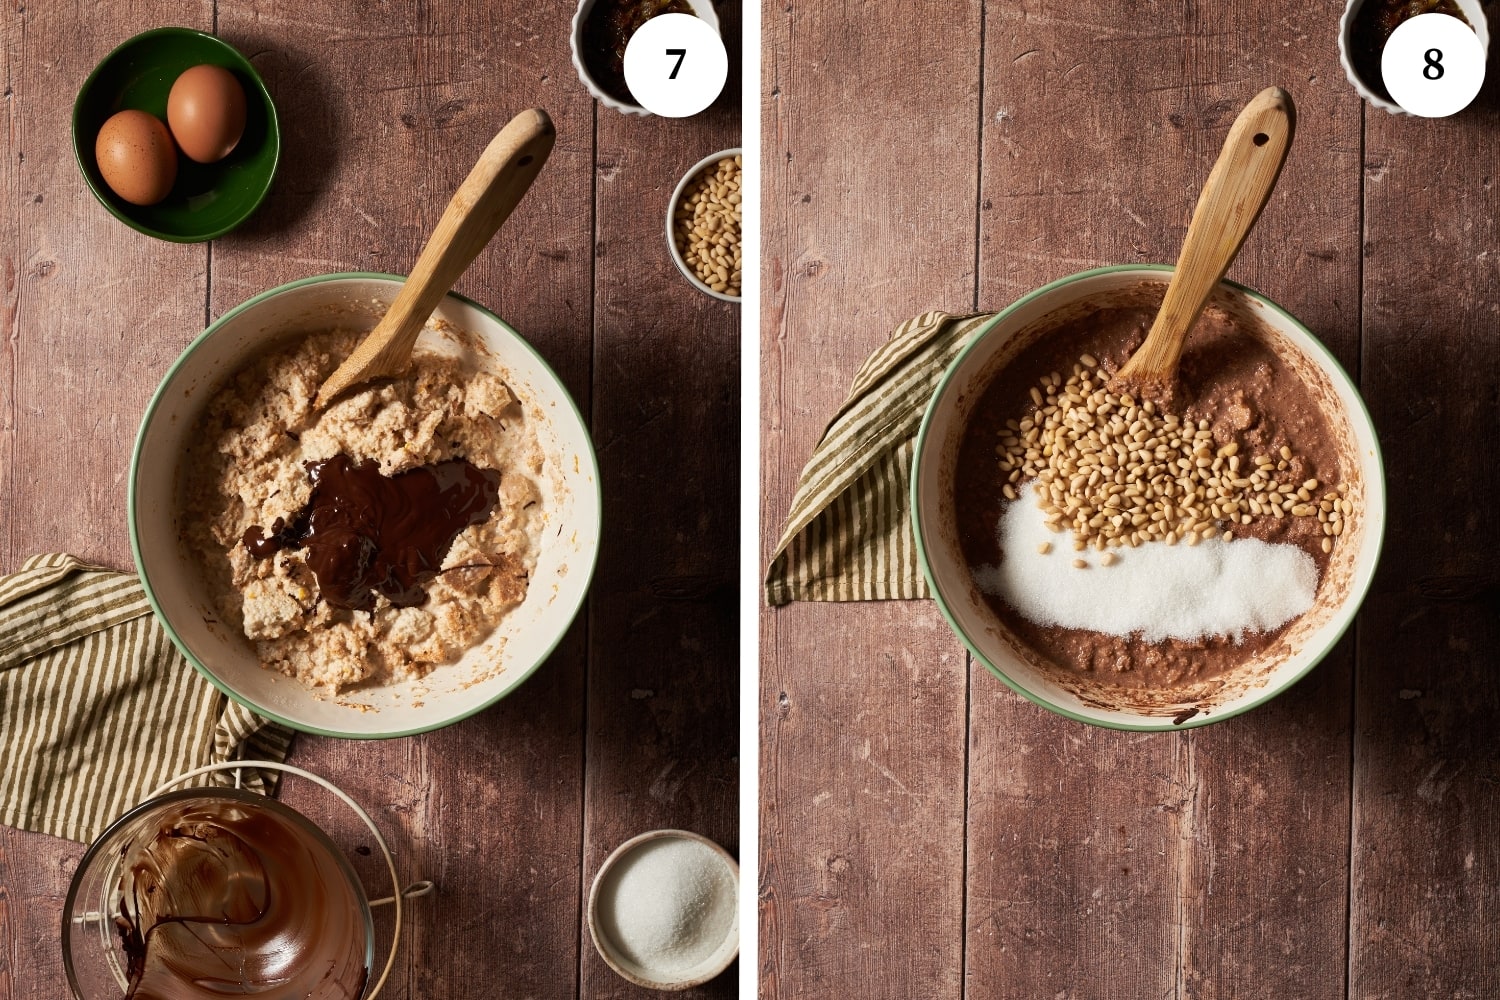
Melt and add the chocolate: Melt the chocolate in a bain-marie, double-boiler or microwave until liquid and stir into the bread mixture (photo 7).

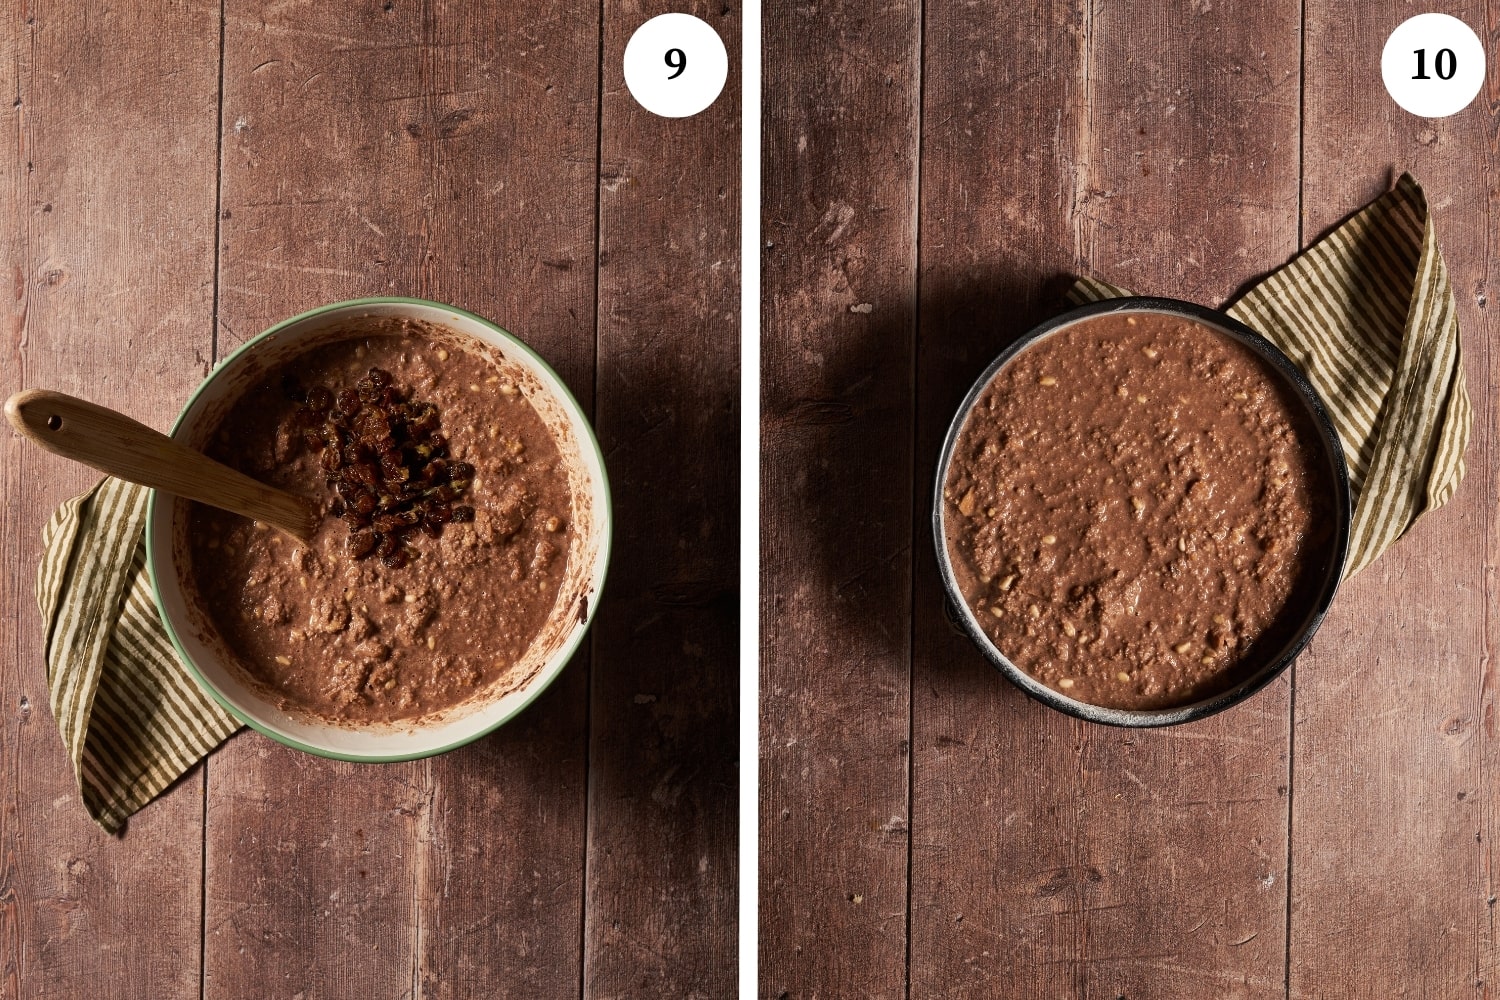
Add the last ingredients and mix all together: Beat the eggs and add them to the bread mixture. Now add the sugar and pine nuts to the bread mixture and stir (photo 8).

Drain and add the raisins: Using a sieve or colander, drain the orange juice from the raisins and add the raisins to the mixture (photo 9). You can discard the orange juice.

Prep and bake the cake: Grease and flour a 10-inch cake pan and then pour the mixture into it evenly (photo 10). Be sure your oven has reached 350°F. Place the cake in the oven on the middle rack for roughly 60 minutes, or until a toothpick comes out clean. When finished, take the torta paesana out of the oven and leave it to cool. Remove the torta paesana carefully from the cake pan and serve on a cake plate.

Expert tips to try

  • Use day-old bread. stale bread works best for this recipe. When I see that bread is getting stale, I often put it in a ziploc bag in the freezer to use later for these types of recipes. You should defrost it ahead of time and then let it sit out so that it dries out properly before using. Of course, do not use bread that has any mold on it.
  • Use cocoa powder instead. If you don’t have dark chocolate, you can use 50 grams of cocoa powder instead as a substitute.

Try something different with these variations

There are multiple variations of this recipe, and some of the ingredients can be replaced with whatever you have in your pantry.

  • Skip the raisins. For instance, if you don’t like raisins, you can use other dried berries or even fresh fruit.
  • Substitute with different nuts. Pine nuts are pricey these days, but they can be replaced with other nuts, such as walnuts or almonds.
  • Add some zing. For a richer cake you can add a shot of your favorite liqueur, such as rum or amaretto, or a small amount of regular or decaf coffee. Both these additions will make your cake even more moist.

Try other easy cake desserts:

FAQs

How long will torta paesana last?

Torta paesana will last for 2 to 3 days at room temperature in an airtight container.

Can I freeze torta paesana?

I don’t recommend freezing torta paesana.

What if I don’t have stale bread to use?

If you don’t have any day-old bread to use, you can cut the fresh bread into little cubes and spread them out on a baking sheet and leave them for a few hours uncovered at room temperature.

Step by Step PhotosMost of our recipes come with step by step photos, helpful tips and tricks to make it perfectly first time and even video!

Save

torta paesana with amaretti e cioccolato

#wprm-recipe-user-rating-0 .wprm-rating-star.wprm-rating-star-full svg * { fill: #343434; }#wprm-recipe-user-rating-0 .wprm-rating-star.wprm-rating-star-33 svg * { fill: url(#wprm-recipe-user-rating-0-33); }#wprm-recipe-user-rating-0 .wprm-rating-star.wprm-rating-star-50 svg * { fill: url(#wprm-recipe-user-rating-0-50); }#wprm-recipe-user-rating-0 .wprm-rating-star.wprm-rating-star-66 svg * { fill: url(#wprm-recipe-user-rating-0-66); }linearGradient#wprm-recipe-user-rating-0-33 stop { stop-color: #343434; }linearGradient#wprm-recipe-user-rating-0-50 stop { stop-color: #343434; }linearGradient#wprm-recipe-user-rating-0-66 stop { stop-color: #343434; }

4.72 from 7 votes

Save

Print Recipe
Pin Recipe

Torta paesana with amaretti and chocolate recipe

This traditional Italian cake made with amaretti cookies and dark chocolate is a delicious dessert full of simple ingredients you’ll find in the pantry of any home. The only exception to this is the amaretti cookies, but you should be able to find them at the local grocery store or Italian market.

Author:

Prep Time 40 minutes
Cook Time 1 hour
Total Time 1 hour 40 minutes
Servings 10 servings

Equipment

  • 1 small saucepan for heating milk
  • 1 zester or small grater for making grated orange zest
  • 2 medium bowls for mixing ingredients
  • 1 Wooden spoon for stirring
  • 1 blender to crush cookies, not required (you can also crush by hand)
  • 1 sieve or colander to drain the raisins
  • 1 10-inch cake pan to bake the torta paesana cake

Ingredients 

1x2x3x

MetricUS Customary
  • 300 grams stale bread
  • 1 liter whole milk
  • 2 medium eggs
  • 120 grams hard amaretti cookies
  • 100 grams dark chocolate
  • 120 grams granulated sugar
  • 70 grams raisins
  • 50 grams pine nuts
  • zest and juice of one orange

Instructions

  • Preheat the oven to 350° F.
  • In a small saucepan, warm the milk slowly over a low flame until heated through but without bringing it to a boil.
  • Cut the stale bread into little cubes and place in a bowl.
  • Add the pre-grated orange zest into the bowl with the bread.
  • Add the warm milk to the bread and combine everything together with a wooden spoon.
  • Cover the bowl with plastic wrap and set aside to soak for 30 minutes, mixing occasionally.
  • In another bowl, mix the raisins and orange juice (pre-squeezed) and set aside until later.
  • Grind the amaretti cookies into a powder, either with a blender or by placing them in a bag and crushing them by hand. Add the ground amaretti to the bread mixture.
  • Melt the chocolate in a bain-marie, double-boiler or microwave until liquid and stir into the bread mixture.
  • Beat the eggs and add them to the bread mixture.
  • Now add the sugar and pine nuts to the bread mixture and stir.
  • Using a sieve or colander, drain the orange juice from the raisins and add the raisins to the mixture. You can discard the orange juice.
  • Grease and flour a 10-inch cake pan and then pour the mixture into it evenly.
  • Place it in the oven on the middle rack for roughly 60 minutes, or until a toothpick comes out clean.
  • When finished, take the torta paesana out of the oven and leave it to cool.
  • Remove the torta paesana from the cake pan and serve on a cake plate.
Tried this recipe?Mention @nonnabox or tag #nonnabox!

This article https://ift.tt/EGKd5eH appeared first on Nonna Box

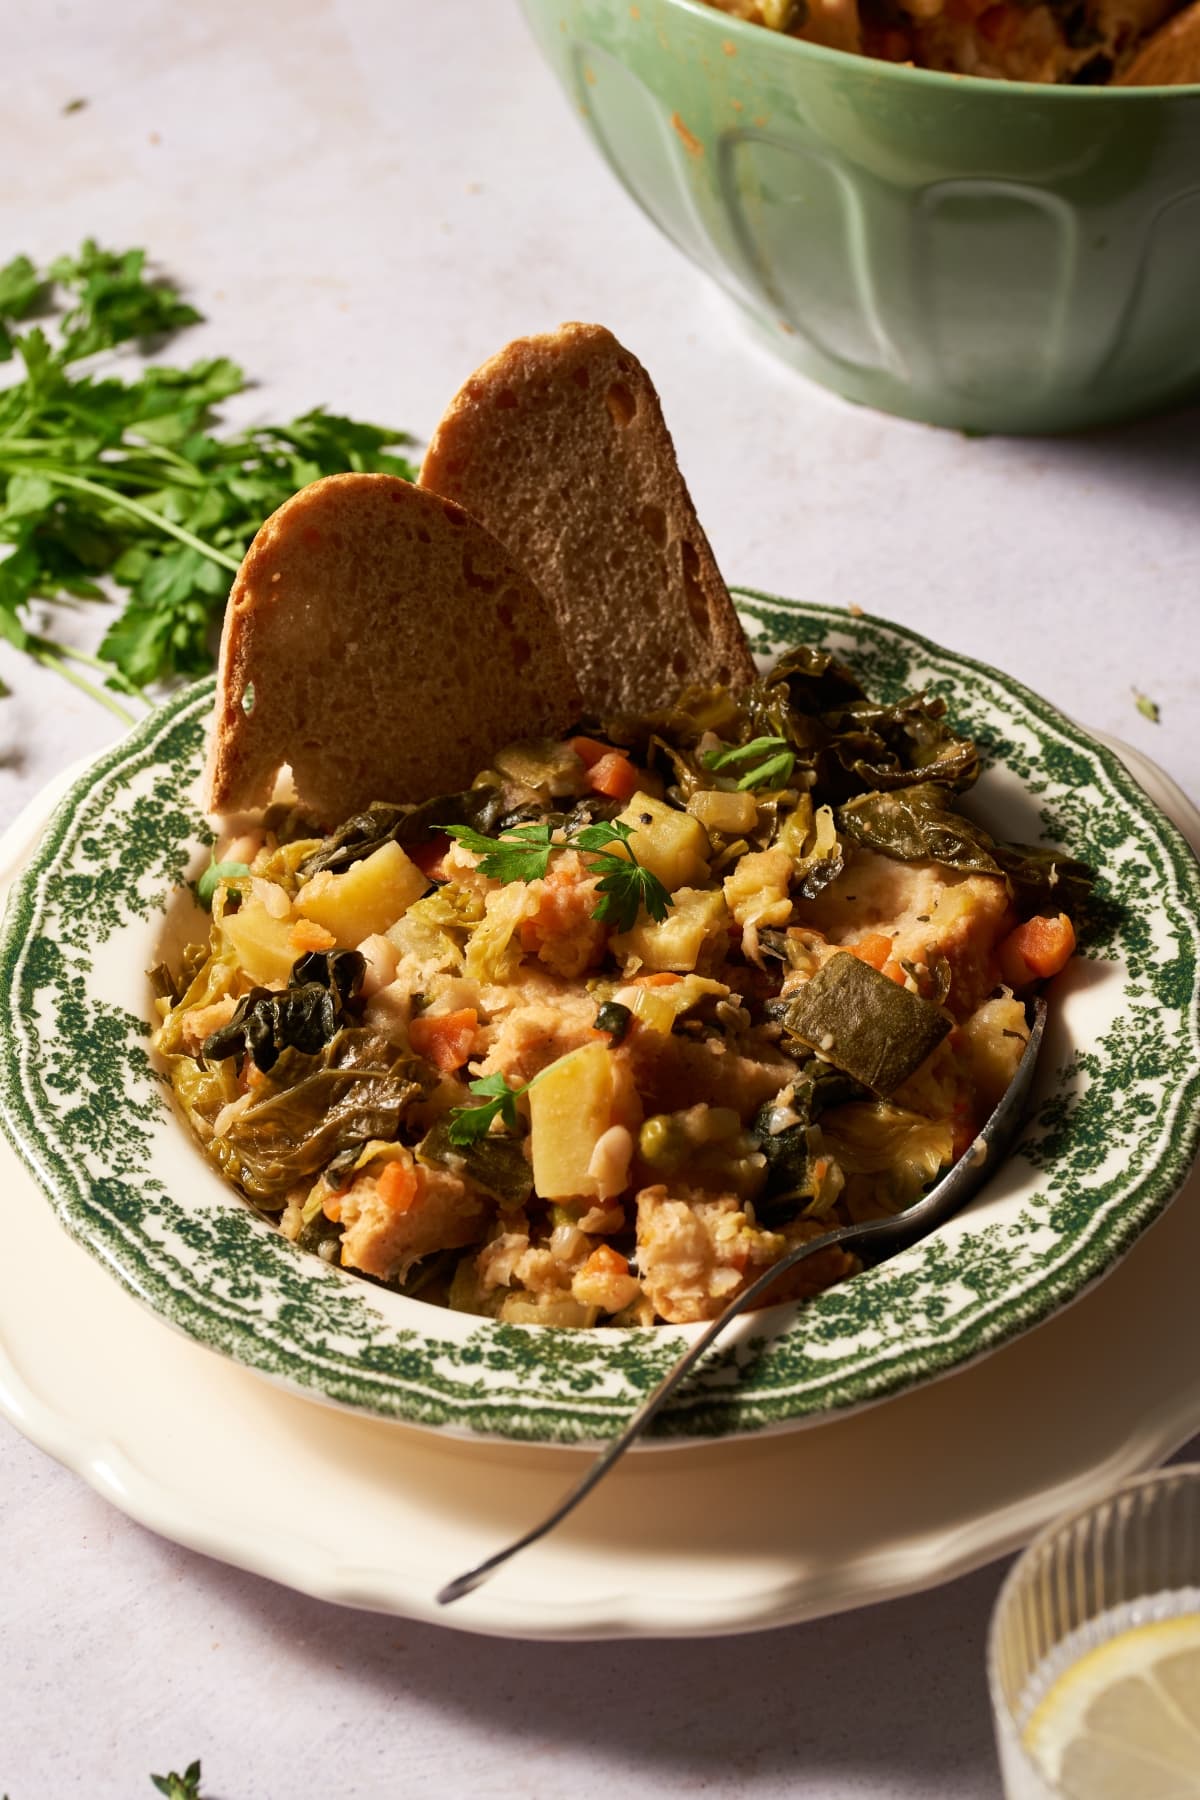
Ribollita Hearty Tuscan Bread Soup Recipe

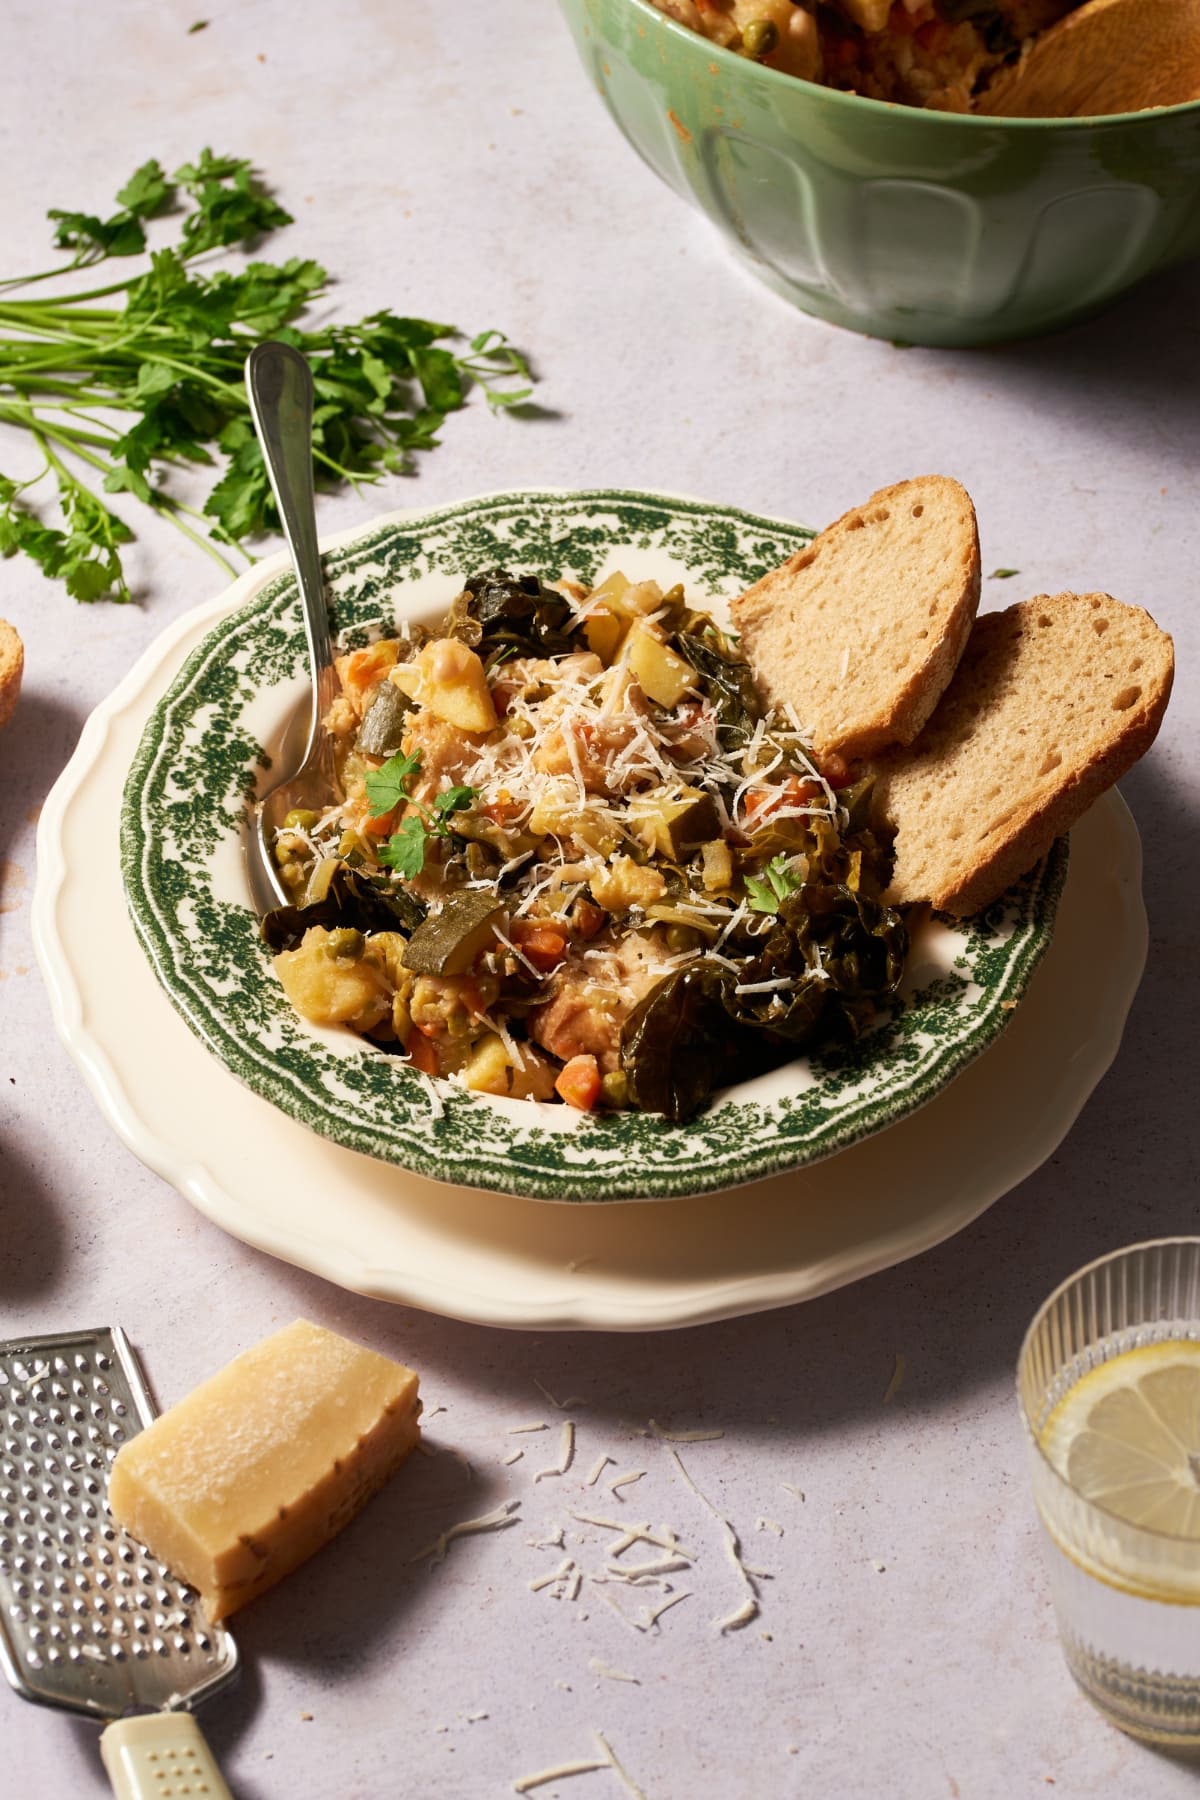
Ribollita is a typical Tuscan winter soup that is quite nutritious and great at warming you up on chilly days. It is a semi-solid soup prepared with black cabbage and beans.

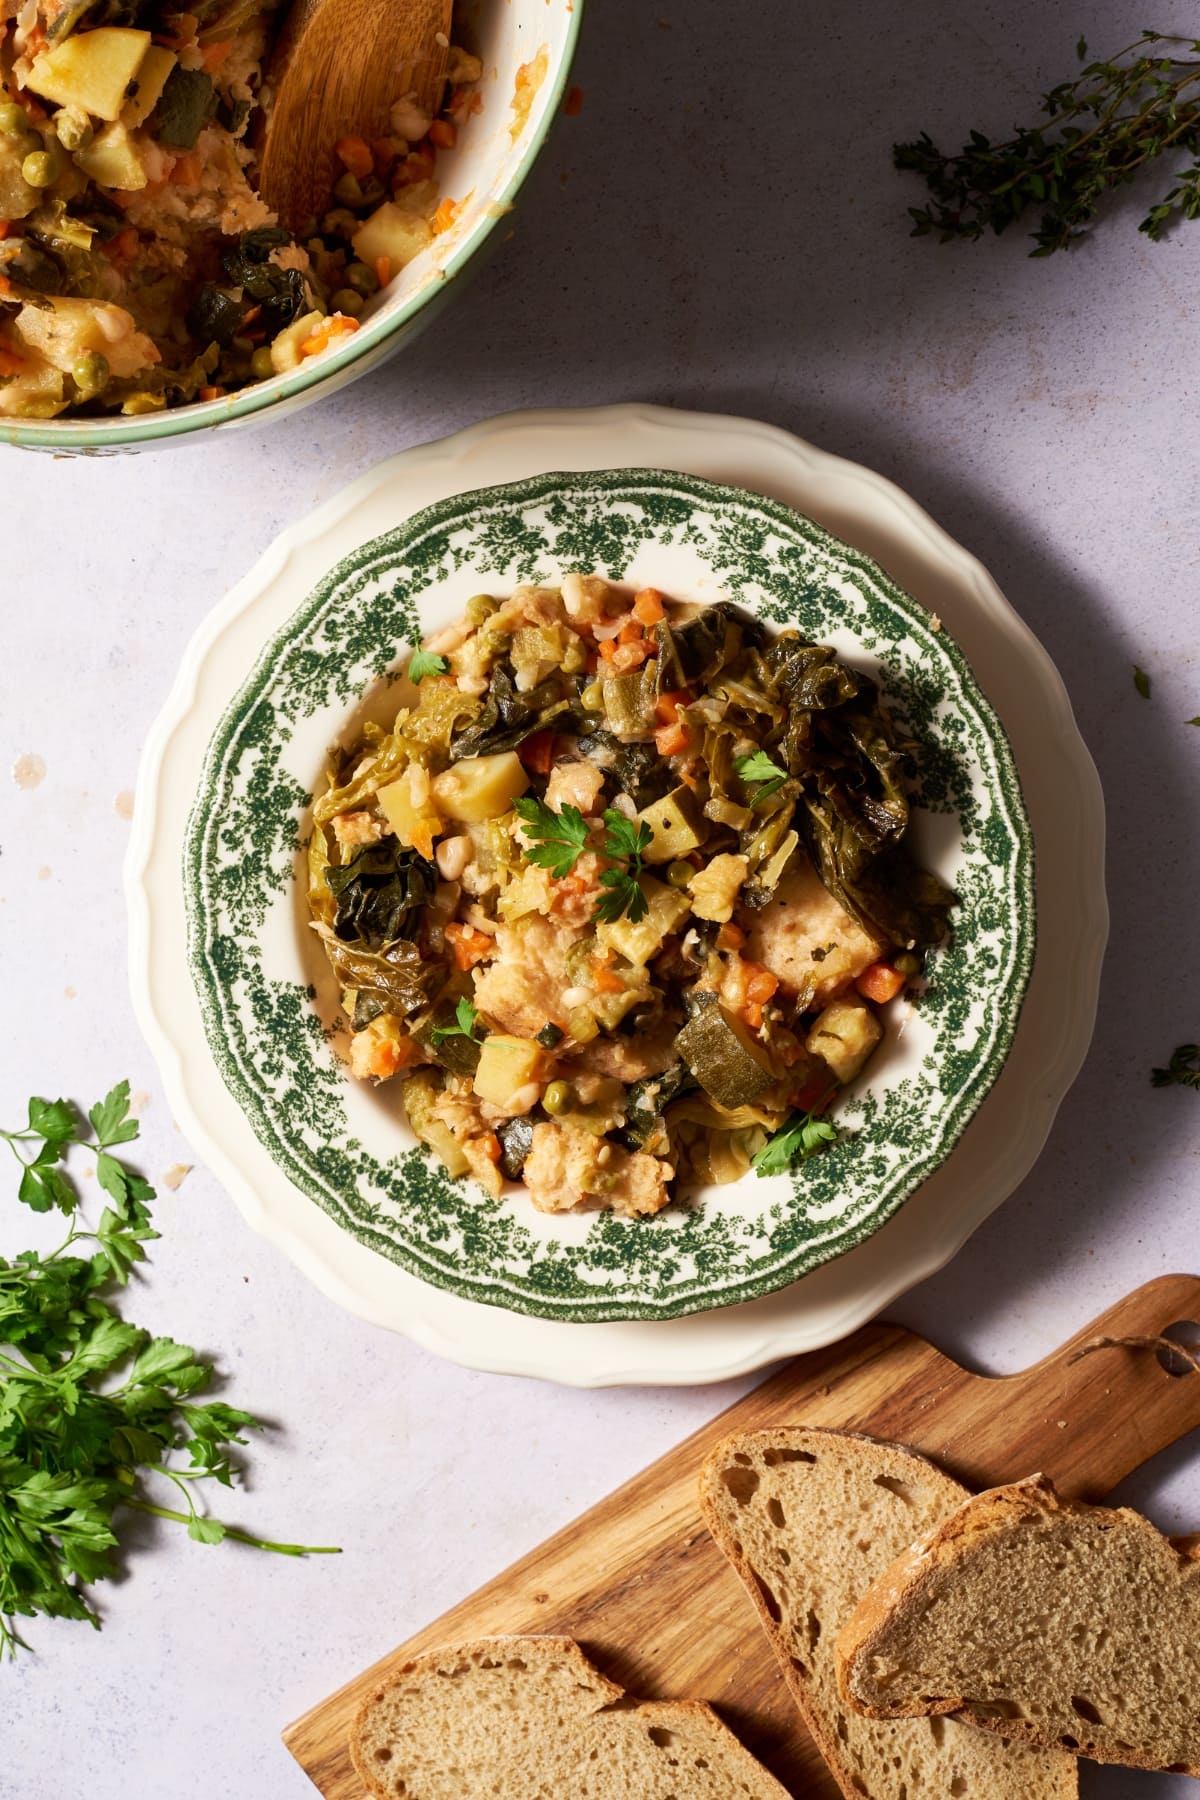
ribollita tuscan soup recipe in a dish

Ribollita literally translates to “boiled a second time.” Thus, as the name implies, real ribollita must be cooked twice if it is going to be considered traditional. The more the soup is cooked, the tastier it becomes.

Ribollita is part of a group of earthy Tuscan soups like acquacotta and pancotto.

Ribollita has peasant origins, with similar earlier versions of bread and vegetable soups that in times past were common among the poor of Tuscany. It was particularly popular in Pisa, Siena, Arezzo and Florence. As is common for peasant dishes, there is no “exact” recipe for ribollita, however there are several key ingredients that create the unmistakable foundation for this delicious dish. These include black cabbage (Tuscan curly black kale), cannellini white beans, and stale Tuscan bread.

Despite there being no “right” recipe, we would like to share our favorite ribollita recipe and then invite you to make changes, additions and improvements, as this centuries old dish continues to change and grow with us in modern times.

The most important thing to have on hand is a knife for chopping and a big soup pot.

  • wooden spoon
  • sharp knife
  • cutting board
  • food processor (optional)
  • soup pot, large dutch oven or slow cooker (optional)
  • soup tureen with lid

From start to finish you can have this soup on the table in under 1.5 hours and you will most likely have leftovers to reheat the next day for lunch!

Ingredients

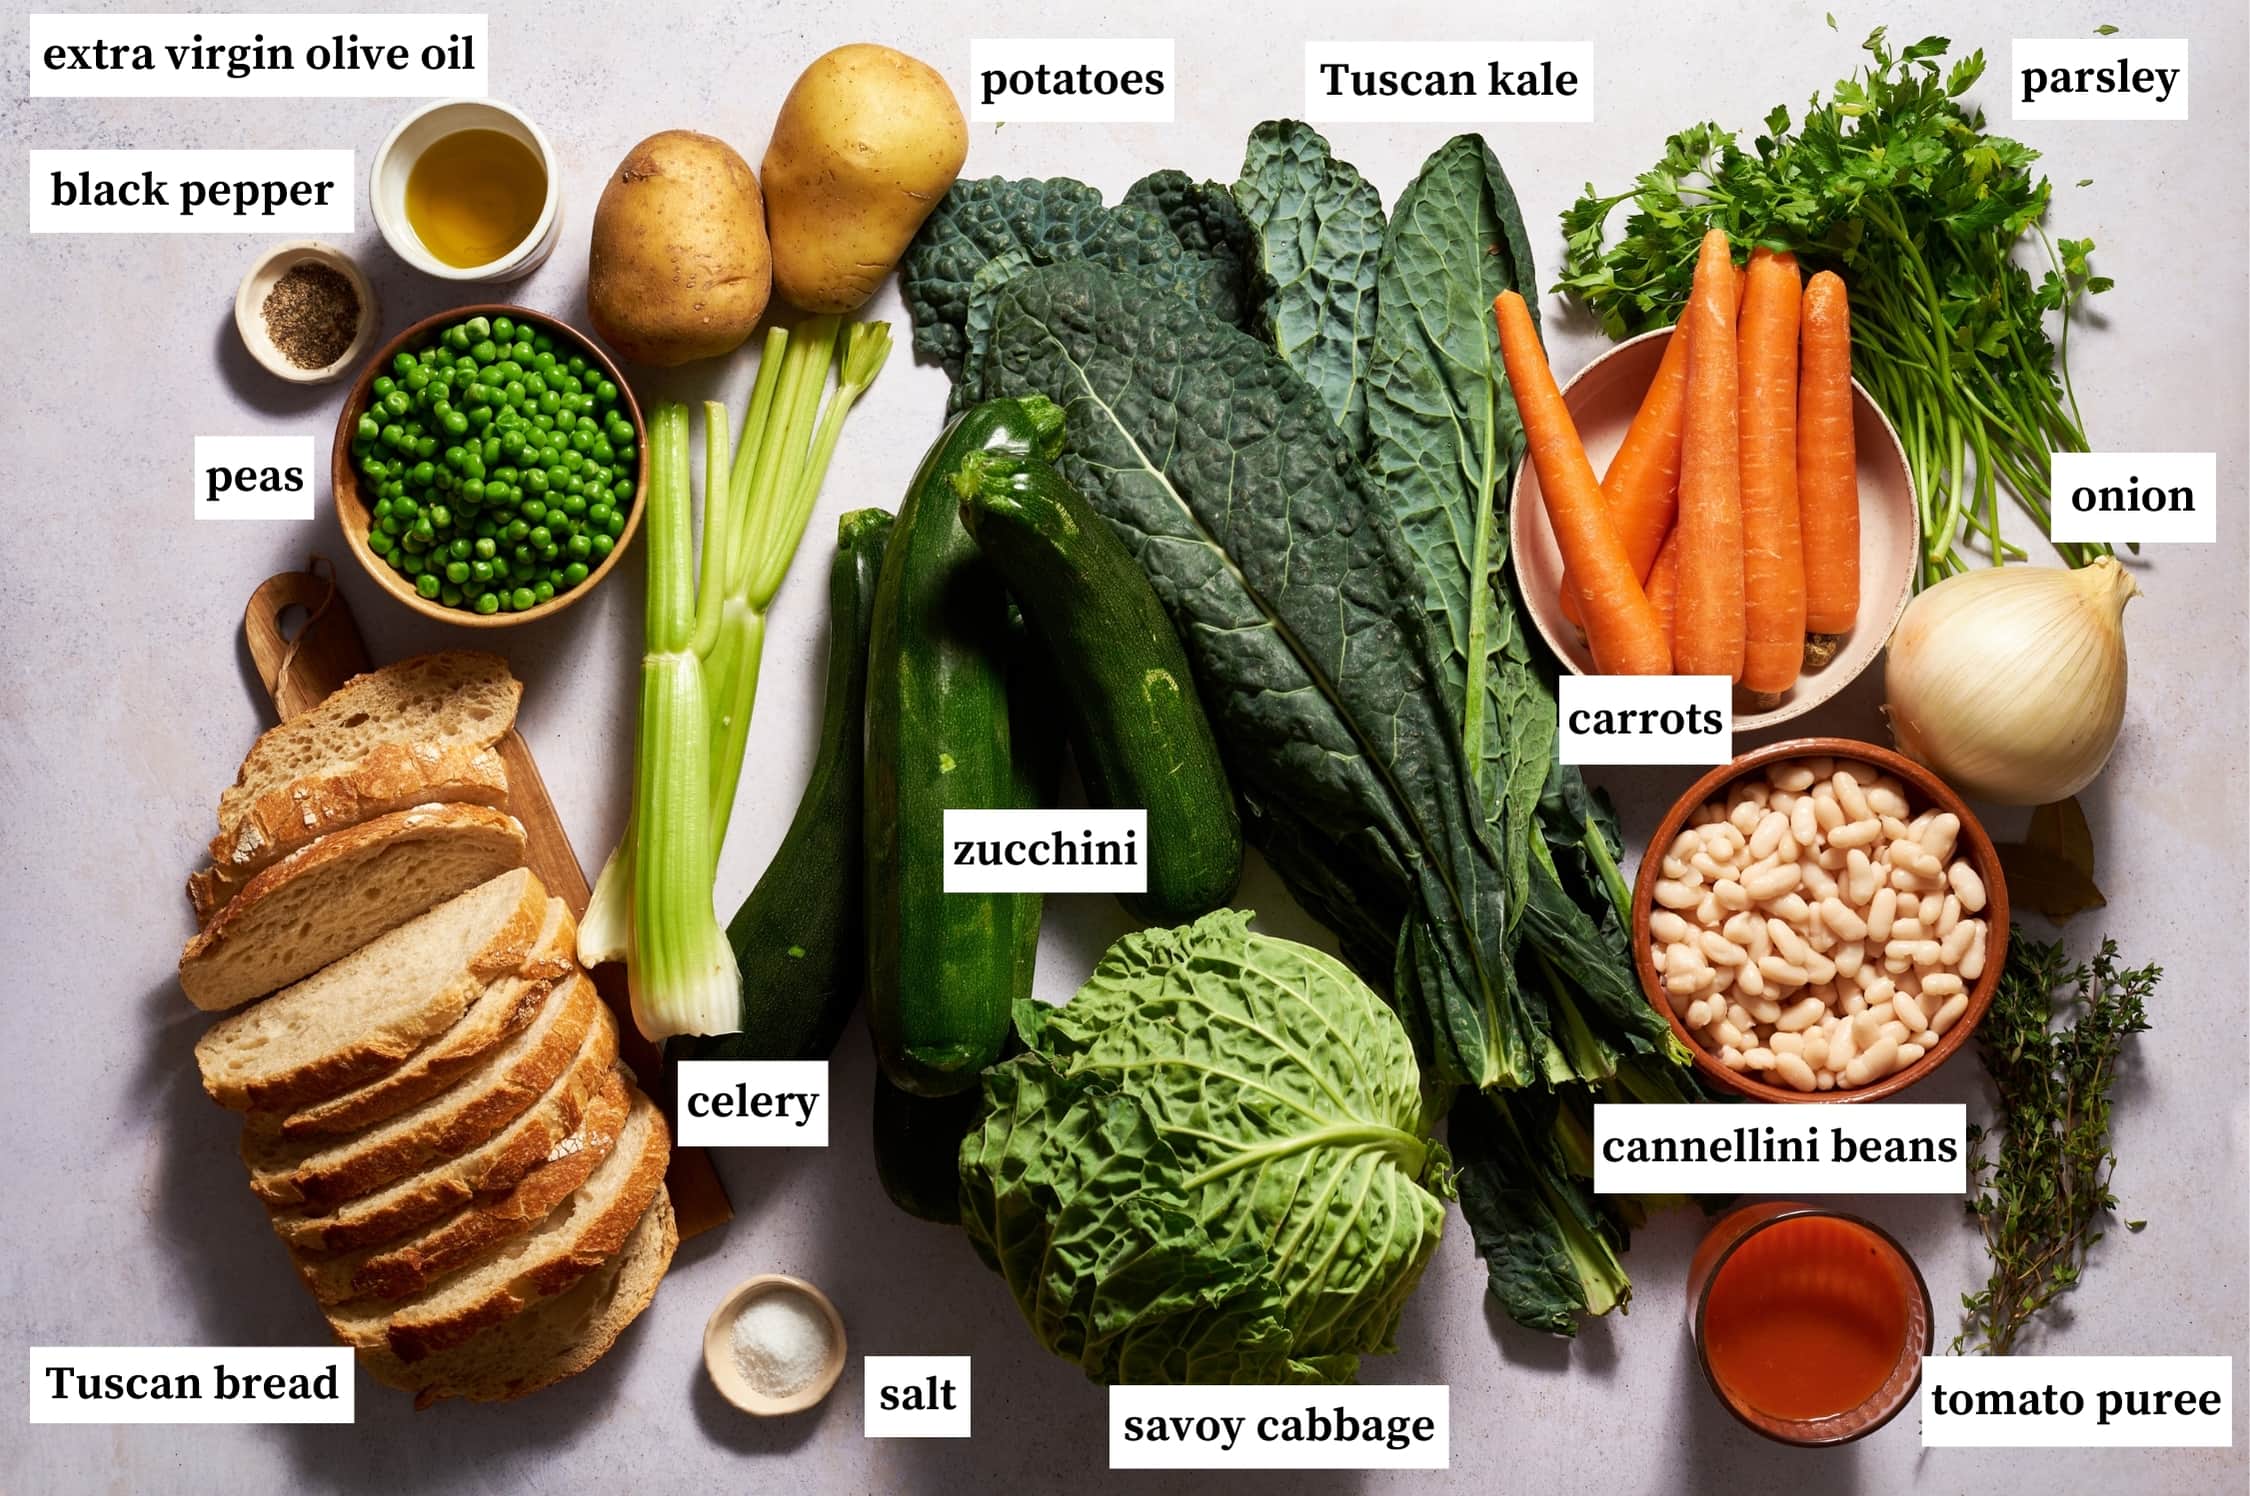
You might have to head to the store for this one, but perhaps not because kale has gotten so popular lately that there is a chance you will have some in your fridge. The list is long but the ingredients are all inexpensive, easy to find and delicious when combined.

  • Celery (1 stick) – wash, remove any strings and chop very finely to use to create the “soffritto” base of the soup.
  • Onion (1) – any color of onion will do, our preference is for a mild golden onion chopped very finely.
  • Carrots (400 grams) – a super important part of the soffritto is the carrot. It should be chopped very finely, you can even use a food processor and put the celery, onion and carrot together and blend into a very fine mixture without turning it into mush.
  • Tuscan kale (300 grams) – also called Tuscan cabbage or black kale, this is the curly dark kind with lots of texture on the leaves.
  • Savoy cabbage (1 small head) – rinsed and thinly sliced.
  • Cannellini beans (500 grams) – use cooked, canned cannellini beans or another small, mild-flavored white bean.
  • Potatoes (500 grams) – any kind of potato is fine for this recipe, chopped into smallish cubes.
  • Peas (200 grams) – frozen peas have the best flavor and color after fresh peas and can be added directly to the recipe without defrosting.
  • Zucchini (4-5 medium size) – dark or light-skinned zucchini is fine, just be sure to remove the seeds if they are large or there is extra flesh around them.
  • Tuscan bread (500 grams) – besides being from Tuscany, the main characteristic of this bread is that it doesn’t have salt. The recipe calls for day-old bread that is dry and stale and will absorb less moisture and stay intact when immersed in the soup.
  • Tomato puree (300 grams) – this can be substituted with 3 peeled and diced tomatoes or a very small can of canned tomatoes.
  • Fresh parsley (as desired) – feel free to add your own favorite herbs such as bay leaf.
  • Extra virgin olive oil (for soffritto and for drizzling) – the absolute queen of the Italian kitchen, you will need some seriously good extra virgin olive oil and don’t forget to drizzle it on top.
  • Kosher salt (as needed) – you can use to taste.
  • Black pepper (as desired) – add pepper or even crushed red pepper flakes if you would like something a bit spicier.
  • Parmesan cheese + Parmesan rind (optional) – some people like to add a dusting of grated Parmesan cheese on top. Others like to add the Parmesan rind, which has been cleaned, directly into the hot soup so that it melts.

How to make ribollita step-by-step

Whip up a rich and hearty meatless dinner tonight straight from the Tuscan peasant kitchen. Here is a step-by-step breakdown of how to make it at home.

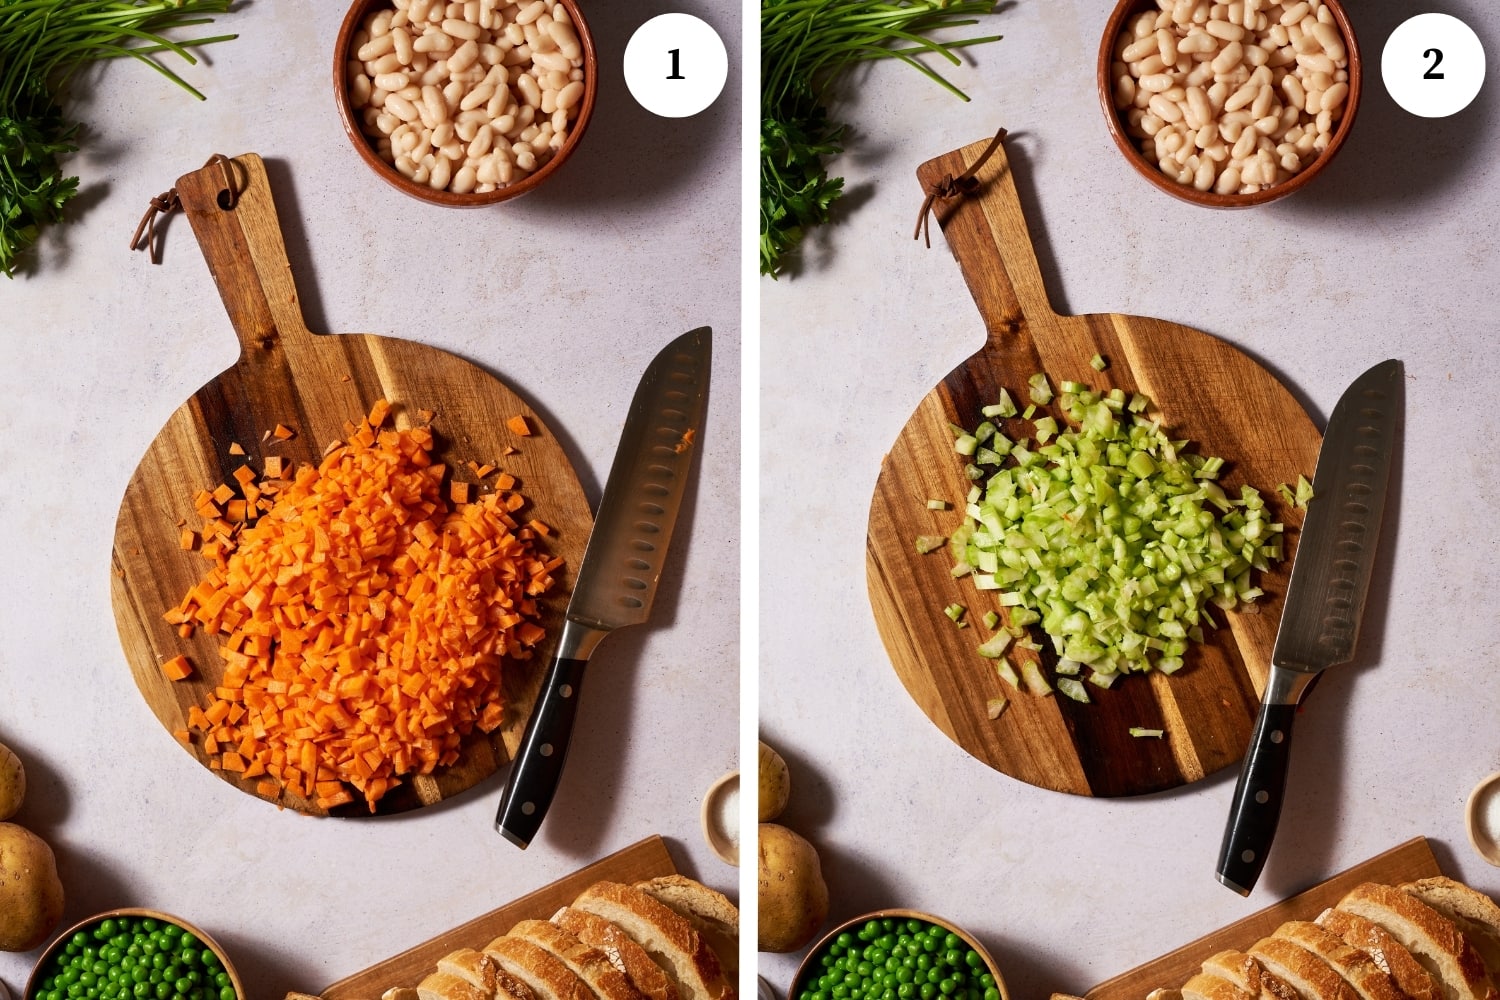
Cut the onion, celery, and carrots into small pieces to make the “soffritto” base for the soup.

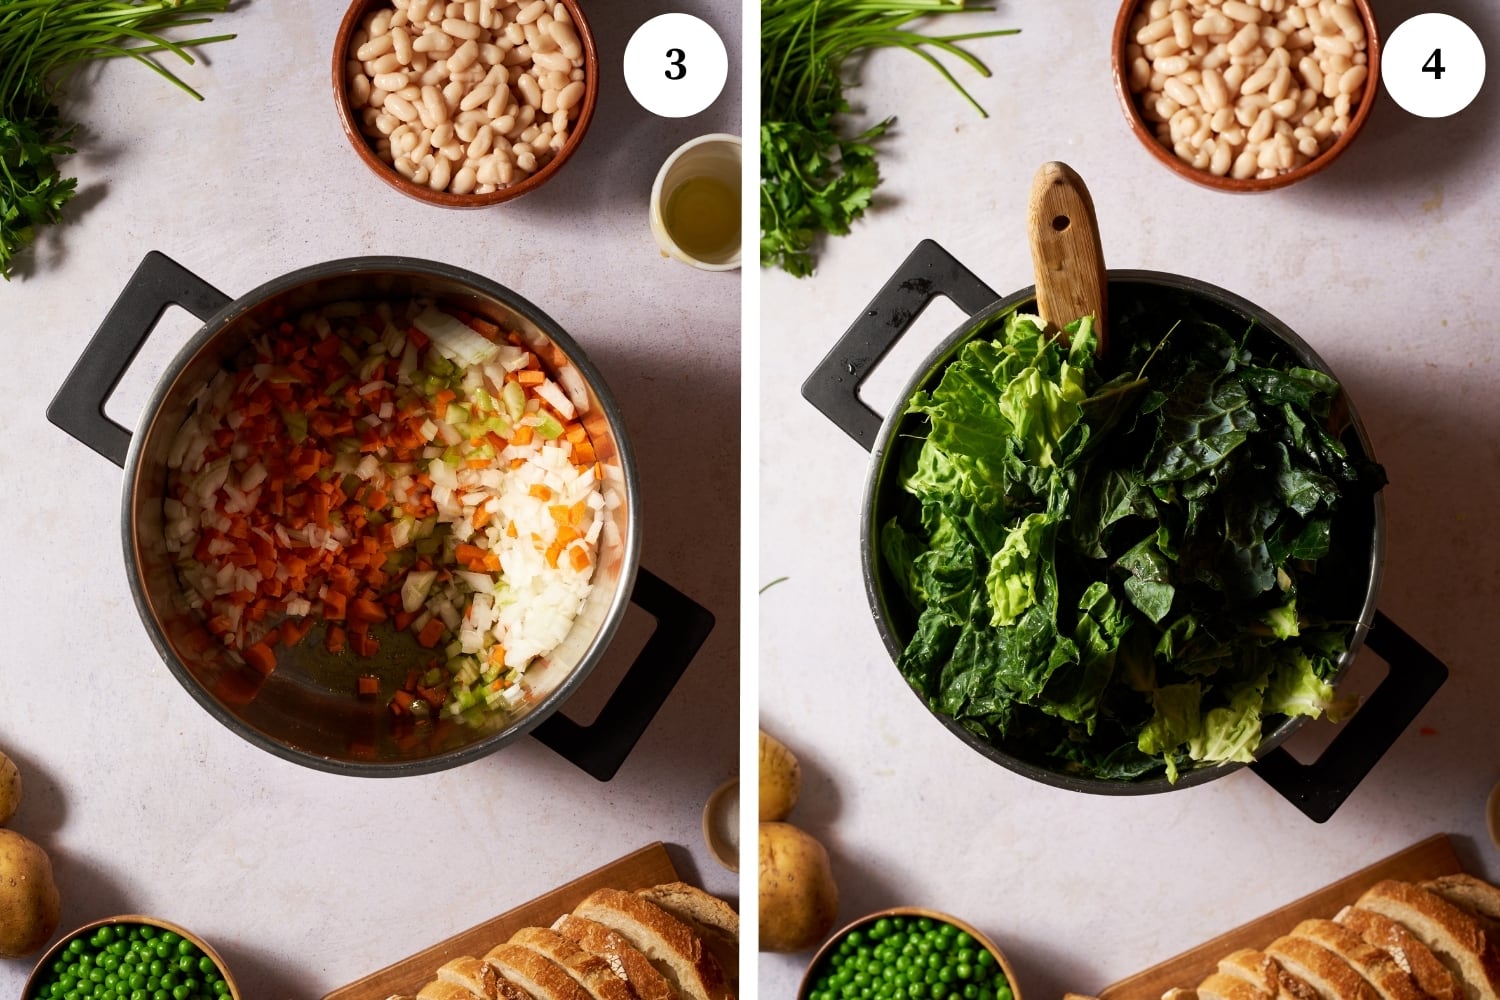
In a large pot, heat the olive oil and saute the onion, celery, and carrots over medium heat (photo 3) once softened, add the black kale and the savoy cabbage (photo 4).

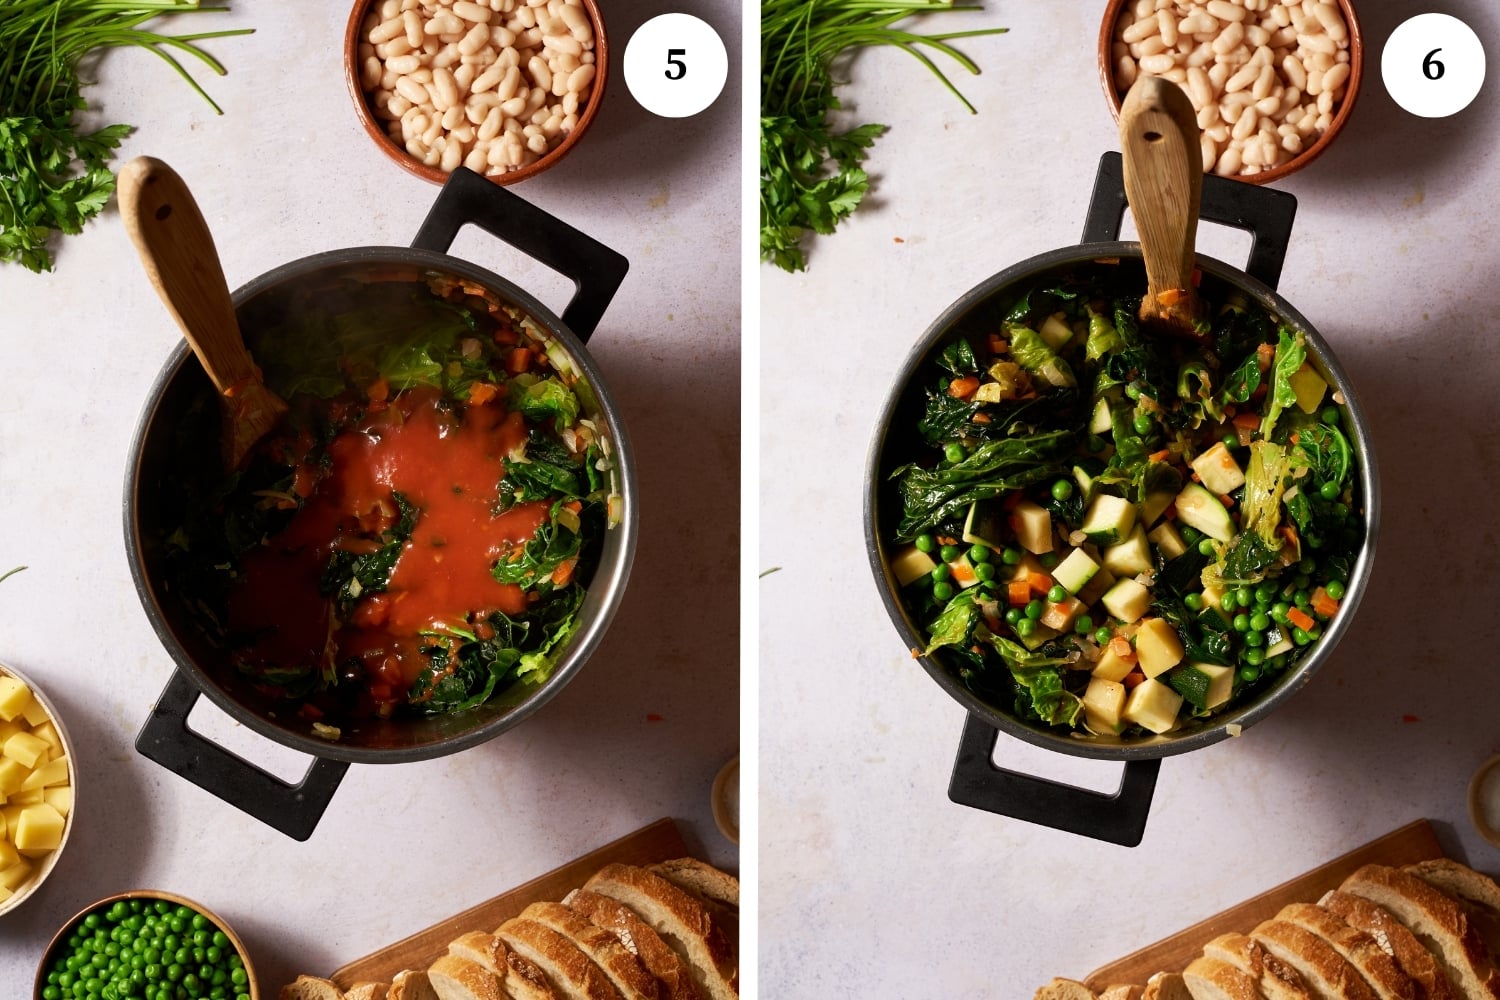
As soon as the cabbage begins to cook, add the tomato puree or peeled tomatoes (photo 5), then the potatoes, chopped zucchini, and peas (photo 6).

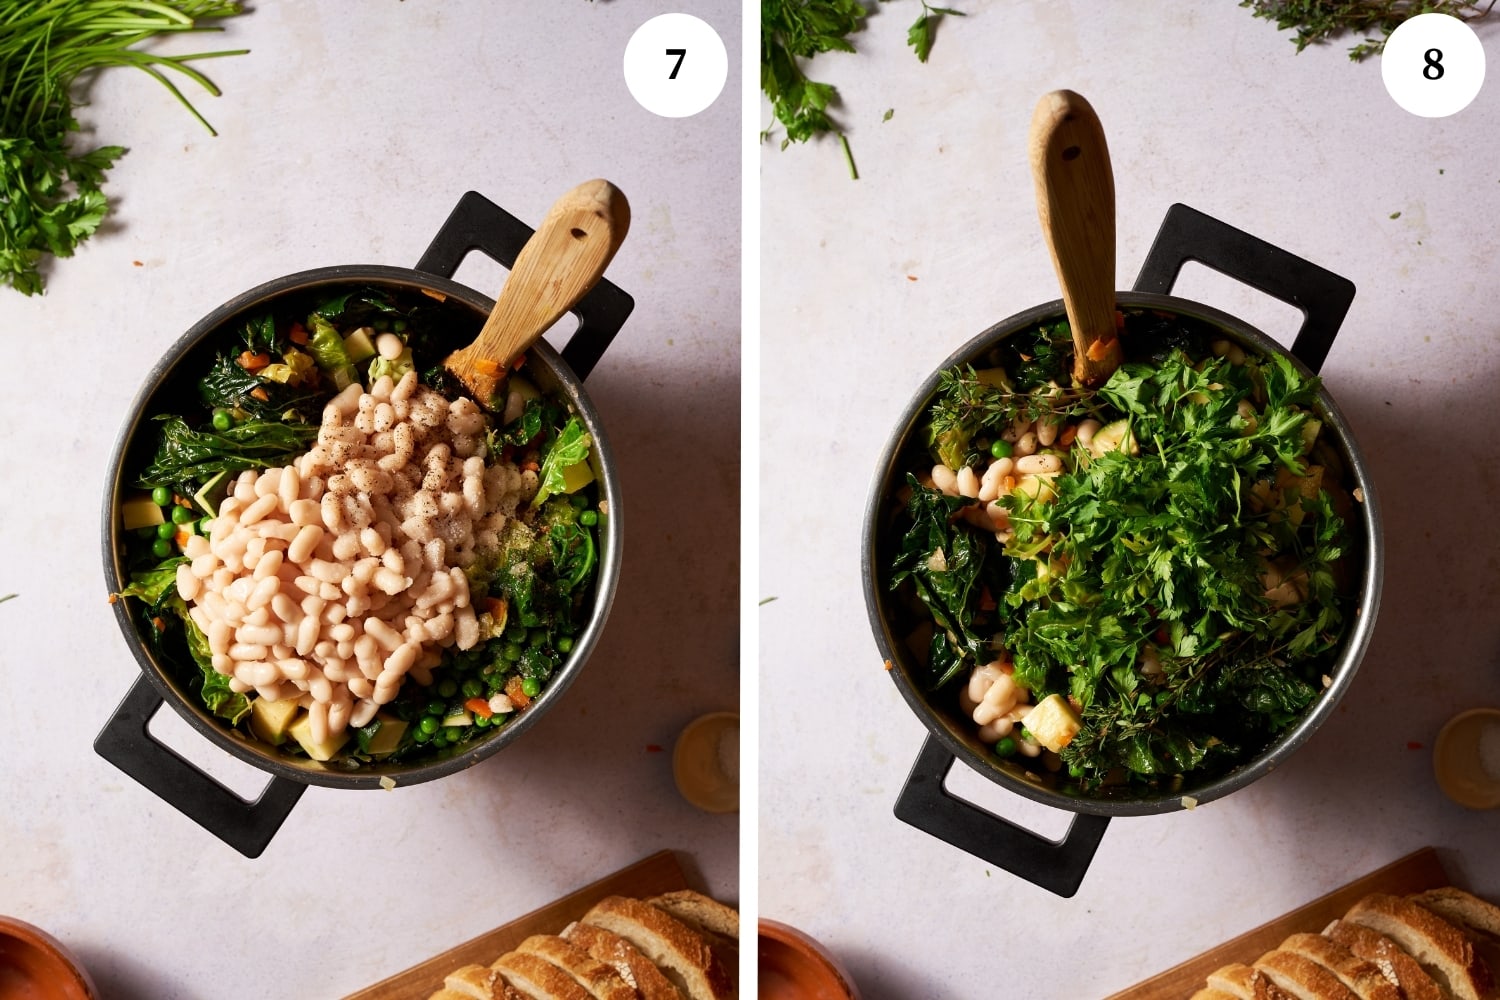
Now add the cannellini beans (photo 7) and add salt, and black pepper, and adjust the seasoning as desired such as parsley, fresh thyme, bay leaf, (photo 8) and cook stirring occasionally over low heat for about 1 hour, then turn off.

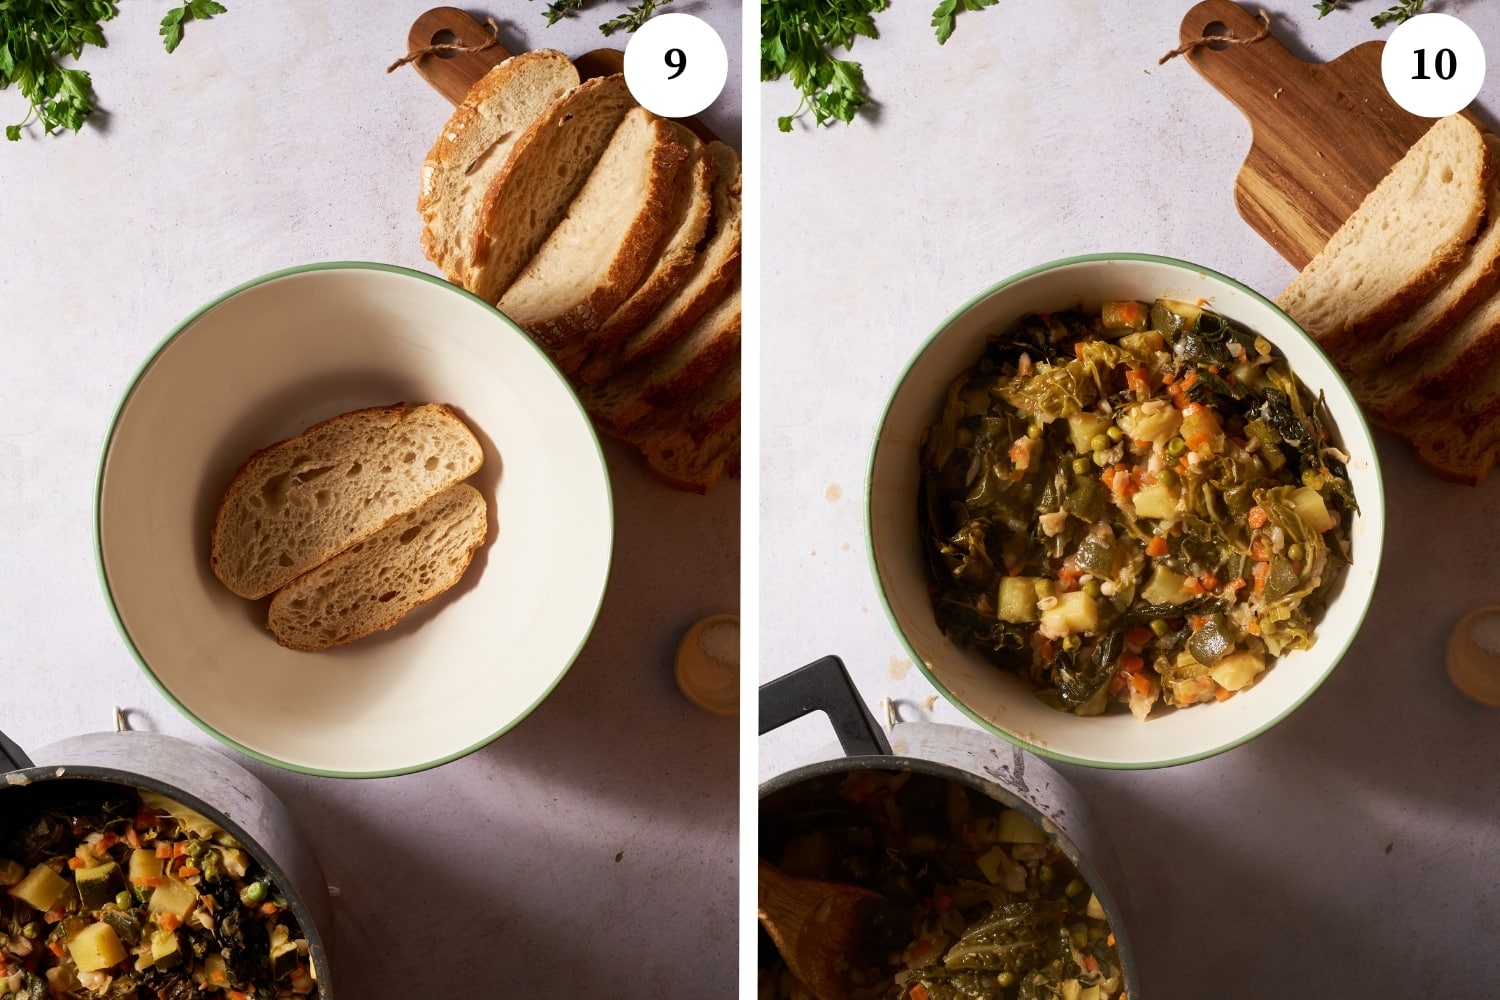
Slice the day-old bread into thin slices. Place a layer of bread in the bottom of a soup tureen or a large deep bowl (photo 9). Then alternate between pouring the cooked vegetables and a layer of bread until you have filled the tureen (photo 10). You can remove the bay leaves if you added them.

Cover and let sit for 20 minutes.

After resting, the soup is ready to serve. Remove a portion of the soup and serve in individual bowls with a sprinkling of Parmesan cheese if desired.

Don’t forget to add a drizzle of olive oil before eating this incredible comfort food.

Expert tips for the perfect ribollita

  • Use stale bread. While it may seem counterintuitive that day old bread is better than fresh bread, at least for this recipe it is certainly the case. Be sure to use a crusty, bread that is very dry, you can also lightly toast it before using it in this recipe if isn’t quite old enough. If the bread is too fresh it will be mushy and not hold up in the soup.
  • Puree part of the beans. Some recipes call for mashing or pureeing the beans or doing half pureed beans and the remaining whole beans. This will give the soup a nice, creamy texture.

Variations of ribollita

  • Use dried beans. Instead of starting with already cooked beans you can start with dry beans, you will need 250 grams. You will need to start by soaking them overnight. Then you should rinse them, but them in a pot covered completely by water and cook until soft. You can drain and add to your soup at the same time you would add canned beans.
  • Get spicy. While not typically spicy, if you are a lover of all things hot, you can add some crushed red pepper flakes or a red pepper while cooking for a spicy variation.
  • Get garlicky! Garlic lovers usually want to put it everywhere, and it actually is quite a tasty addition to ribollita so feel free to add it. We like to finely mince a clove or two and add it to the carrots and celery mixture when it is almost done sauteing.

Try other soup recipes

FAQs

How should I store and reheat ribollita?

This soup is really great reheated the next day. We recommend storing the soup in an airtight container for up to 3 days in the refrigerator. It is best stored without the bread, so you can remove and toss any remnants of bread before storing and then add new stale bread slices before serving the next time.

What is the history of ribollita?

Ribollita is a true symbol of “poor” Tuscan cuisine. The predecessor to the modern ribollita recipe was already popular during the Middle Ages. At the time, noblemen had meat served over unleavened bread for meals which was then given to the servants who boiled the leftovers with whatever additional ingredients were available from the garden.  These usually included herbs and vegetables such as celery, carrots, and cabbage. The soup was reheated and consumed over the following days. Today the recipe has been modernized and become a true symbol of Tuscan cuisine.

What is soffritto?

Soffritto is an Italian word that means “lightly fried”. It refers to the cooking process of finely chopping onion, carrot and celery and then sauteing the mixture in olive oil for several minutes and then using this as the base for sauces and soups to add depth and flavor to the dish.

Step by Step PhotosMost of our recipes come with step by step photos, helpful tips and tricks to make it perfectly first time and even video!

Save

ribollita tuscan soup recipe in a dish

#wprm-recipe-user-rating-0 .wprm-rating-star.wprm-rating-star-full svg * { fill: #343434; }#wprm-recipe-user-rating-0 .wprm-rating-star.wprm-rating-star-33 svg * { fill: url(#wprm-recipe-user-rating-0-33); }#wprm-recipe-user-rating-0 .wprm-rating-star.wprm-rating-star-50 svg * { fill: url(#wprm-recipe-user-rating-0-50); }#wprm-recipe-user-rating-0 .wprm-rating-star.wprm-rating-star-66 svg * { fill: url(#wprm-recipe-user-rating-0-66); }linearGradient#wprm-recipe-user-rating-0-33 stop { stop-color: #343434; }linearGradient#wprm-recipe-user-rating-0-50 stop { stop-color: #343434; }linearGradient#wprm-recipe-user-rating-0-66 stop { stop-color: #343434; }

4.15 from 7 votes

Save

Print Recipe
Pin Recipe

Ribollita Recipe

A delicious hearty Tuscan soup filled with vegetables, cannellini beans, and Tuscan bread to fill you up on a cold winter’s day.

Author:

Prep Time 5 minutes
Cook Time 1 hour 10 minutes
Total Time 1 hour 15 minutes
Servings 4 people

Equipment

  • Wooden spoon
  • Sharp Knife
  • Cutting Board
  • food processor (optional)
  • soup pot, large dutch oven or slow cooker (optional)
  • soup tureen with lid

Ingredients 

1x2x3x

MetricUS Customary
  • 1 celery stick
  • 1 onion
  • 300 grams black Tuscan kale
  • 400 grams carrots
  • extra virgin olive oil (for soffritto + drizzling)
  • 1 savoy cabbage
  • 500 grams cannellini beans (canned)
  • 500 grams potatoes
  • 200 grams peas
  • 4-5 zucchinis (medium size)
  • 500 grams stale Tuscan bread
  • 300 grams tomato puree or 3 peeled tomatoes
  • Fresh parsley (as desired)
  • salt
  • black pepper

Instructions

  • Cut the onion, celery, and carrots into very small pieces to make the “soffritto” base for the soup.
  • In a large pot, heat the olive oil and saute the onion, celery and carrots over medium heat Once softened, add the black kale and the savoy cabbage.
  • As soon as the cabbage begins to to cook, add the tomato puree, canned tomatoes or peeled tomatoes, then potatoes, chopped zucchini and peas.
  • Now add the cannellini beans and add salt, black pepper and adjust seasoning and herbs as desired such as parsley, fresh thyme, bay leaf, and cook stirring occasionally over low heat for about 1 hour, then turn off.
  • Slice the bread into thin slices. Place a layer of bread in the bottom of a soup tureen or a large deep bowl. Then alternate between pouring the cooked vegetables and a layer of bread until you have filled the tureen. You can remove the bay leaves if you added them.
  • Cover and let sit for 20 minutes.
  • After resting, the soup is ready to serve. Remove a portion of the soup and serve in individual bowls with a sprinkling of Parmesan cheese if desired.
  • As mentioned previously, we’d like to remind you that the soup is even better reheated the following day!
  • Don’t forget to add a drizzle of olive oil before eating this scrumptious comfort food.
Tried this recipe?Mention @nonnabox or tag #nonnabox!

This article https://ift.tt/wSuf0md appeared first on Nonna Box

Piadina Romagnola Recipe

Piadina or piada, pieda, pida or piè, depending on the local dialect, is an Italian flatbread made from wheat flour that is a typical food of the Romagna area (my home region!) and the upper part of the Marche region, in particular in the Italian provinces of Ravenna, Forlì-Cesena, Rimini, Pesaro and Urbino, including San Marino, which is a small country separate from Italy but within its borders.

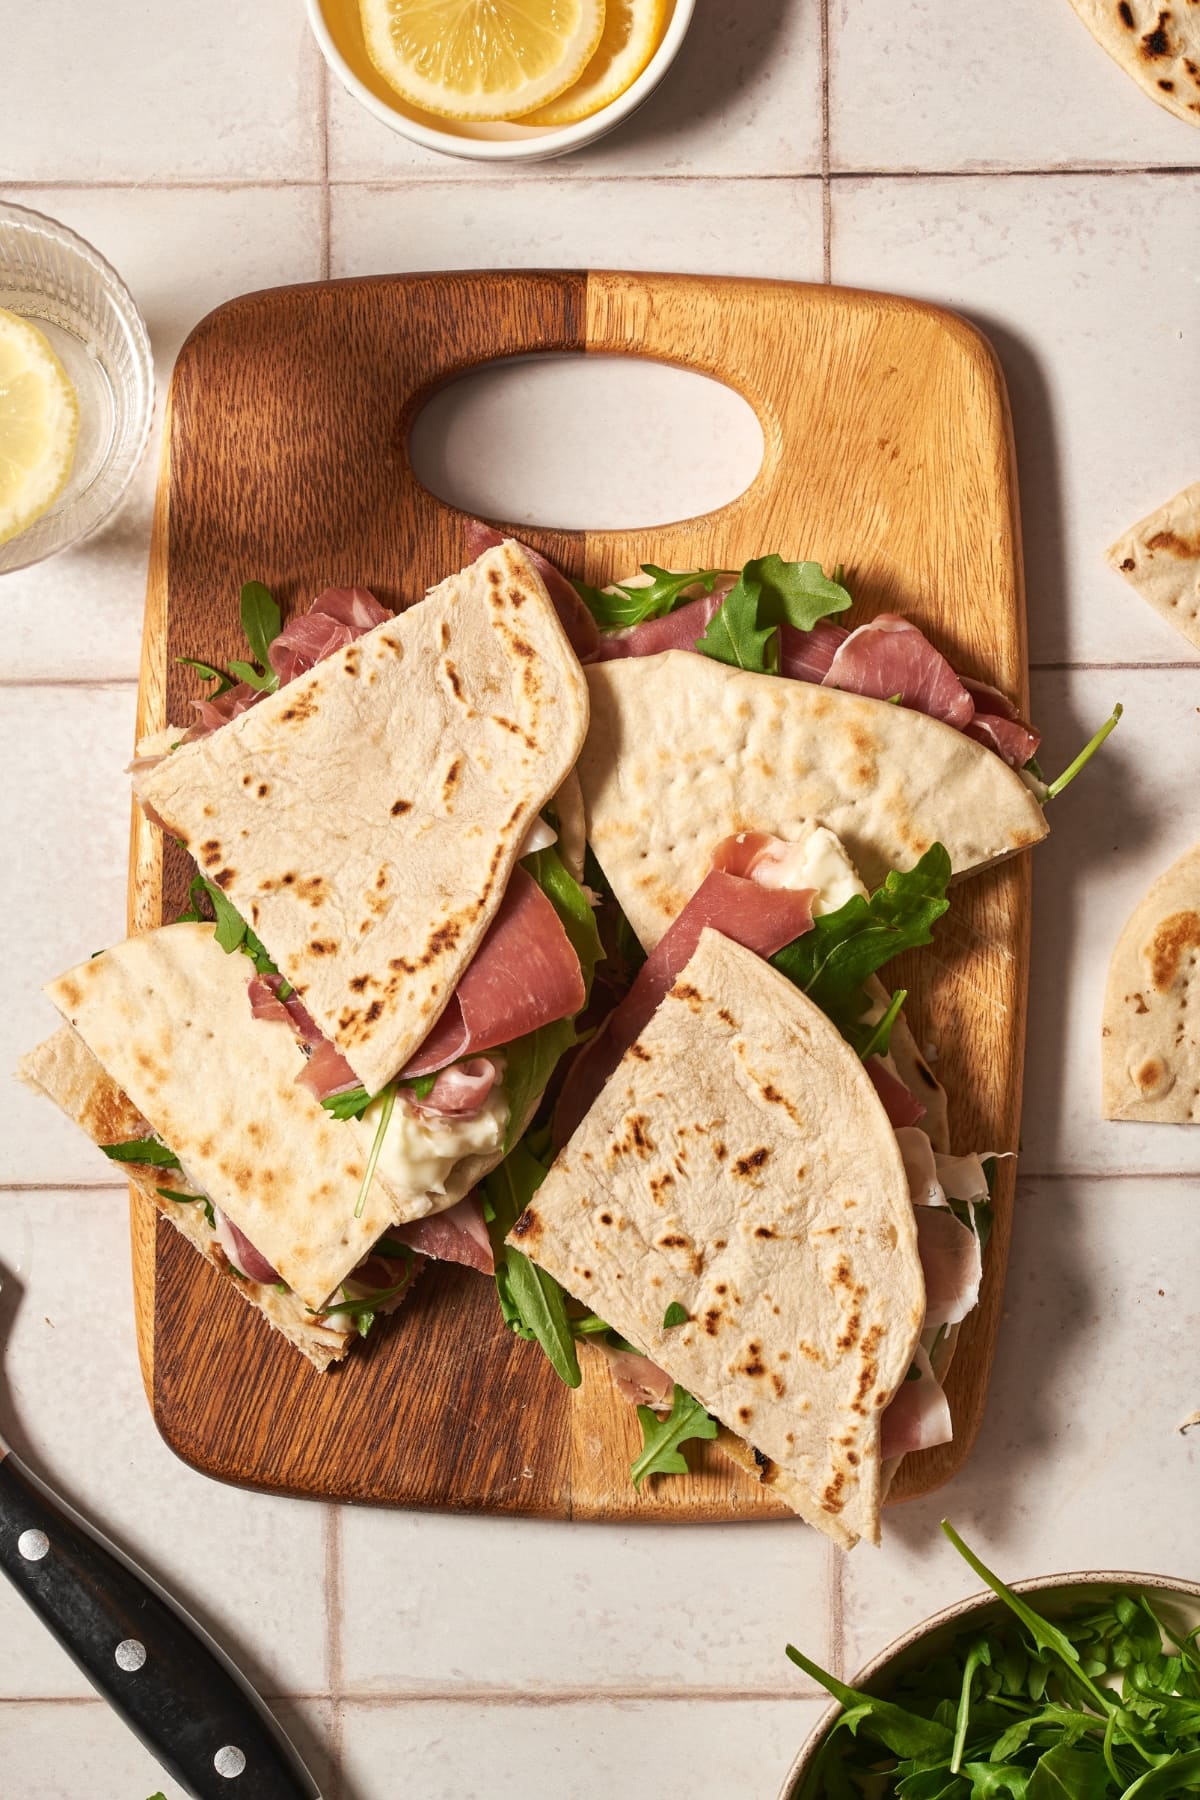
piadina

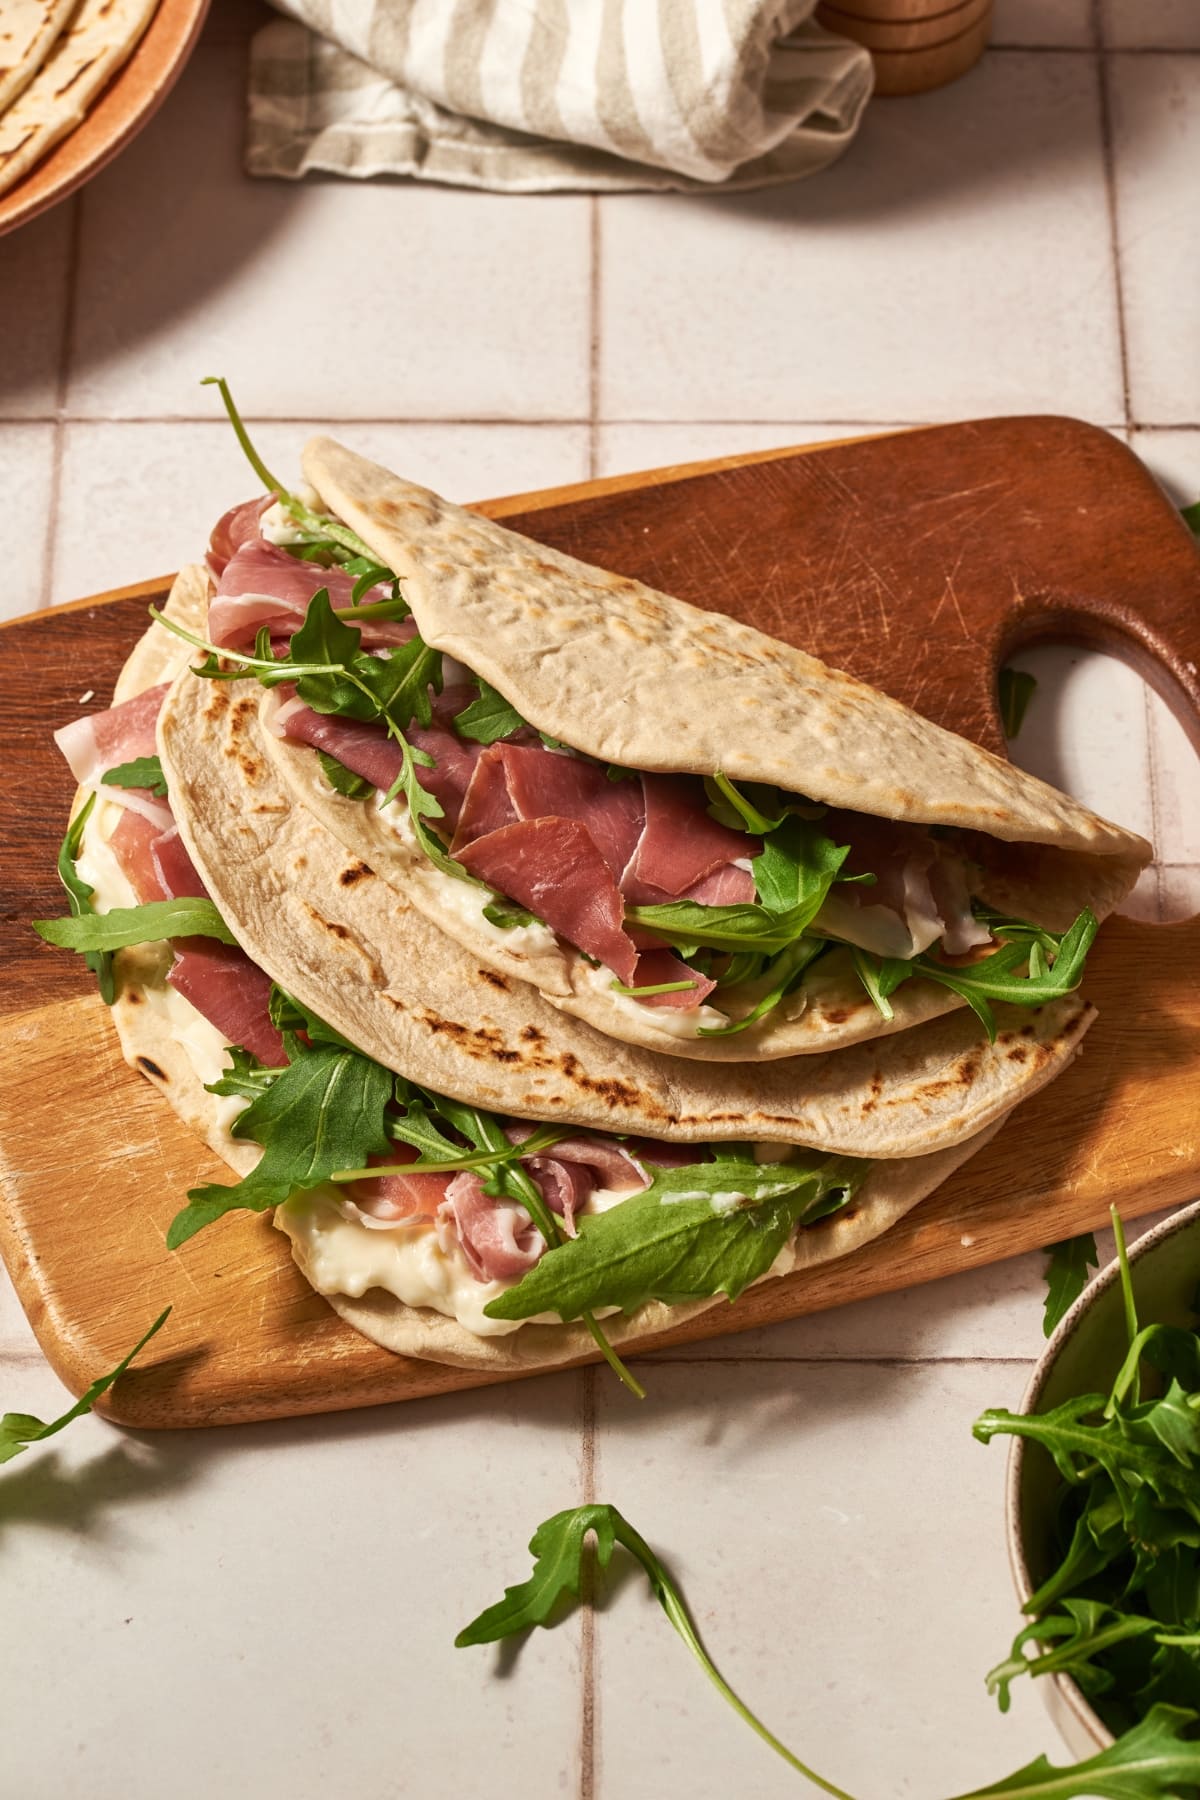
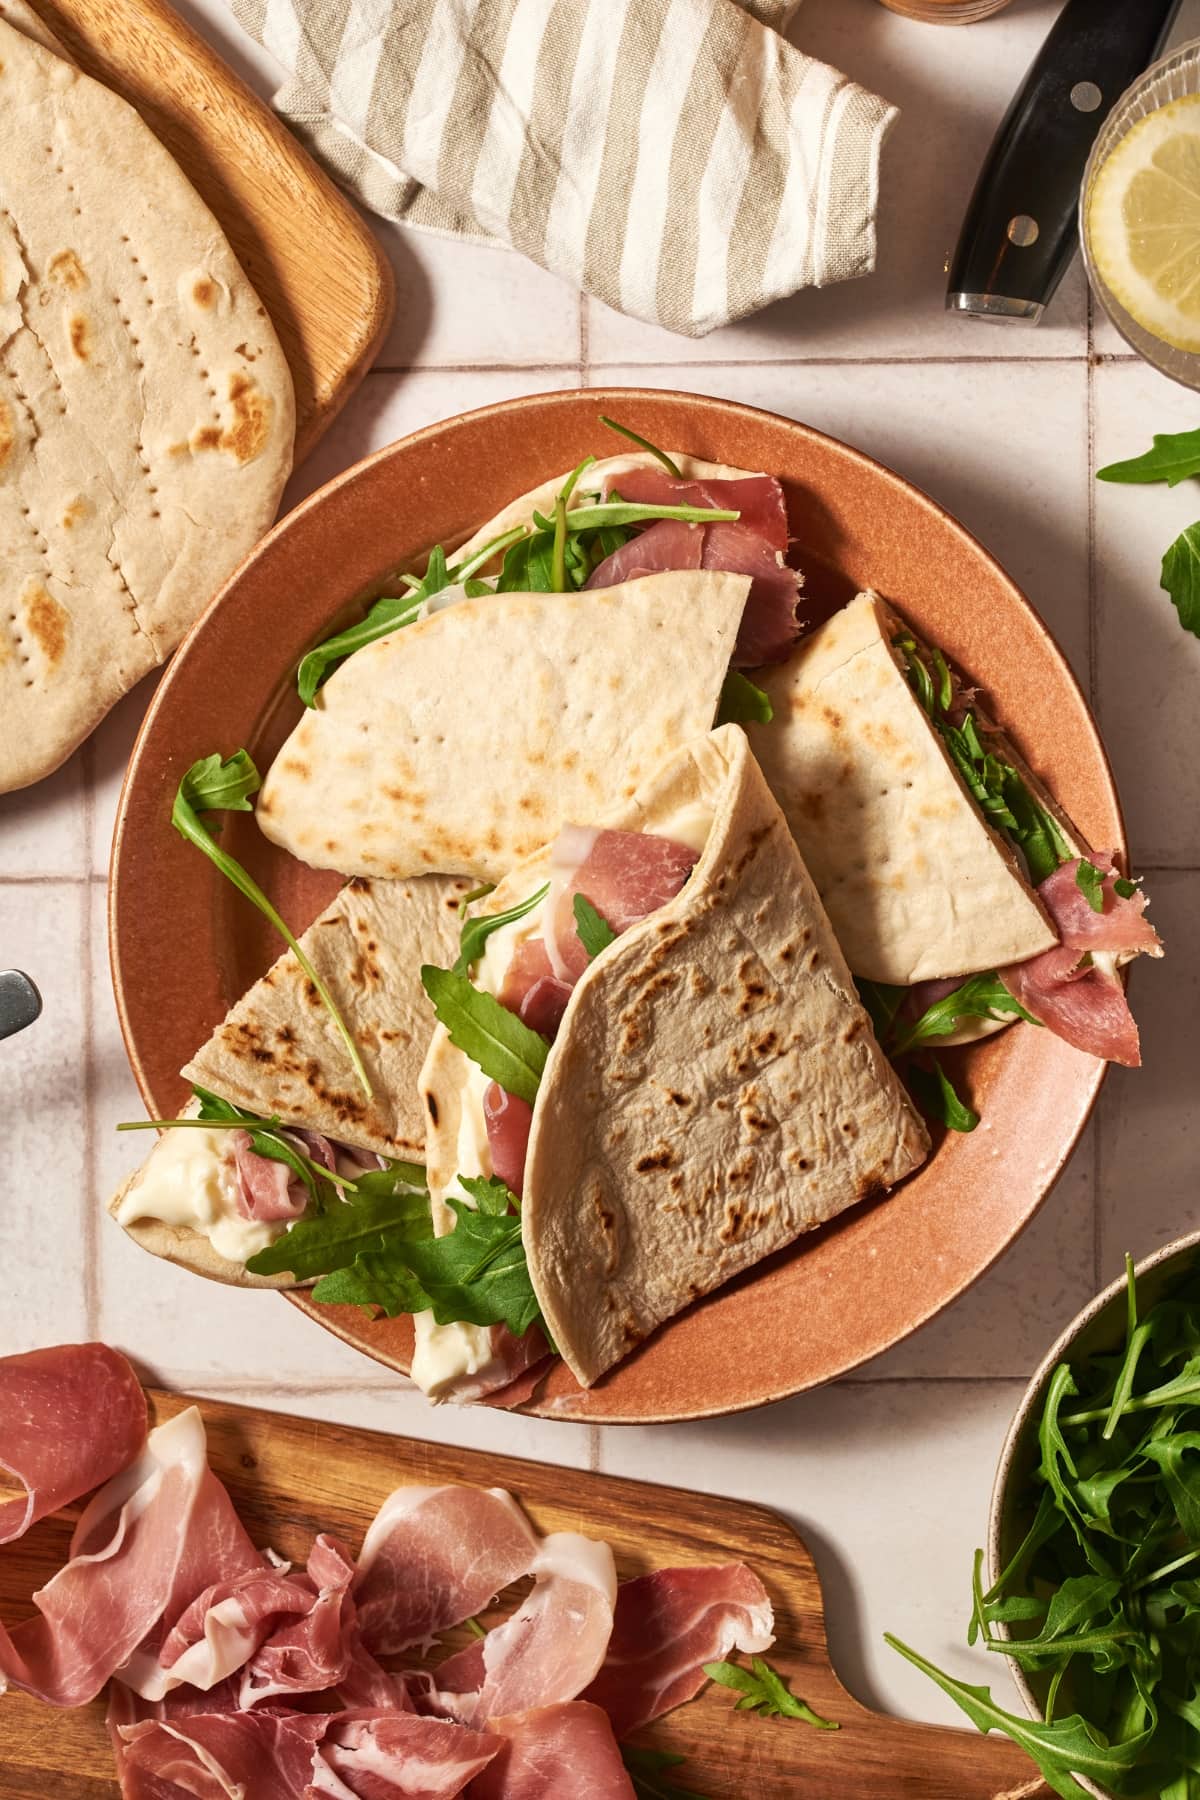
A piadina looks like a large flour tortilla. It is a thin, flattened, circular flatbread that is eaten in slices or stuffed with wonderful local delicacies such as cold-cut meats, cheeses, vegetables, or for a sweet treat with jam, honey or spreadable chocolate like Nutella.

The piadina is made and then stuffed right away and served hot. If you are starting with a store bought pre-made piadina, it is usually filled and then heated by grilling it in a cast iron skillet or pressing it like in a panini press.

Not sure what to make tonight for dinner? How about making this delicious Italian flatbread recipe and filling your piadina with your favorite Italian cold cuts and cheeses. I love the combination of arugula, squacquerone cheese and prosciutto, or mozzarella slices with tomatoes and basil. You are sure to get inspiration while reading all about piadina flatbreads.

  • fork for stirring at the beginning as well as pricking the piadina before cooking
  • large non-stick pan or cast iron skillet for cooking the piadina
  • small bowl for mixing some of the dry ingredients
  • flat surface such as a large wooden cutting board for making the dough and rolling out each piadina
  • rolling pin to roll out the piadina
  • plastic wrap for wrapping the piadina dough while it rests

Ingredients

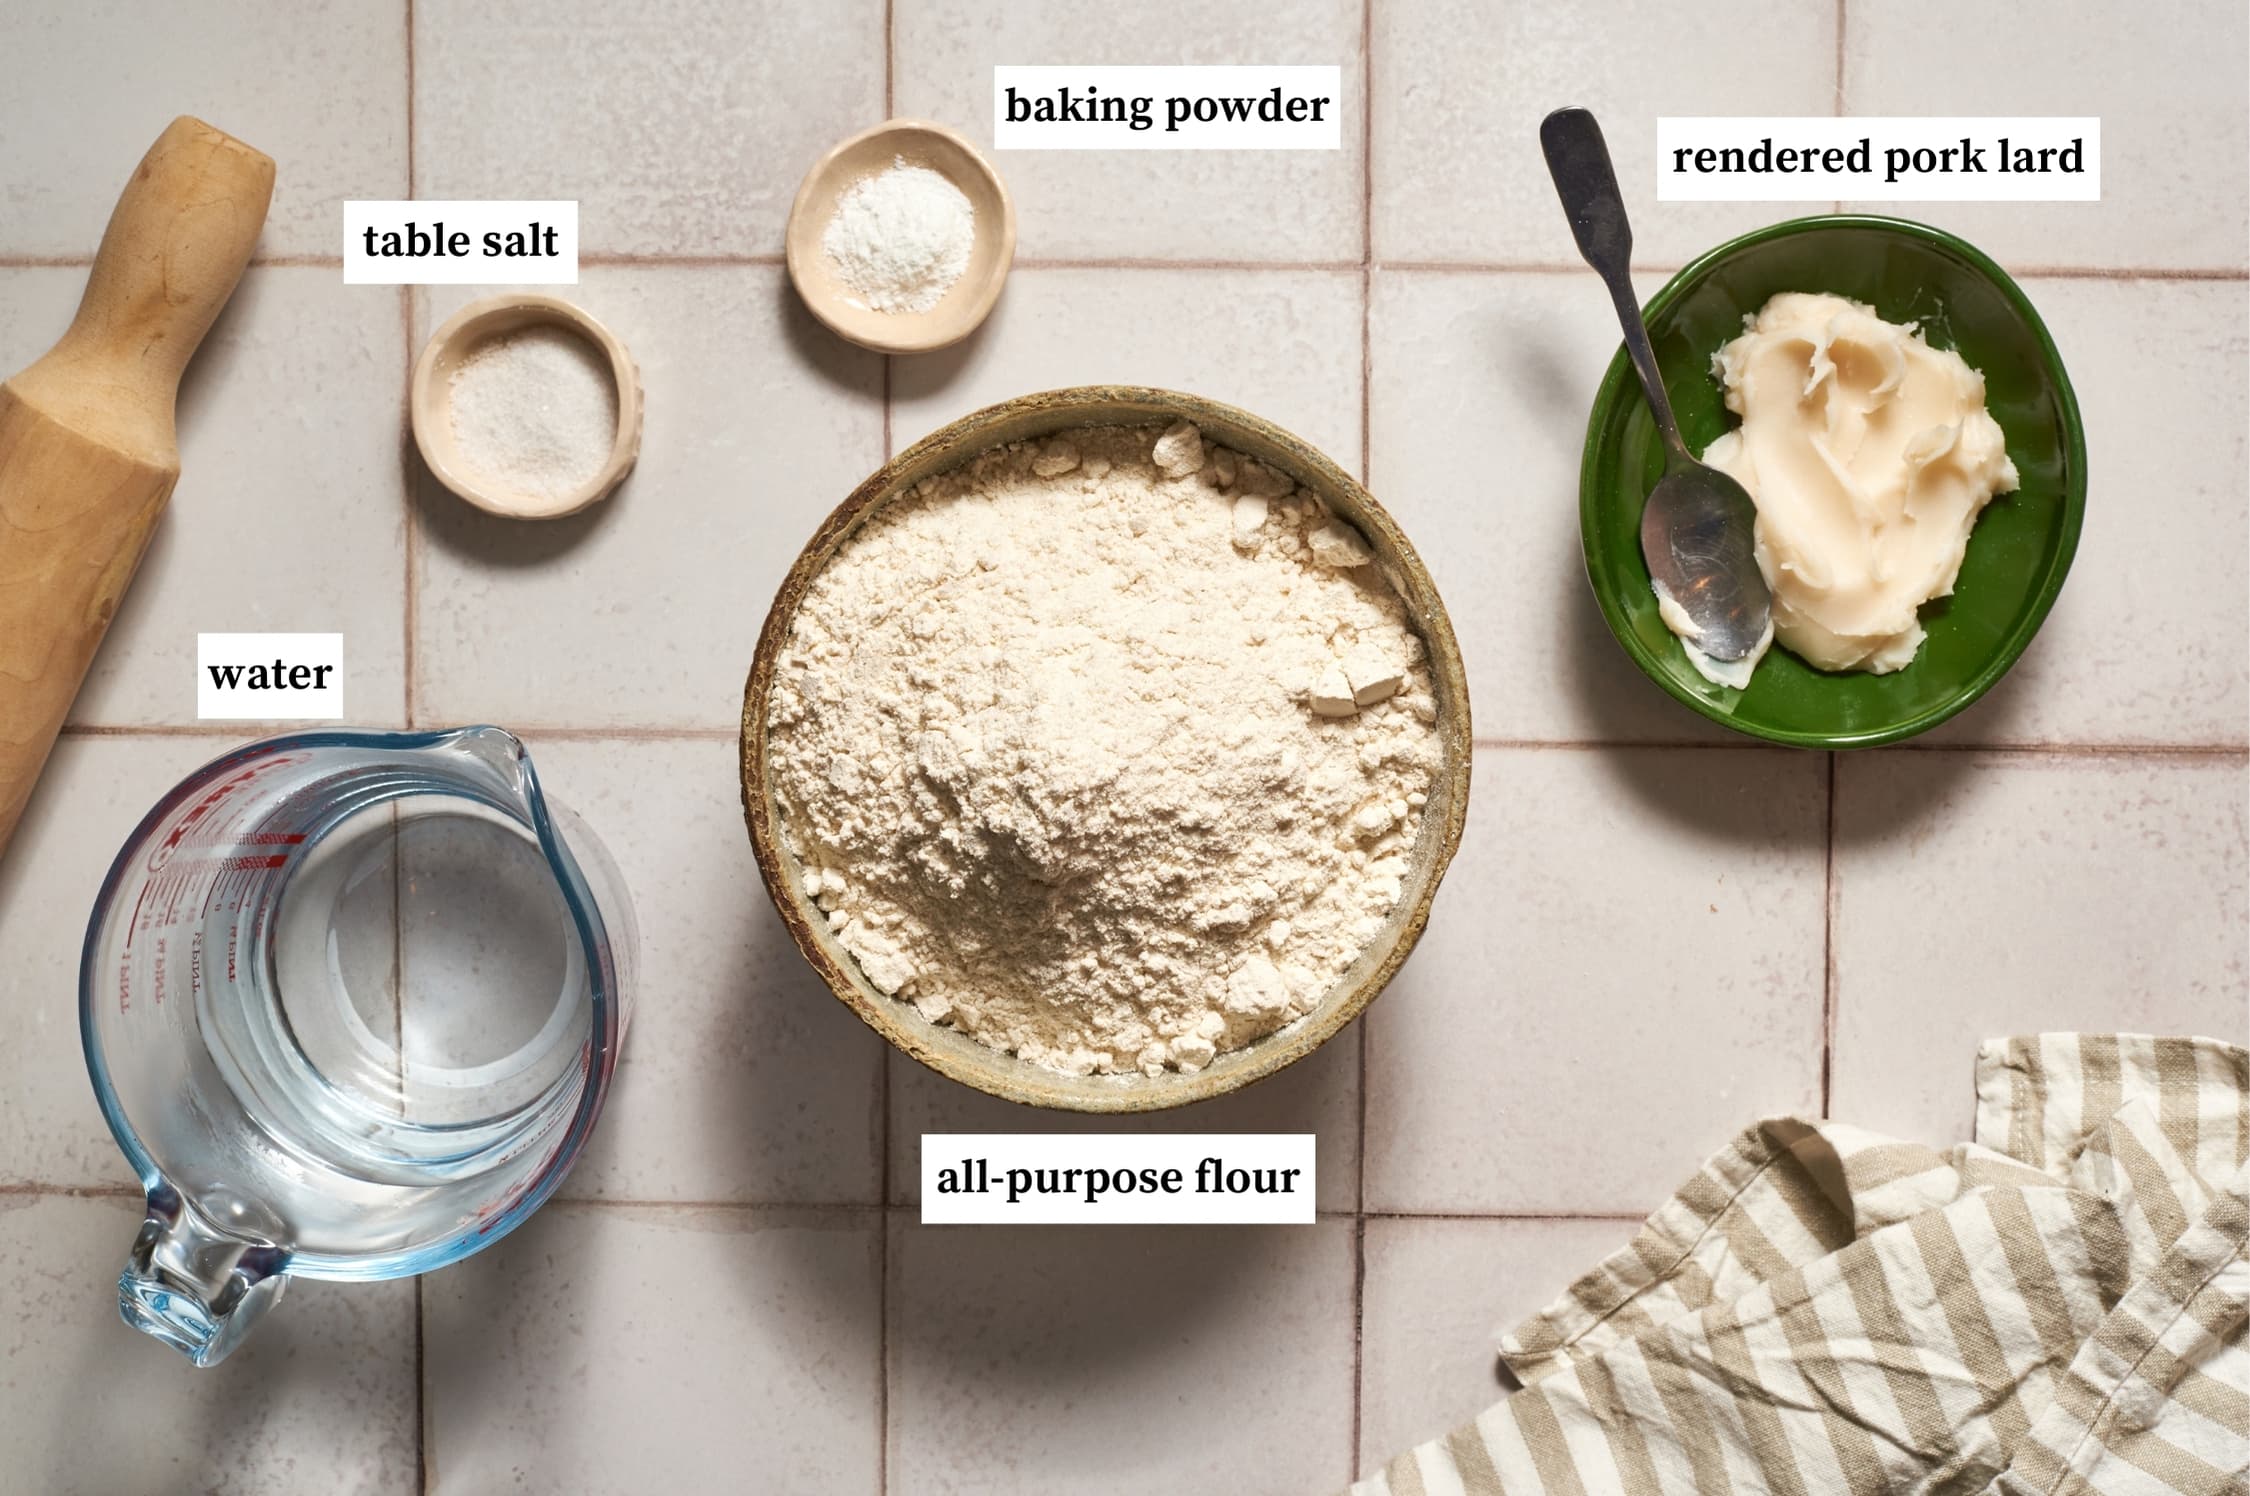
piadina ingredients
  • All-purpose flour (4 cups) – while regular all purpose flour works great in this recipe, we highly recommend using organic wheat flour when possible. You can use whole wheat flour if you prefer, but you might need a little more water as it is often drier. Some cooks also like to use bread flour in this recipe.
  • Baking powder (½ teaspoon) – this is essential for giving your piadina a little lift when cooking. Some piadina recipes call for baking soda, but we prefer baking powder.
  • Table salt (½ teaspoon) – you do not need much salt in this recipe because the ingredients to stuff the piadina are usually salty, such as prosciutto or Pecorino cheese.
  • Water (1 ¼ cups ) – the water can be tap or bottled water and should be lukewarm.
  • Rendered pork lard (1.80 oz) – called strutto in Italian, a high-quality rendered pork lard works best, but it can be substituted with the same amount of vegetable shortening or olive oil (5 tablespoons), if desired.

How to make this recipe, step by step

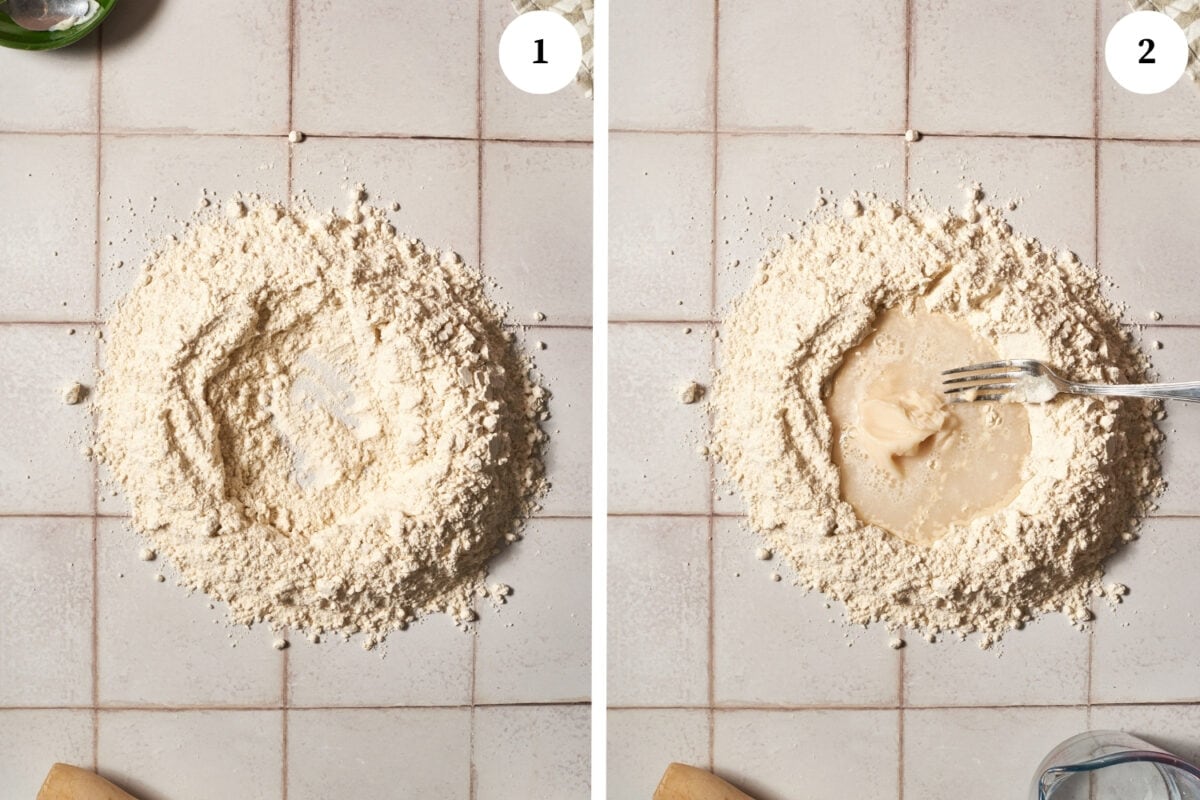
Make the dough: start by putting all the flour onto a flat surface, making a well in the center (photo 1). In a small bowl, mix together the baking powder and salt. Pour the salt, baking powder, and then rendered pork lard (or olive oil) and warm water into the center of the well and start mixing it into the flour with a fork (photo 2). Next knead the dough with your hands for about 10 minutes until quite smooth, uniform, and soft but not sticky (if it’s still sticky, add more flour).

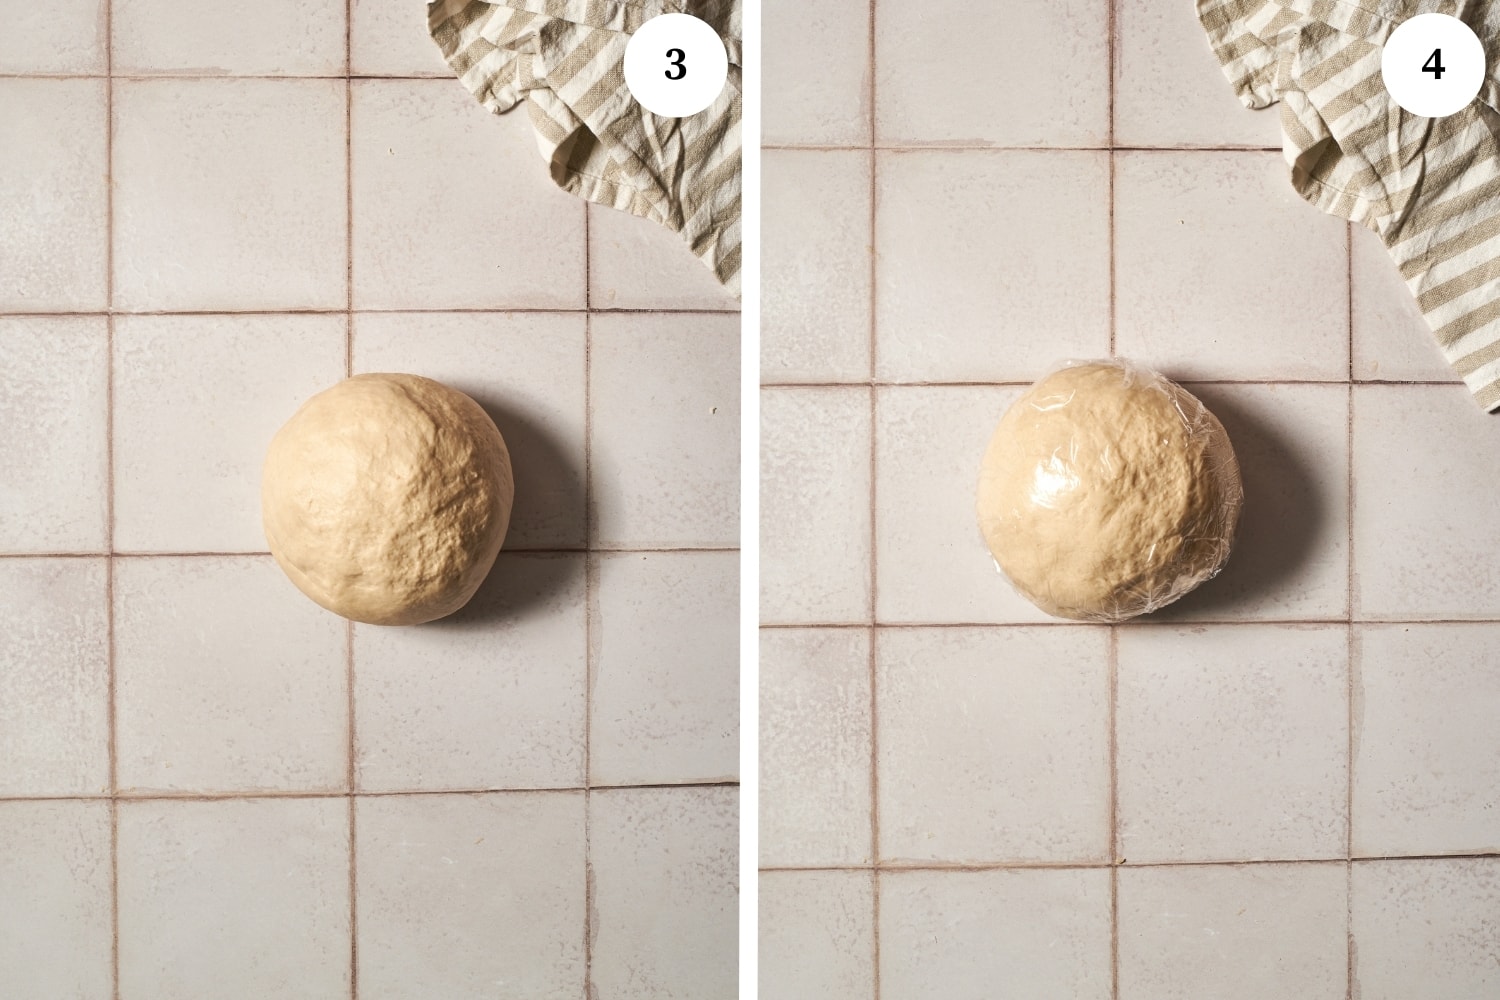
Let the dough ball rest: make the dough into a ball and cover it with cling film (photo 4). Let it rest at least 30 minutes at room temperature (if the dough is being prepared more than 1 hour in advance, you can keep it in the fridge and, when needed, remove one hour before using it).

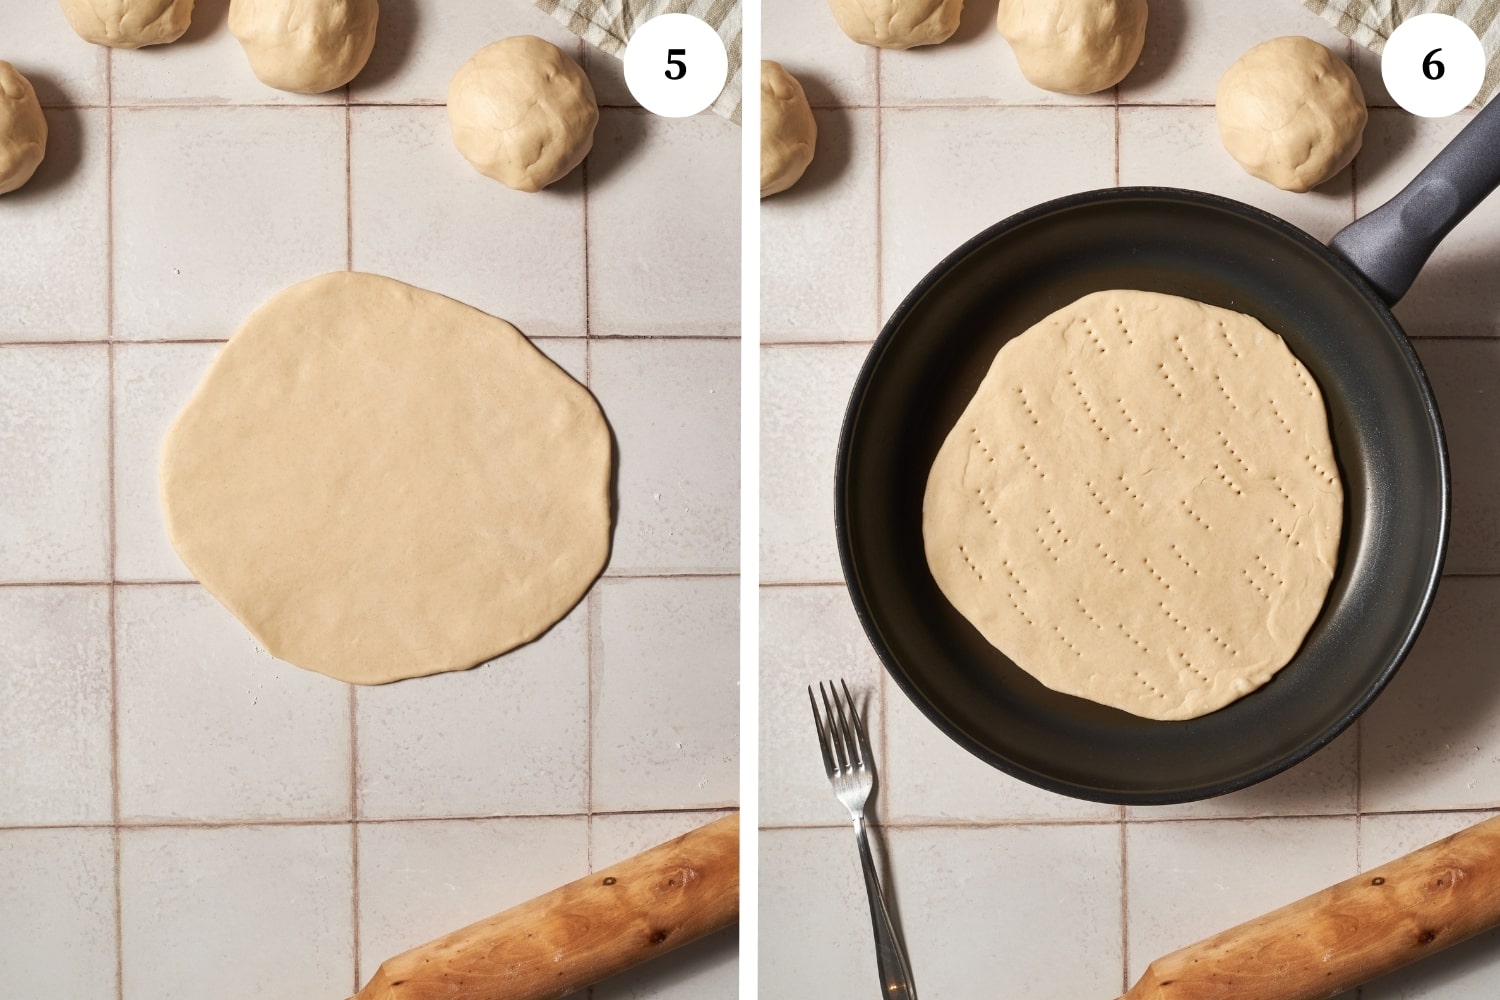
Prepping and cooking each Italian flatbread: heat a large nonstick pan on medium heat. Divide dough into about 5 smaller balls (about 140-150 grams per ball). On a flat surface, use a rolling pin to roll out the dough into a large circle until it reaches the desired thickness (ideally about ⅙ inch) (photo 5). Once the pan is hot, add a circle of dough, pricking it all over with a fork to avoid air bubbles (photo 6). Cook for about 1-2 minutes for a thin piadina, 2-3 minutes for a thicker one, or however long it takes for brown spots to form on the bottom. Then flip the piadina and cook for about the same time on the other side.

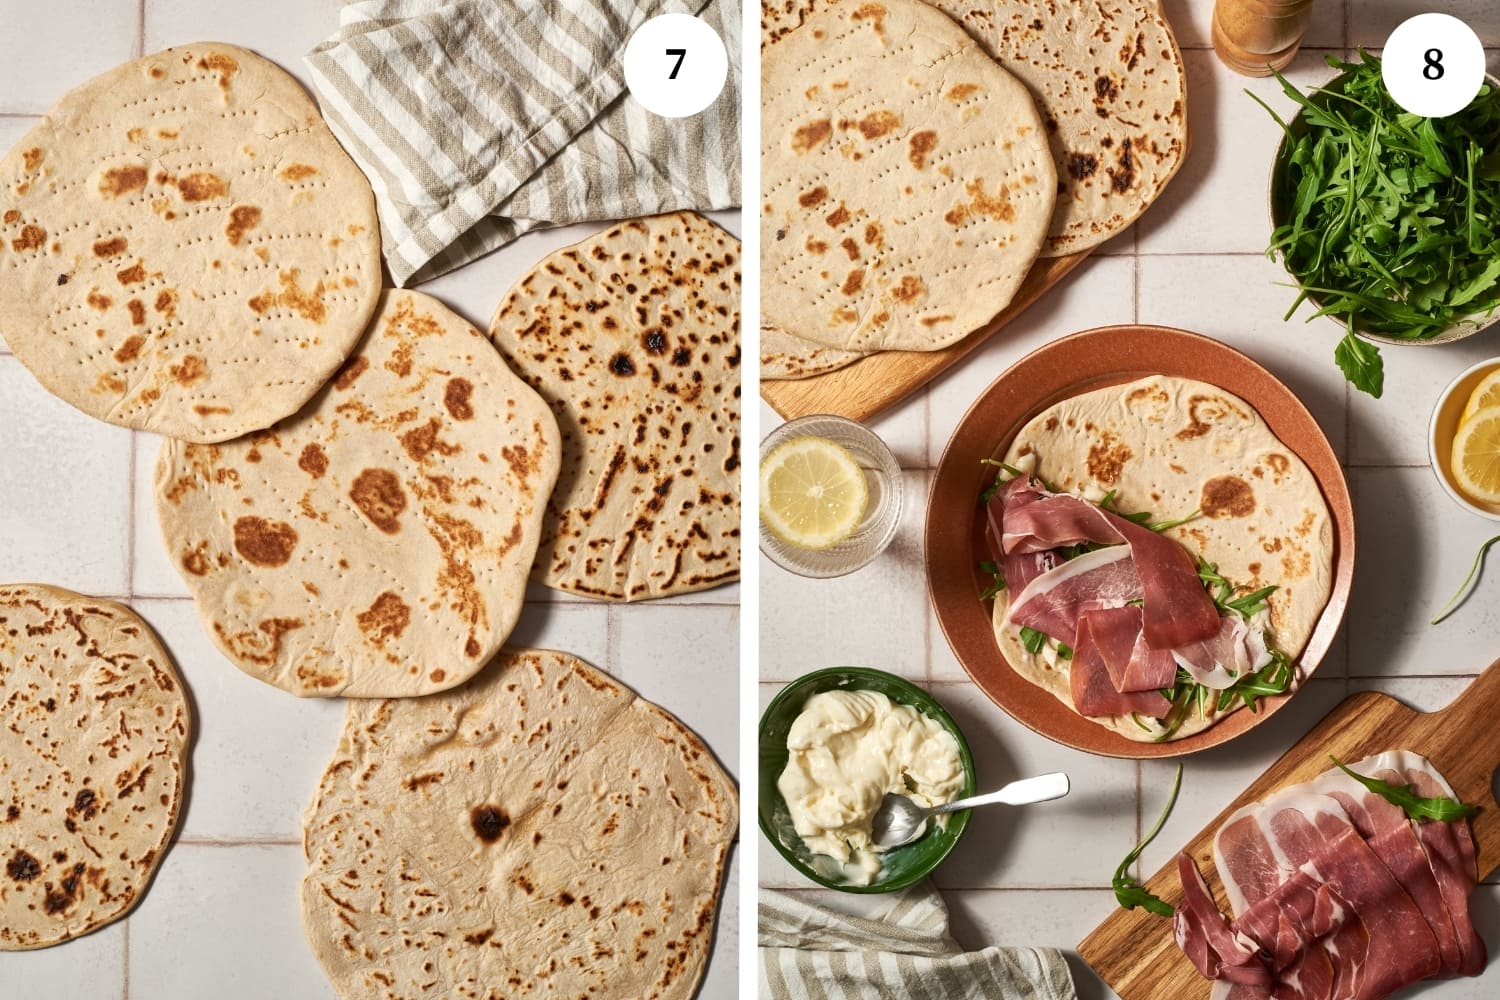
The finishing touches and filling: Remember that a piadina should be served hot, so it’s recommended to have your fillings ready (see fillings section). Once cooked, you can serve the piadina immediately by placing your desired fillings on one side of the circle and then folding it into a half moon, or by cutting the piadina into triangles to use like pieces of bread (photo 8).

Expert tips for making a delicious piadina

  • Prick the piadina before or while cooking. Using the tines of a fork, poke the piadina several times to avoid large bubbles and so that it cooks evenly.
  • Have your fillings ready. Be sure to have your fillings ready so you can enjoy your piadina nice and hot.
  • Use a hot pan. Without pre-heating the pan you will find that the piadina will stick and be much harder to work with so be sure your pan is hot before cooking the piadina. If the pan gets too hot the piadina will burn, so you might need to reduce the heat once the pan is up to temperature.

The two main variations of piadina Italian flatbread

Piadina Romagnola has very ancient origins. It comes from a poor and simple peasant tradition, but over the years it has gotten a more gourmet reputation and achieved worldwide fame.

Currently, the piadina is registered in the list of traditional Italian agri-food products (PAT) of the Emilia-Romagna region. In 2003, some associations for the promotion and protection of the Romagna piadina requested PGI certification for the two variants of this product:

  • Piadina Terre di Romagna
  • Piadina Romagnola di Rimini

The differences between the two piadina variants are the size: traditionally, the piadina prepared along the coast (in the area between Riccione and Rimini) is thinner and wider than that consumed inland (e.g. in the Cesena and Forlì area). Another difference is that the piadina in the Pesaro area is often prepared as a puffed version, which is even tastier because it is fluffy and made strictly with lard.

FAQs

How long can I store piadina Italian flatbread?

The cooked piadina can be stored for one day, but be aware that they get hard very quickly. You will need to properly reheat them before using again, and be sure to serve them warm. An alternative method is to store the uncooked dough balls for up to 2 days in the fridge wrapped in cling wrap and then take a ball out, roll it out and cook it on the spot.

Can you freeze piadina?

Absolutely. It can keep for months in the freezer, simply store it wrapped with oven paper or in a plastic bag. To re-heat, place it on a skillet for a few minutes until it’s soft again.

Is piadina a street food, where can I buy one?

chiosco piadina romagnola

Piadina is the quintessential street food of Romagna. In fact, you can’t travel through Romagna without noticing the famous and characteristic chioschi, or kiosk in English, which are small shacks like the one pictured above, where piadine are made and sold mostly by women called piadinare.

Try other traditional Italian recipes:

piadina italian flatbread recipe

Print

Traditional Romagnola piadina flatbread

#wprm-recipe-user-rating-0 .wprm-rating-star.wprm-rating-star-full svg * { fill: #343434; }#wprm-recipe-user-rating-0 .wprm-rating-star.wprm-rating-star-33 svg * { fill: url(#wprm-recipe-user-rating-0-33); }#wprm-recipe-user-rating-0 .wprm-rating-star.wprm-rating-star-50 svg * { fill: url(#wprm-recipe-user-rating-0-50); }#wprm-recipe-user-rating-0 .wprm-rating-star.wprm-rating-star-66 svg * { fill: url(#wprm-recipe-user-rating-0-66); }linearGradient#wprm-recipe-user-rating-0-33 stop { stop-color: #343434; }linearGradient#wprm-recipe-user-rating-0-50 stop { stop-color: #343434; }linearGradient#wprm-recipe-user-rating-0-66 stop { stop-color: #343434; }

Probably the most famous Italian flatbread, piadina is delicious and you can’t go wrong serving it with cold cuts and cheese.
Course Bread
Cuisine Italian
Keyword piada, piadina, salumi
Prep Time 15 minutes
Cook Time 5 minutes
Resting Time 40 minutes
Total Time 1 hour
Servings 4 people
Calories 565kcal

Equipment

  • 1 Fork for stirring at the beginning as well as pricking the piadina before cooking
  • 1 large non-stick pan or cast iron skillet for cooking the piadina
  • 1 Small bowl for mixing some of the dry ingredients
  • 1 flat surface such as a large wooden cutting board for making the dough and rolling out each piadina
  • 1 Rolling pin to roll out the piadina
  • Plastic wrap for wrapping the piadina dough while it rests

Ingredients

  • 4 cups all-purpose flour
  • ½ teaspoon baking powder
  • ½ teaspoon salt
  • 1 ¼ cups lukewarm water
  • 1.80 oz rendered pork lard*

Instructions

  • Pour all the flour onto a flat surface, making a well in the center.
  • In a small bowl, mix together the baking powder and salt.
  • Pour the salt and baking powder mixture and then the rendered pork lard (or extra virgin olive oil) and warm water into the center of the well and start mixing it together with a fork.
  • Next knead the dough with your hands for about 10 minutes until quite smooth, uniform, and soft but not sticky (if it’s still sticky, add more flour).
  • Make a smooth ball and cover the piadina dough with plastic wrap. Let it rest at least 30 minutes at room temperature (if the dough is being prepared more than 1 hour in advance, you can keep it in the fridge and, when needed, remove one hour before using it).
  • Heat a large nonstick pan on medium-high heat.
  • Divide the dough into about 5 smaller balls (about 140-150 grams per ball).
  • On a flat work surface, use a rolling pin to roll out the dough into a large circle until it reaches the desired thickness (ideally about ⅙ inch) and is as perfectly round as possible. You can dust with flour if it sticks.
  • Once the pan is hot, add a circle of dough, pricking it all over with a fork to avoid air bubbles.
  • Cook for about 1-2 minutes for a thin piadina, 2-3 minutes for a thicker one, or however long it takes for brown spots to form on the bottom. Then flip the piadina and cook for about the same time on the other side.
  • Remember that a piadina should be served hot, so it’s recommended to have your fillings ready (see below for filling ideas).
  • Once cooked, you can serve the piadina immediately by placing your desired fillings on one side of the circle and then folding it into a half moon, or by cutting the piadina into triangles to use like pieces of bread.

Notes

*Traditional piadina Romagnola is made with strutto, or rendered pork lard, although in the Romagna area near Rimini it’s made with olive oil; if you prefer the latter, then substitute the lard with 5 tablespoons of extra virgin olive oil.

Nutrition

Serving: 150g | Calories: 565kcal | Carbohydrates: 96g | Protein: 13g | Fat: 14g | Saturated Fat: 11g | Sodium: 297mg | Potassium: 184mg | Fiber: 3g | Sugar: 1g | Calcium: 40mg | Iron: 6mg

Fillings for piadina

The Italian tradition is to eat piadina filled with salumi (cured meats) like salami, but you can also use prosciutto, coppa, or something similar. It is also very common to serve piadina with a very soft, young cheese traditionally from Romagna, called stracchino, which is spread on the surface of the piadina and served with arugula on top. Other combinations include mozzarella cheese, fresh sliced tomatoes, extra virgin olive oil and oregano or fresh basil. Una bontà!

If you’ve tried the traditionally cooked savory fillings and are ready for a change, why not try a sweet piadina? You can fill it with spreadable chocolate, any type of jam or jelly, or even honey and a sprinkling of cinnamon with a nice glass of milk to go with it.

Also very common in Romagna are the crescioni, or cassoni. This is similar to a calzone, but made with piadina dough. The most common fillings are spinach, sausage and onion, pumpkin and potato, mozzarella cheese and tomato, Nutella (which I love) and many others.

History and origins of the Italian flatbread from Romagna

The first to cook a rudimentary version of the piadina recipe were the Etruscans, who were the pioneers in the cultivation and processing of cereals and therefore in the production of sfarinate, which closely resembles the modern-day piadina. Both are prepared without yeast and cooked on a metal or stone hotplate.

Sfarinate, the rudimentary piade, continued to be produced in ancient Rome, where they represented food for the rich, because they had to be eaten freshly cooked. Already after a few hours, in fact, the piadina Italian flatbread became too hard to chew. Therefore, they were not suitable for peasants who, on the other hand, needed food that could be stored for long periods of time without spoiling.

In the Middle Ages, there was an inversion of roles, so to speak. All the leavened bread products became the domain of the rich, which meant the simple piadina, produced without yeast and with less valuable flours such as barley, became the food of the poor.

Because of its relative simplicity, as cooking schools were born and gastronomy became a real art, the piadina was considered peasant food for the masses. The poor often resorted to adding acorns and dried legumes to the dough to make it as nourishing and satiating as possible.

During the twentieth century, the piadina flatbread experienced a period of resurgence, initially appearing on all the tables in Romagna before spreading to the rest of Italy and the world. Its true fame came when it became a street food, prepared and cooked to order in kiosks along the Adriatic coast, gaining international fame as early as the 1950s thanks to the many tourists who visited the area’s beautiful beaches.

This article https://ift.tt/kwYxNej appeared first on Nonna Box

Penne all’Arrabbiata Recipe

Penne all’arrabbiata translates literally to angry penne pasta and is a beloved spicy tomato pasta dish from the Lazio region where Rome is located. Arrabbiata sauce is a favorite all over Italy and around the world and one of the most shared Italian recipes.

Although making homemade arrabiata sauce is quite simple, basically just tomatoes, garlic and chili peppers, it still needs some care and attention to get it just right. Here we are sharing all our tips for how to make the perfect penne all’arrabbiata for your family tonight.

This traditional recipe only takes 35 minutes to make from scratch, and is super simple because it calls for packaged pasta.

If you want to spice up your weeknight meals with a dish that is full of classic Roman flavor, but don’t have a lot of time, this is the recipe to try! Serve it with some mozzarella in carrozza and a side salad with Italian seasoning for an absolutely delicious meal.

  • pot for boiling water and cooking the pasta
  • large saucepan or frying pan to cook the arrabbiata sauce
  • pasta drainer to drain the penne pasta
  • cutting board to chop the ingredients
  • sharp knife to peel and chop the tomatoes if you are using whole tomatoes
  • serving dish, if desired
  • wooden spoon for stirring the sauce

Ingredients

  • Olive oil (6-8 tablespoons) – you should use a good quality extra virgin olive oil.
  • Garlic (2 cloves) – start with whole fresh garlic and crush or chop it.
  • Red chili peppers or flakes (½-1 tablespoon dried crushed red pepper or red pepper flakes or ½-1 fresh red chili peppers) – if you are starting with fresh chili peppers, wash and dry and then remove the seeds and chop finely. While the spicyness may be the defining characteristic of this tomato sauce, arrabbiata doesn’t call for an obscure or unique variety of chili pepper. Simple crushed chili peppers, preferably dried and flaked, is all that is needed. Calabrian chili will give you the right kick.
  • Tomatoes 1.1 lb (500 g) – diced canned tomatoes or whole fresh tomatoes can both work, but the sauce will be slightly different. (see expert tips below for additional context)
  • Penne pasta 1.1 lb (500 g package) – the most common pasta that is paired with arrabbiata sauce is the shape known as penne. Penne dried pasta looks like a small tube that is diagonally cut on both ends. Basically, it looks like the nib of an old-fashioned quill pen. There are a few variants of penne, based on either the size or the outer surface. Mezze penne (half) are shorter and sometimes narrower, while penne rigate are ridged on the outer surface. While most trattorias in Rome will use smooth penne, or penne lisce, you may find that penne rigate are able to hold onto the sauce even more effectively, ensuring loads of flavor in every bite.
  • Fresh basil or fresh parsley (as desired) – use fresh or dried basil or parsley for garnishing the top of the dish once it is done.
  • Salt (as needed) – you can add a pinch of salt to the homemade arrabbiata sauce and a small scoop of salt to the pasta water.

Preparing penne with arrabbiata sauce step-by-step

Make the arrabbiata sauce: Heat olive oil in a large frying pan over medium-high heat and add the garlic and red pepper flakes once it is glistening slightly (photo 1). Remove the garlic cloves once they begin to brown so they don’t give the sauce a bitter taste. Add the diced tomatoes (or chopped whole tomatoes or tomato sauce) to the pan and simmer for ten minutes (photo 2).

Cook pasta: Start a large pot of water for the pasta, add salt and bring to a boil. Put in the pasta and cook until al dente by following the package instructions (photo 3). Drain the pasta (photo 4).

Coat the cooked pasta with sauce: Put the drained, cooked pasta into the frying pan (photo 5), and toss with the sauce over high heat for a few minutes (not too long, use your judgment when the sauce starts coating the pasta well you can turn off).

The spicy tomato pasta is served: Transfer to a serving dish. Sprinkle with fresh basil leaves or chopped parsley and enjoy! Some people also add grated Pecorino Romano cheese, Parmigiano Reggiano or Parmesan on top.

Expert Tips

  • Remove the garlic. Even if you are a garlic lover, we recommend removing the garlic as soon as it starts to turn brown because leaving it in can cause your arrabbiata sauce to have a bitter taste.
  • Not too spicy. If you don’t want your sauce to come out too spicy you can substitute half of the crushed red pepper flakes with black pepper.
  • Reserved pasta water trick. You can save a small cup of pasta water and add it back into your pasta while you are mixing it with the sauce if your sauce is too thick or doesn’t properly coat the pasta.
  • Chili. Some recipes will call for fresh chili peppers, but this can make the sauce too fruity, rather than the earthy spiciness that dried chili gives. This sharper spice is what balances so wonderfully with the sweetness of the tomatoes. If you wanted to mix it up and go non-traditional you could even try a chipotle or ancho chili, though that veers away from the traditional Italian into a fusion style, mixing Italian with American Southwestern flavors.
  • Tomatoes. With canned crushed tomatoes, most of the work is already done for you and they will cook down into a sauce much more quickly. All Italian grandmothers have a strong opinion about what the best fresh tomatoes are (most likely it’s San Marzano tomatoes) for making pasta sauce, but we’ve found that any high-quality ripe plum-style tomato will work, though they will be a lot more work to prepare (blanch, peel, de-seed, and then chop). San Marzano tomatoes are ideal if you can get them as they have a sweetness that balances beautifully with the heat of the peppers. Likewise, you can also use Passata or tomato sauce that has been pureed, although you may find the sauce a little too thin, we prefer a few tomato chunks. Some people also add tomato paste, you can experiment with different methods to see what you like.

Homemade arrabbiata sauce variations

  • Add onion instead of garlic. If you are not a garlic lover, you can substitute with a small white or yellow onion finely chopped and added at the same time as you would have added the garlic.
  • Black olives. Although this won’t be a classic arrabbiata sauce, you can add pitted olives either whole, sliced or chopped when the sauce is almost done to give it some extra flavor and depth.

Other pasta recipes to try:

FAQs

How can I store leftover penne all’arrabbiata?

You can store leftovers in an airtight container for up to 2 days. Reheat by adding a little water and oil to a pan and then cooking over medium heat until warmed through, stirring frequently.

What wine pairs well with arrabbiata sauce?

Penne all’arrabbiata pairs well with young, fruity red wine like Nobile di Montepulciano, Barbera, or Nero d’Avola. You want to avoid anything too alcoholic though, as the spice from the chili flakes will make the wine feel a little too “hot” in your mouth.

penne all arrabbiate recipe

Print

Penne all’Arrabbiata

#wprm-recipe-user-rating-0 .wprm-rating-star.wprm-rating-star-full svg * { fill: #343434; }#wprm-recipe-user-rating-0 .wprm-rating-star.wprm-rating-star-33 svg * { fill: url(#wprm-recipe-user-rating-0-33); }#wprm-recipe-user-rating-0 .wprm-rating-star.wprm-rating-star-50 svg * { fill: url(#wprm-recipe-user-rating-0-50); }#wprm-recipe-user-rating-0 .wprm-rating-star.wprm-rating-star-66 svg * { fill: url(#wprm-recipe-user-rating-0-66); }linearGradient#wprm-recipe-user-rating-0-33 stop { stop-color: #343434; }linearGradient#wprm-recipe-user-rating-0-50 stop { stop-color: #343434; }linearGradient#wprm-recipe-user-rating-0-66 stop { stop-color: #343434; }

Penne arrabbiata is a simple, spicy and filling pasta dish from Lazio and one of the traditional favorites in Italy and around the world. Although it is an easy recipe, basically tomatoes, garlic, olive oil and chili peppers, it still needs a bit of attention to perfect and selecting the best ingredients can make all the difference.
Course Pasta
Cuisine Italian
Keyword chili, pasta, penne, Roma, tomato
Prep Time 5 minutes
Cook Time 30 minutes
Total Time 35 minutes
Servings 6 servings
Calories 338kcal

Ingredients

  • 6-8 tablespoons olive oil
  • 2 garlic cloves slightly crushed
  • ½-1 tablespoon dried red pepper flakes; or ½-1 fresh chili peppers seeded and chopped
  • 500 grams canned diced tomatoes or whole tomatoes work as well just chop before adding to the pan
  • 500 grams penne pasta
  • Basil or parsley optional, for garnishing
  • Kosher salt as needed

Instructions

  • Heat the olive oil in large skillet over medium-high heat and add the garlic and crushed red pepper flakes once it is glistening slightly.
  • Start a pot of water for the pasta and add salt and bring to a boil.
  • Remove the garlic cloves right before they start to brown.
  • Add the crushed tomatoes (only use peeled tomatoes) to the pan, reduce heat and simmer for ten minutes.
  • Start the pasta and cook until al dente by following the instructions on the box.
  • Drain the pasta, add to frying pan, and toss with the sauce over high heat for a few minutes (not too long, use your judgment and when the sauce starts coating the pasta you can turn it off).
  • Transfer to a serving dish and sprinkle with fresh basil or parsley and enjoy!

Notes

Opinions are mixed on whether grated cheese should be served on top of penne all’arrabbiata. In the end it is a personal choice. If it is something that you want to add to your dish, then we recommend Pecorino Romano.

Nutrition

Serving: 100g | Calories: 338kcal | Carbohydrates: 67g | Protein: 12g | Fat: 3g | Saturated Fat: 0.4g | Polyunsaturated Fat: 1g | Monounsaturated Fat: 1g | Sodium: 260mg | Potassium: 363mg | Fiber: 4g | Sugar: 4g | Vitamin A: 327IU | Vitamin C: 8mg | Calcium: 52mg | Iron: 2mg

Where did penne all’arrabbiata originate?

Penne all’arrabbiata is a fairly modern dish from the Lazio region and specifically Rome. Although no one has been able to pinpoint for sure where it came from, some say that it was a dish perfected by Chef Antonio Cecchini in his restaurant named Le Arrabbiate in Rome during the 1920s. The dish became famous because of Italian films from the 60s and 70s and remains popular around the world today.

This article https://ift.tt/1cpx4y3 appeared first on Nonna Box

Tomato Passata Recipe(Passata di Pomodoro)

Passata di pomodoro is an Italian staple. You have likely heard of it or perhaps even used it without knowing what it was! At its core, tomato passata is simply a tomato purèe or strained tomatoes with a bright tomato flavor that can be used as the base of all kinds of sauces and dishes.

homemade tomato passata prepared in jars on a table

There are a few characteristics that set tomato passata apart from basic tomato puree. The most important is that tomato passata has the seeds and sometimes skins removed. This extra step isn’t always present when making a tomato puree. In addition, tomato puree is also usually cooked for a longer period of time while passata is sometimes barely cooked at all.

Italian passata is something that most Italians eat every single week, in pasta recipes, soups and much more. Find out more about this delicious ingredient.

Equipment

Kitchen tools needed:

  • food mill or tomato strainer machine is essential for getting the desired consistency
  • cutting board for tomato prep
  • sharp knife to cut the tomatoes
  • large pots with at least one with a lid for cooking the tomato passata and then for sterilizing and boiling the cans
  • large bowl for the tomatoes

Ingredients

tomato passata ingredients
  • Tomatoes (4 ½ pounds) – our favorite tomatoes for making this tomato sauce are ripe San Marzano tomatoes or juicy Roma tomatoes. As tomatoes are the only ingredient, you should use the best quality you can find (or grow in your own garden!). Most people make this in large batches and choose to remove the skins all at the beginning by dunking the tomatoes in boiling water for a few minutes. You can then cut the whole peeled tomatoes in half and remove the seeds before following the instructions in the recipe.
  • Basil leaves (optional) – some people add basil leaves but others may add other herbs or spices to their family tomato paste recipe depending on how they will be using the tomato passata throughout the year.
  • Salt (optional) – you can add salt if you already know what you will be using your tomato sauce for or if your tomatoes have a particularly sweet flavor. Some people also add a pinch of sugar if they find the tomatoes they used are a bit too acidic.

How to make passata di pomodoro step by step

Prep the tomatoes: Wash and dry the tomatoes. Slice each tomato in half and gently squeeze or scoop out the seeds (photo 1). You can opt to leave the seeds in the tomatoes and simply strain them later in the recipe, however, removing them, in the beginning, is the best way to ensure there are no seeds in the passata. It also prevents the passata from being too liquid and creates a thick sauce with a smooth consistency of a tomato purée.

Cook the tomatoes down: Place the cleaned tomatoes in a large pot, cover, and cook over medium-low heat, stirring occasionally. Cook the tomatoes until they are soft, not totally mashed (photo 4). It will take approximately 20-30 minutes. Some people add salt to the recipe at this point, but traditionally it is left without salt so it can be used in any recipe.

Make the passata smooth. Place the tomatoes through a strainer machine or food mill (photo 5), this removes the seeds and some skin and makes the sauce very smooth. If the sauce seems too liquid for you at this stage, put it through a very fine strainer to remove some of the liquid and obtain the right consistency.

Can or use as desired. You can add some fresh basil leaves if desired. Your wonderful homemade passata is now ready to can or use in your favorite tomato sauce recipe to get a bright tomato flavor with just a dash of olive oil and fresh basil leaf on top and a sprinkling of Parmesan.

tomato passata

How to use tomato passata

So what exactly is this specialty tomato passata used for? You can pretty much use passata in any Italian cuisine recipe that calls for tomatoes. It can be used in soups, stews, and pasta sauces. Passata di pomodoro will give your dish the full flavor of fresh tomatoes even when they aren’t in season with some people saying that they offer more flavor than canned tomatoes.

Tomato passata has a smooth sauce-like texture, making it the perfect base for any of your favorite pasta sauces like bolognese sauce, stews or casseroles such as eggplant parmigiana. You do not need to puree passata or alter it in any way – it is ready to use right out of the jar! Once you try using this great passata recipe rather than canned tomatoes or tomato purée from grocery stores, which is often heavily seasoned and can ruin simple Italian pasta sauces, you will never go back.

Other Italian sauces to try:

Variations of tomato passata

  • Thicker consistency. Some people want their passata to have a very thick consistency, so they remove all the excess seeds and water by squeezing or scooping out everything at the beginning. It is also possible to cook it for longer so any excess water evaporates during the cooking process and is more like a store bought passata (which is sometimes labeled strained tomatoes) or even similar to a tomato paste.
  • Leave it liquid and light. If instead, you like a very light tomato flavor, you can leave the seeds and pulp in and cook the tomatoes for a shorter than recommended time. Once you put them through the food mill, it will have a more liquid consistency and lighter flavor and is great to use in panzanella bread salad or in place of canned tomatoes in dishes.

Tips and tricks for the perfect tomato passata

  • Be sure they are ripe! The first key to a perfect passata di pomodoro is to start with ripe tomatoes. They cannot be under-ripe, or they will have no flavor, and over-ripe tomatoes will cause the sauce to be sour. After ripe tomatoes are selected, they need to be carefully washed and cleaned. Any black, rotten spots need to be cut out and any moldy tomatoes should be thrown away.
  • Remove skins first. Boiling or blanching the tomatoes for 2 minutes will allow you to remove the skins if you don’t have a food mill. They can be thrown away.
  • Food mill or “passapomodoro.” Many Italian families who make tomato passata every year have a machine called a “passapomodoro” or a pulp machine or food mill. They use this to remove the skins from the tomatoes and crush the flesh in the process, making a smooth tomato purée. If you do not have a similar machine, puree the skinless tomatoes in a standard blender and then pour through a sieve or fine mesh strainer.
  • Be sure to sterilize jars properly. For more information on properly sterilizing jars and lids in hot water, go to the National Center for Home Food Preservation website and read more.
  • Follow proper canning methods. Again, following the proper methods here is key to food safety. If you are not a pro at canning, be sure to follow all advice when processing the jars to get them to form the proper vacuum seal. Canning the tomato passata the right way is essential so that the puree is shelf-stable. Here is more information about canning your tomatoes properly so you can use them in recipes throughout the year.

FAQs

How long can I keep passata in the fridge?

You can keep passata in the fridge for up to 3 days. Passata can also be frozen in an ice cube tray and then transferred to freezer Ziplock bags and kept in the freezer for up to 3 months. When you need a little tomato purèe in a recipe you can simply pull out as many tomato purée ice cubes as you need and defrost and use them.

Is passata the same as tomato sauce?

Passata is simply strained tomatoes and is not the same as what Americans typically think of as tomato sauce. The first has only tomatoes and the second usually has other ingredients such as olive oil, spices, salt and pepper and is much more dense and sometimes even meant to be used directly as a pasta sauce.

Is passata and tomato puree the same thing?

Passata and tomato purée are almost the exact same thing, the only difference is that often the passata has the seeds removed and is not cooked as long as the tomato puree which sometimes undergoes a longer cooking process depending on if it is made at home or comercially.

Can I substitute tomato paste for passata?

Tomato paste is similar to a concentrated tomato passata that has been cooked for longer. It can be watered down to be used to substitute passata, but of course there will be a slightly different consistency and flavor.

Step by Step PhotosMost of our recipes come with step by step photos, helpful tips and tricks to make it perfectly first time and even video!

Save

passata di pomodoro recipe

#wprm-recipe-user-rating-0 .wprm-rating-star.wprm-rating-star-full svg * { fill: #343434; }#wprm-recipe-user-rating-0 .wprm-rating-star.wprm-rating-star-33 svg * { fill: url(#wprm-recipe-user-rating-0-33); }#wprm-recipe-user-rating-0 .wprm-rating-star.wprm-rating-star-50 svg * { fill: url(#wprm-recipe-user-rating-0-50); }#wprm-recipe-user-rating-0 .wprm-rating-star.wprm-rating-star-66 svg * { fill: url(#wprm-recipe-user-rating-0-66); }linearGradient#wprm-recipe-user-rating-0-33 stop { stop-color: #343434; }linearGradient#wprm-recipe-user-rating-0-50 stop { stop-color: #343434; }linearGradient#wprm-recipe-user-rating-0-66 stop { stop-color: #343434; }

4.25 from 24 votes

Save

Print Recipe
Pin Recipe

Tomato Passata Recipe

Passata di pomodoro is an Italian staple. You have likely heard of it or used it without even knowing! Tomato passata is something any chef should be familiar with and its history and traditions are also worth knowing.

Author:

Prep Time 20 minutes
Cook Time 20 minutes
Total Time 40 minutes
Servings 10 servings

Equipment

  • 1 food mill or tomato strainer machine essential for getting the desired consistency
  • 1 Cutting Board for tomato prep
  • 1 Sharp Knife to cut the tomatoes
  • large pots with at least one with a lid for cooking the tomato passata and then for sterilizing and boiling the cans
  • Large bowl for the tomatoes

Ingredients 

1x2x3x

  • 4 ½ pounds tomatoes ripe (Roma or San Marzano)
  • Fresh basil leaves (optional)
  • salt (optional)

Instructions

  • Wash and dry the tomatoes. Slice each tomato in half and gently squeeze or scoop out the seeds. You can opt to leave the seeds in the tomatoes and simply strain them later in the recipe, however, removing them in the beginning is the best way to ensure there are no seeds in the passata. It also prevents the passata from being too liquid and creates a thick sauce with a smooth consistency.
  • Place the clean, halved tomatoes in a large pot, cover and cook over medium-low heat, stirring occasionally. Cook the tomatoes until they are soft, not totally mushy. It will take approximately 20-30 minutes. Some people add salt to the recipe at this point, but traditionally it is left without salt so it can be used in any recipe.
  • Place the tomatoes through a strainer machine or food mill, this removes the seeds and some skin and makes the sauce very smooth.
  • If the sauce seems too liquid at this stage, put it through a very fine strainer to remove some of the liquid and obtain the right consistency.
  • You can add some basil leaves if desired. Your wonderful homemade passata is now ready to can or use in recipes such as soups, sauce for pasta or other Italian dishes you love.
Tried this recipe?Mention @nonnabox or tag #nonnabox!

History and traditions of passata di pomodoro

Passata di pomodoro is a long standing family tradition in Italy, especially southern Italy, where tomatoes grow in abundance and are an Italian pantry essential. At the end of August, when the tomatoes are at their peak ripeness, an Italian family will gather together to prepare enough passata di pomodoro for the next year and then can them in sterilized glass jars or glass bottles. In one or two days, they will process enough tomatoes for a full year!

However, tomatoes were not always an Italian staple. They were brought to Europe in the 16th century by the Spanish returning from the New World. Incredibly enough, there are more than 10,000 types of tomatoes known today.

At first, the plants were ornamental as they were bitter and even toxic. Yet over time, the tomatoes adapted to the Mediterranean climate and became sweeter and more like they are today. After the plants began to change, Italians started incorporating them into their cuisine. And now, families come together every year to pick the ripest tomatoes from the vines and make enough tomato passata for the entire year!

The tradition of making tomato passata at the end of each summer has reached other countries as well, as Italian immigrants continued to gather and bottle jars upon jars of passata even when living in faraway lands. Everyone has an assigned job on “Passata Day,” and the family works together as a team to keep the tradition going.

While getting the family together to make tomato passata is important for food production, it is also a very social event. There is food, wine, and lots of conversation as the tomatoes are processed. It is a wonderful moment for bonding, which is probably another reason why this tradition has continued to the present day.

This article https://ift.tt/g4NzDXe appeared first on Nonna Box
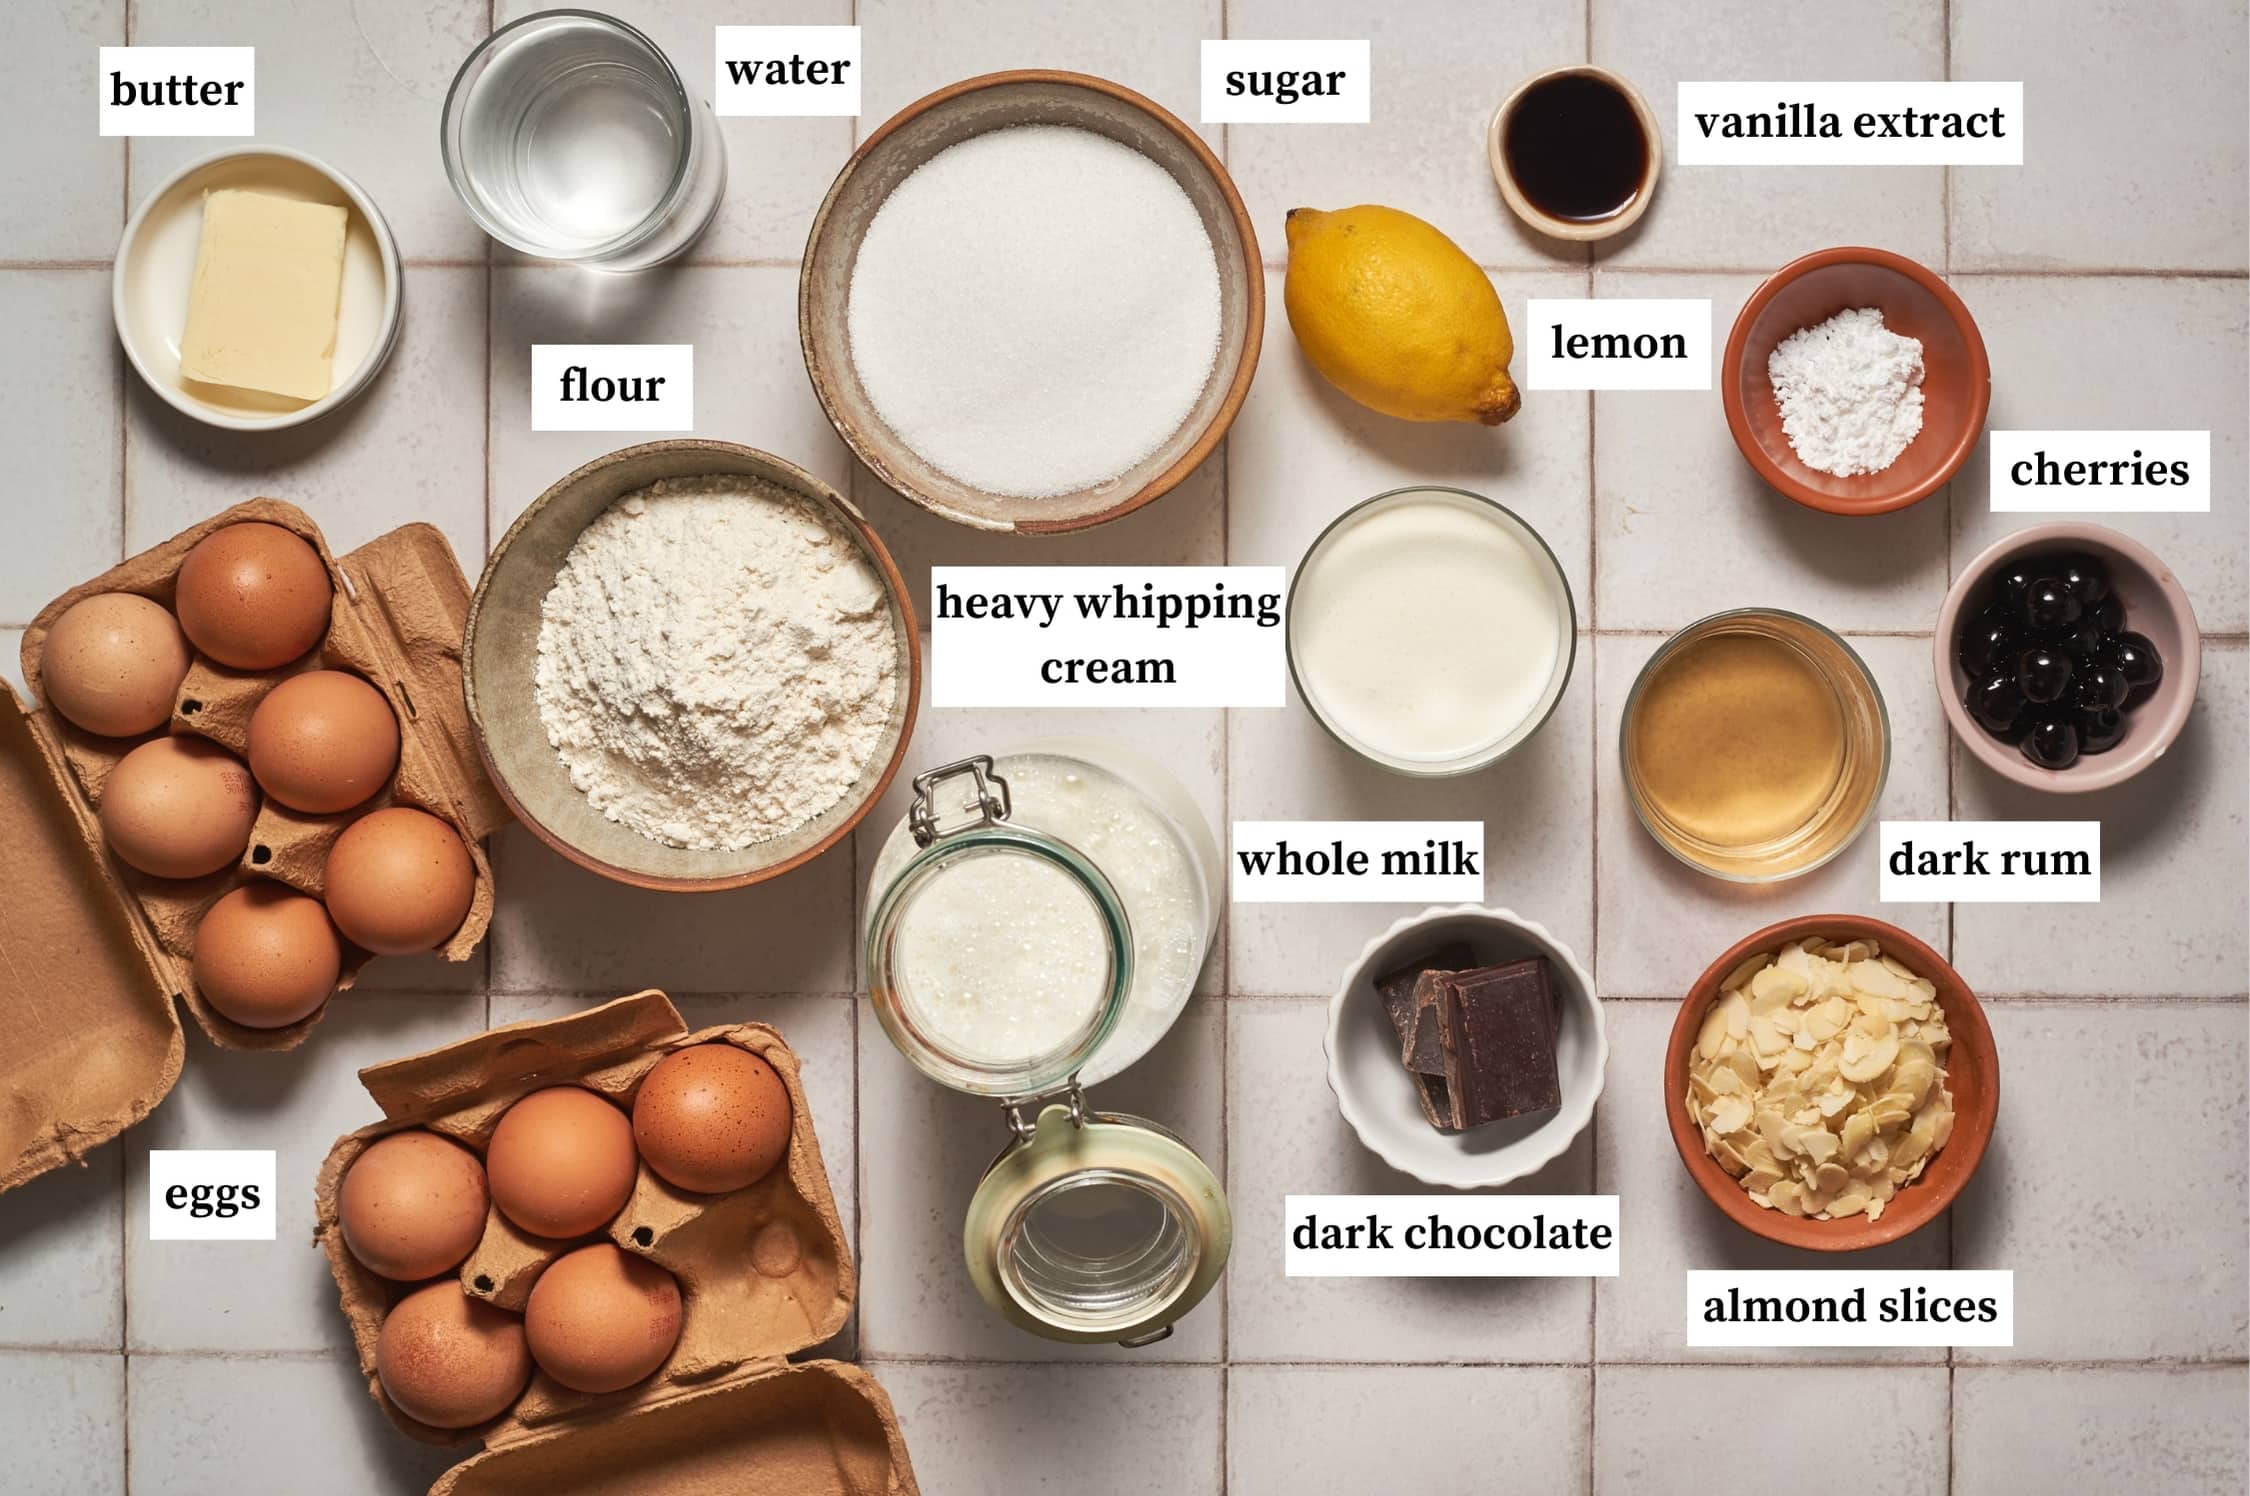
Traditional Sfincione Sicilian Pizza Recipe

For hundreds of years, various kinds of rustic breads covered with tomato sauces and other toppings have been made all over Italy because they are a food that is filling and can be eaten on the go.

sfincione sicilian pizza nonna box

One such pizza is sfincione, a Sicilian style pizza, which is an inexpensive and delicious treat to enjoy at any time of the day.

Sfincione Sicilian pizza starts with a yeast that is activated by sugar or honey and warm water and is then left to rise for several hours, creating a spongy, slightly sweet pizza base.

The base is then loaded with savory toppings like tomato sauce, onions, anchovies, oregano, cheese and a sprinkling of bread crumbs before being baked in the oven and enjoyed. Delicious!

Ingredients

If you’ve ever eaten sfincione, you’ll know that the toppings are really what makes it special, so be sure to use only high-quality and carefully chosen ingredients in order to make the perfect Sicilian pizza.

  • All-purpose flour (3 ½ cups) – a good quality all-purpose flour that you would use to make regular pizza, focaccia or bread will work well.
  • Active dry yeast (2 ¼ tsp) – be sure to check the expiration date of your yeast before using it and also that it has been stored properly. The yeast should bubble and froth when activated by the sugar/honey and warm water, if it doesn’t you should use different yeast.
  • Salt (1 tsp) – this is just regular fine table salt.
  • Honey or sugar (1 Tbsp) – be sure to use one or the other, as the yeast needs to be activated by the honey or sugar in able to make the pizza dough rise properly.
  • Warm water (1 cup) – tap water is fine, just make sure it is warm enough so that it activates the yeast properly.
  • Extra virgin olive oil (2 Tbsp)we like to use an olive oil from Southern Italy or Greece for this recipe, as it needs to be a denser olive oil to taste more like the original recipe.
  • Red onions (3) – they should be thinly sliced, but not diced. You want the onion slices to show on the top of the Sicilian-style pizza.
  • San Marzano tomatoes (42 oz) – either fresh, peeled tomatoes or canned peeled tomatoes will work for this recipe. Do be aware that the type of tomatoes you choose to use in the sauce can alter the taste dramatically, so we recommend San Marzano or plum tomatoes that are not too acidic or too sweet.
  • Garlic (2 cloves) should be chopped very finely. If you don’t like garlic, you can definitely leave it out.
  • Anchovy fillets (8) – If you want to make the true, Sicilian sfincione, keep the fillets whole and place them randomly around the pizza! If you don’t like the idea of seeing the fillets on your pizza, but still want the salty anchovy taste, you can blend them into the sauce or chop them finely to distribute them more evenly to achieve a milder taste.
  • Palermo Caciocavallo cheese (½ pound) – this is not the easiest cheese to find in the US, so you can look for another type of aged cow’s milk cheese that you can grate on the pizza. A good substitute that is easier to find in the US is aged provolone cheese or even a dry mozzarella cheese. If you can’t find a cow’s milk cheese, then you can use grated Pecorino Romano cheese, but be aware that as a sheep cheese it will have a stronger flavor.
  • Oregano (1 Tbsp) – you can use either dried or fresh oregano.
  • Breadcrumbs (1 ½ cups) – we like the slightly larger breadcrumbs as opposed to the very fine bread crumbs. You might even consider making your own so that the pizza topping has a nice toasty crunch to it.
  • Red pepper flakes (as desired, optional) – if you love a spicy dish, consider adding a dash of red pepper flakes to your pizza, either before cooking or serve on the side, and let each person choose whether or not to sprinkle some on top.

How to make sfincione pizza step by step

Recipes for making the dough for this authentic Sicilian pizza may vary slightly depending on the sfincione recipe you use, but this recipe is sure to produce a light, airy pizza everyone is sure to love.

In a large bowl, combine the yeast, water, and sugar. Set aside for 10 minutes, the yeast should begin to froth and activate (photo 1).

Now add the flour and salt and stir until incorporated (photo 2).

Remove from the bowl and knead the dough on a lightly floured flat surface (photo 3), such as a cutting board, until the dough is smooth (photo 4).

Optional use of stand mixer: you can do step 2 using a stand mixer fitted with a dough hook if desired, mixing the dough on medium for several minutes.

Place the dough back in the bowl (photo 5), cover with clean towels (photo 6), and set aside in a warm place to rise for three hours.

While the dough is rising, heat the olive oil in a large skillet. Sauté the onions until soft, stirring occasionally for about 5-8 minutes (photo 7). Set half the onions aside to use as toppings and keep the remaining onions in the pan (photo 8).

Add the tomatoes and garlic to the pan and cook for about 20 minutes (photo 9). Smash the tomatoes with a spatula to make into a thick sauce (photo 10). Add the dried oregano and remove it from the heat to cool.

Once the dough is ready, lightly press it into a rimmed sheet tray or baking sheet with sides that has been covered with a little olive oil. Preheat oven at this time to 450° F.

Place the anchovies on the dough then sprinkle the top with the cooked onions (photo 11).

Spoon sauce onto the pizza evenly until you have used all the sauce and then sprinkle on the grated cheese (photo 12).

Add the breadcrumbs over the entire surface of the pizza (photo 13) then place it in the preheated 450° F oven.

Bake for 15 minutes or until the pizza dough has risen and the breadcrumbs are golden (photo 14).

Slice into large rectangle pieces, serve hot and enjoy!

Expert tips for making sfincione

Since the dough needs time to rise, it can take some time to prepare. It will not take longer than the typical pizza, so don’t be scared! You can opt to use a prepared pizza dough but it is so much more fun to make your own.

  • Leave the dough to rise. Although it’s easy to start making shortcuts, don’t reduce the rising time for this dough. You need to leave it covered in a warm area for the full three hours so it can double in size and you get the spongy, airy Sicilian pizza.
  • Don’t spread it too thin! You want the raw dough to be about an inch thick at least once it is pressed into the baking sheet with sides. This will ensure your pizza comes out with a thicker crust, we guarantee it will be your favorite pizza recipe.

Variations of Sfincione Toppings

While we absolutely love the combination of flavors on the original sfincione Sicilian-style pizza, we recognize that not everyone (especially kids) will be cheering about the anchovies or onions. The amazing thing about this recipe is that it works with pretty much any topping, you can experiment and get creative all you like!

  • No anchovies and onions. You can easily leave out the anchovies and onions, even just on one half of the pizza, because the delicious tomato sauce and cheese work great together and the simpler it is the more popular it will probably be with the kids.
  • No red sauce. If you want to skip the marinara sauce, it’s no big deal. You can make a “white” pizza. Instead of adding tomato sauce, simply drizzle a little more olive oil on the top and follow all the other directions as listed. It is one of the best pizzas ever!
  • Add some meat and skip the fish. While we love the fact that this recipe has fish in it, some people might not agree. You can easily swap out the anchovies for 100 grams of Italian sausage, salami, or ham cut up into bite-sized pieces and spread over the top just like you would have done with the anchovies.

Other street food recipes to try:

FAQs

How long will sfincione stay fresh?

Sfincione is best consumed hot right out of the oven, but it will still taste good kept for 2 to 3 days in the refrigerator. It should be stored on a paper towel inside a plastic bag with the air squeezed out.

How should sfincione be reheated?

If stored in the fridge, we recommend heating it up again in the toaster oven or regular oven for several minutes before eating as a leftover. It can also be frozen for several months, but do not defrost it. Instead pop the frozen sfincione wrapped in tinfoil right in a hot oven and cook for 4 minutes and then uncover and cook for another 4 minutes or until it has warmed up and the cheese is slightly melted and then enjoy while still warm.

Why is it named sfincione?

Sfincione most likely got its name from the word spongia which means sponge in Sicilian dialect because it is a spongy, light and airy focaccia-like pizza.

When was sfincione traditionally made?

Sfincione was initially prepared around Christmas time in the Palermo area. It became widely popular and was often eaten on New Years and for the Feast of San Giovanni. Now, however, the pizza is made year-round and can be purchased from the street food vendors in Palermo, especially in the Alberghiera district.

sfincione sicilian pizza nonna box

Print

Sicilian Pizza (Sfincione)

#wprm-recipe-user-rating-0 .wprm-rating-star.wprm-rating-star-full svg * { fill: #343434; }#wprm-recipe-user-rating-0 .wprm-rating-star.wprm-rating-star-33 svg * { fill: url(#wprm-recipe-user-rating-0-33); }#wprm-recipe-user-rating-0 .wprm-rating-star.wprm-rating-star-50 svg * { fill: url(#wprm-recipe-user-rating-0-50); }#wprm-recipe-user-rating-0 .wprm-rating-star.wprm-rating-star-66 svg * { fill: url(#wprm-recipe-user-rating-0-66); }linearGradient#wprm-recipe-user-rating-0-33 stop { stop-color: #343434; }linearGradient#wprm-recipe-user-rating-0-50 stop { stop-color: #343434; }linearGradient#wprm-recipe-user-rating-0-66 stop { stop-color: #343434; }

If you are looking for an authentic Sicilian pizza, then you are looking for sfincione. Let's take a look at this delicious, specialty pizza.
Course Pizza
Cuisine Italian
Keyword pizza, sfincione, sicilian
Prep Time 35 minutes
Cook Time 15 minutes
Leavening Time 3 hours
Total Time 3 hours 50 minutes
Servings 6 servings
Calories 600kcal

Equipment

  • Large bowl
  • Baking sheet
  • cutting board or other flat surface
  • wooden spoon or spatula
  • skillet or saute pan
  • stand mixer optional

Ingredients

  • 3 ½ cups flour
  • 2 ¼ tsp active dry yeast
  • 1 tsp salt
  • 1 Tbsp honey or sugar
  • 1 cup warm water
  • 2 Tbsp olive oil
  • 3 red onions sliced
  • 42 oz San Marzano tomatoes
  • 2 cloves garlic chopped
  • 8 anchovy fillets
  • ½ pound Caciocavallo cheese
  • 1 Tbsp dried oregano
  • 1 ½ cups breadcrumbs

Instructions

  • To make the dough, combine the yeast, water, and sugar in a large bowl. Set aside for 10 minutes, it should begin to froth and activate.
  • Now add the flour and salt and stir in. Remove from the bowl and knead the dough on a lightly-floured flat surface until the dough is smooth.
  • Place the dough in a large bowl, cover the clean towels, and set aside in a warm place to rise for three hours.
  • While the dough is rising, heat the olive oil in a large skillet. Sauté the onions until soft, about 5-8 minutes. Set half the onions aside to use as toppings and keep the remaining onions in the pan.
  • Add the tomatoes and garlic to the pan and cook over medium heat for about 20 minutes. If you still have whole tomatoes, smash them to make into a thick sauce. Add the oregano to the sauce and remove it from the heat to cool.
  • Once the dough is ready, press it into a rimmed sheet tray that has been covered with a light coating of olive oil.
  • Place the anchovy fillets on the dough then sprinkle the top with the cooked onions.
  • Coat the pizza with the tomato sauce and then evenly sprinkle on a thick layer of grated cheese.
  • Add the breadcrumbs over the entire surface of the pizza then place it in a preheated 450° F oven.
  • Bake for 15 minutes or until the pizza dough has risen and the breadcrumbs are golden and the crust is lightly browned.
  • Slice and enjoy!

Nutrition

Serving: 100g | Calories: 600kcal | Carbohydrates: 91g | Protein: 24g | Fat: 16g | Saturated Fat: 8g | Polyunsaturated Fat: 2g | Monounsaturated Fat: 4g | Cholesterol: 41mg | Sodium: 1170mg | Potassium: 661mg | Fiber: 7g | Sugar: 9g | Vitamin A: 639IU | Vitamin C: 23mg | Calcium: 428mg | Iron: 7mg

This article https://ift.tt/JoxTqsN appeared first on Nonna Box
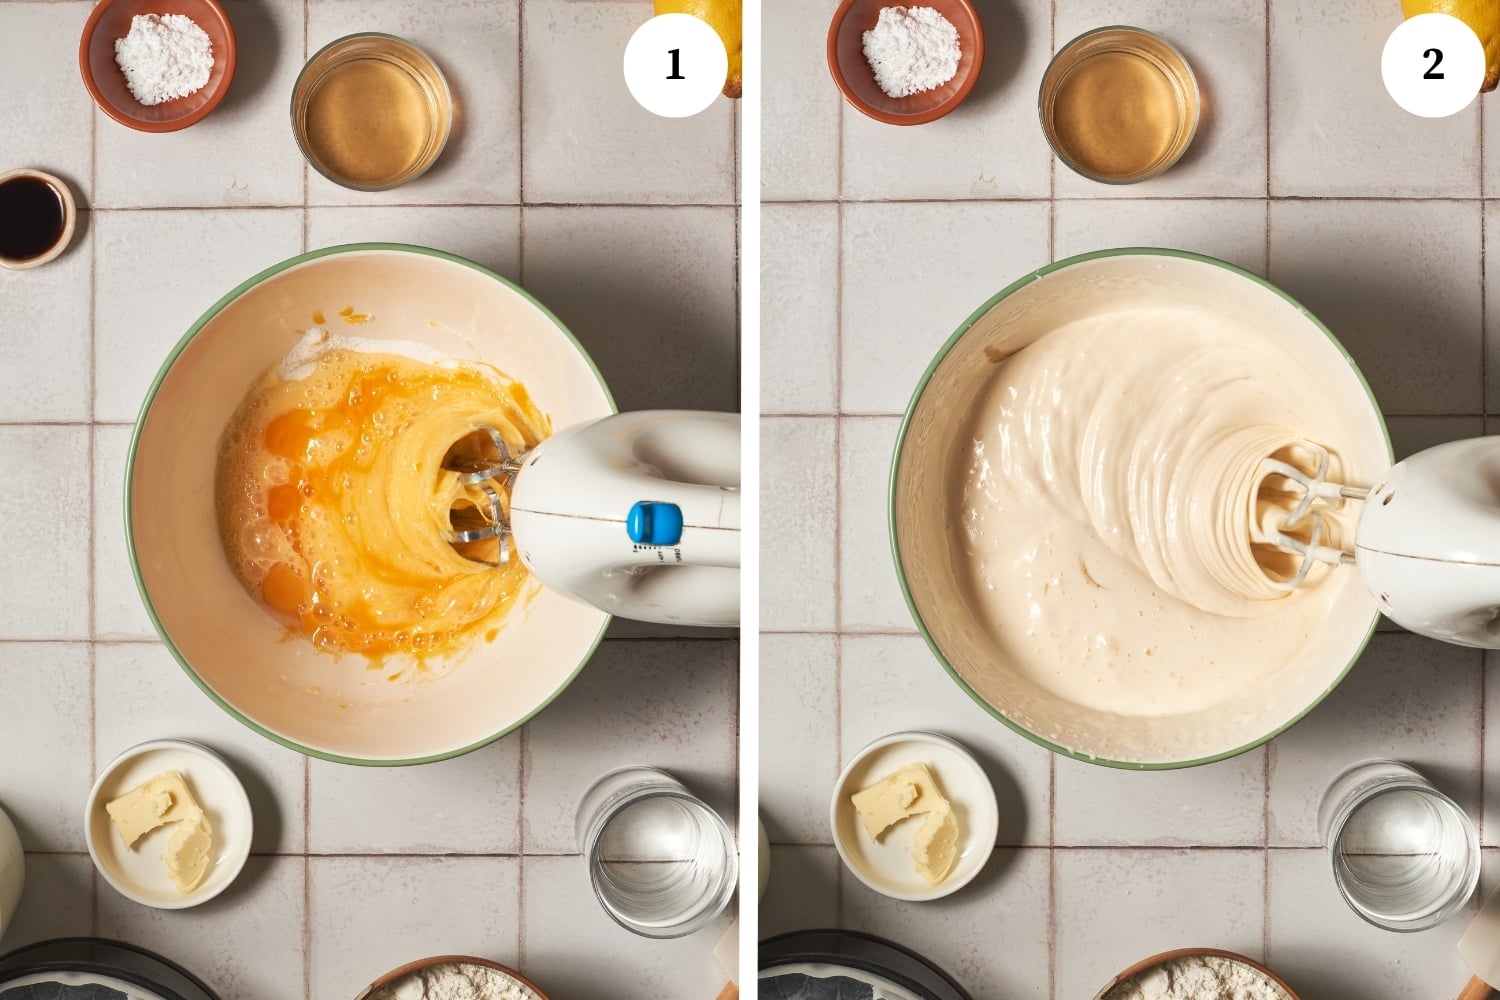
Design a site like this with WordPress.com
Get started